HP Dv4-1124nr HP Pavilion dv4 Entertainment PC - Display Replacement Guide - Page 24
Flush Glass display assembly, Turn the display assembly over.
 |
UPC - 884420609841
View all HP Dv4-1124nr manuals
Add to My Manuals
Save this manual to your list of manuals |
Page 24 highlights
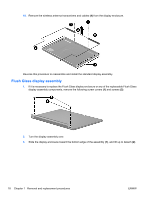
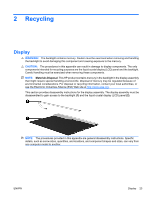
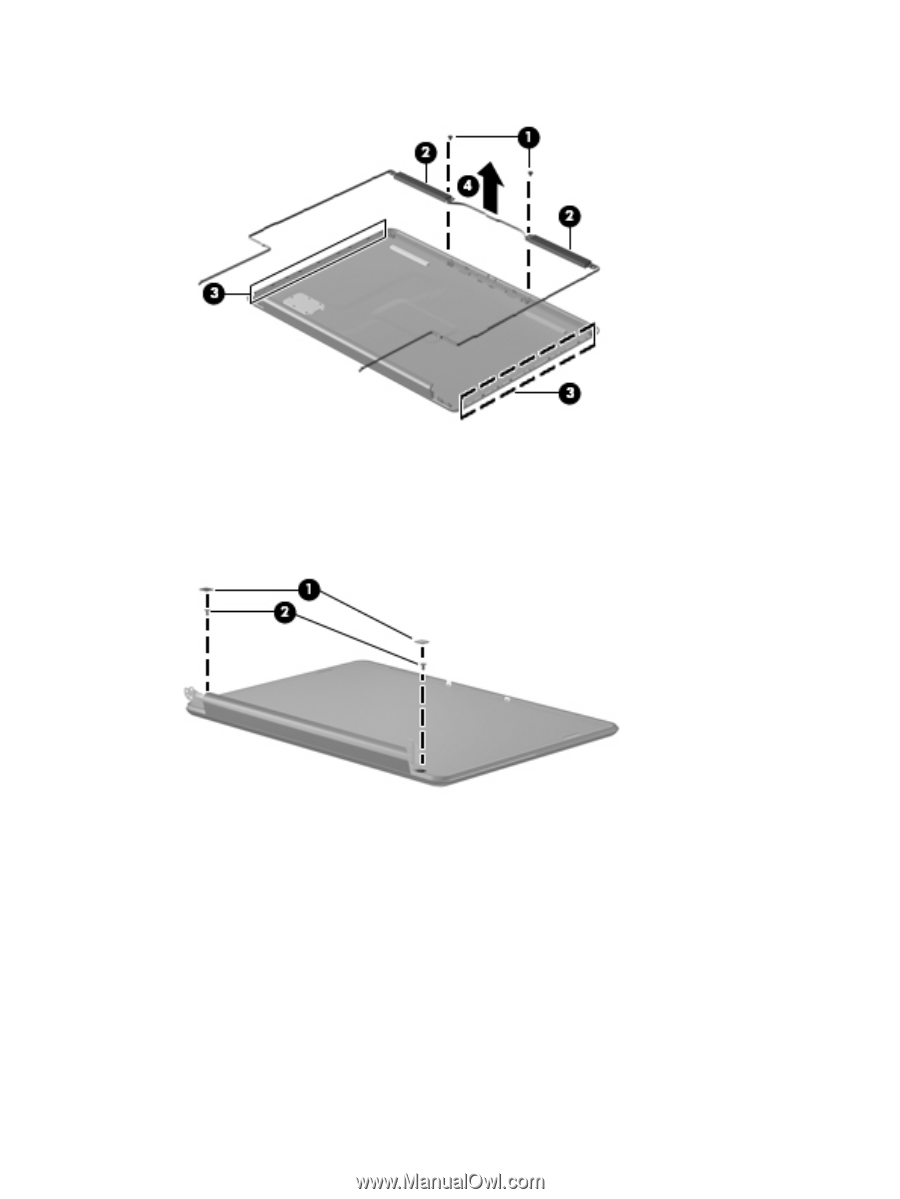
18. Remove the wireless antenna transceivers and cables (4) from the display enclosure. Reverse this procedure to reassemble and install the standard display assembly. Flush Glass display assembly 1. If it is necessary to replace the Flush Glass display enclosure or any of the replaceable Flush Glass display assembly components, remove the following screw covers (1) and screws (2): 2. Turn the display assembly over. 3. Slide the display enclosure toward the bottom edge of the assembly (1), and lift up to detach (2). 18 Chapter 1 Removal and replacement procedures ENWW
-
 1
1 -
2
-
3
-
4
-
5
-
6
-
7
-
8
-
9
-
10
-
11
-
12
-
13
-
14
-
15
-
16
-
17
-
18
-
 19
19 -
 20
20 -
 21
21 -
 22
22 -
 23
23 -
 24
24 -
 25
25 -
 26
26 -
 27
27 -
 28
28 -
 29
29 -
30
-
31
-
32
-
33
-
34
-
35
-
36
-
37
-
38
 |
 |
18.
Remove the wireless antenna transceivers and cables
(4)
from the display enclosure.
Reverse this procedure to reassemble and install the standard display assembly.
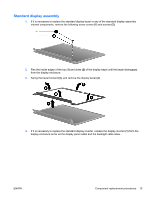
Flush Glass display assembly
1.
If it is necessary to replace the Flush Glass display enclosure or any of the replaceable Flush Glass
display assembly components, remove the following screw covers
(1)
and screws
(2)
:
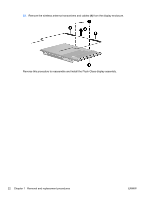
2.
Turn the display assembly over.
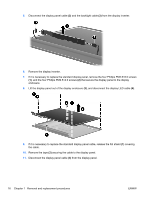
3.
Slide the display enclosure toward the bottom edge of the assembly
(1)
, and lift up to detach
(2)
.
18
Chapter 1
Removal and replacement procedures
ENWW