HP Officejet 5500 HP Officejet 5500 series All-in-One - (English) Reference Gu - Page 78
clean the print cartridge contacts, the HP Officejet.
 |
View all HP Officejet 5500 manuals
Add to My Manuals
Save this manual to your list of manuals |
Page 78 highlights
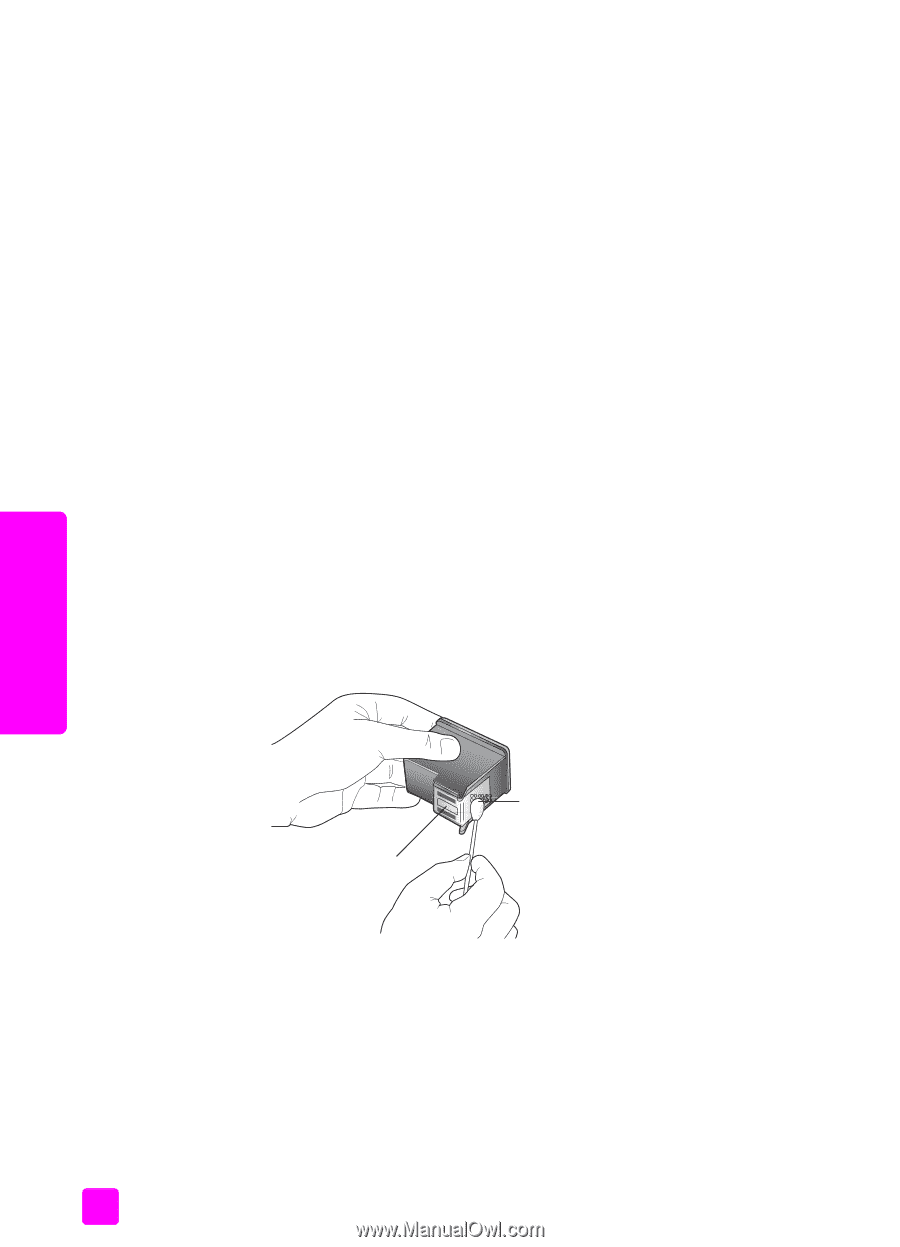
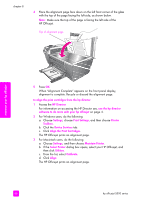
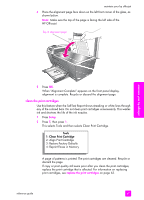
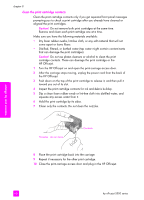
maintain your hp officejet chapter 8 clean the print cartridge contacts Clean the print cartridge contacts only if you get repeated front panel messages prompting you to check a print cartridge after you already have cleaned or aligned the print cartridges. Caution! Do not remove both print cartridges at the same time. Remove and clean each print cartridge one at a time. Make sure you have the following materials available: • Dry foam rubber swabs, lint-free cloth, or any soft material that will not come apart or leave fibers. • Distilled, filtered, or bottled water (tap water might contain contaminants that can damage the print cartridges). Caution! Do not use platen cleaners or alcohol to clean the print cartridge contacts. These can damage the print cartridge or the HP Officejet. 1 Turn the HP Officejet on and open the print-carriage access door. 2 After the carriage stops moving, unplug the power cord from the back of the HP Officejet. 3 Push down on the top of the print cartridge to release it, and then pull it toward you out of its slot. 4 Inspect the print cartridge contacts for ink and debris buildup. 5 Dip a clean foam rubber swab or lint-free cloth into distilled water, and squeeze any excess water from it. 6 Hold the print cartridge by its sides. 7 Clean only the contacts. Do not clean the nozzles. Nozzles - do not clean Contacts 8 Place the print cartridge back into the carriage. 9 Repeat if necessary for the other print cartridge. 10 Close the print-carriage access door and plug in the HP Officejet. 68 hp officejet 5500 series
-
 1
1 -
2
-
3
-
4
-
5
-
6
-
7
-
8
-
9
-
10
-
11
-
12
-
13
-
14
-
15
-
16
-
17
-
18
-
19
-
20
-
21
-
22
-
23
-
24
-
25
-
26
-
27
-
28
-
29
-
30
-
31
-
32
-
33
-
34
-
35
-
36
-
37
-
38
-
39
-
40
-
41
-
42
-
43
-
44
-
45
-
46
-
47
-
48
-
49
-
50
-
51
-
52
-
53
-
54
-
55
-
56
-
57
-
58
-
59
-
60
-
61
-
62
-
63
-
64
-
65
-
66
-
67
-
68
-
69
-
70
-
71
-
72
-
 73
73 -
 74
74 -
 75
75 -
 76
76 -
 77
77 -
 78
78 -
 79
79 -
 80
80 -
 81
81 -
 82
82 -
 83
83 -
84
-
85
-
86
-
87
-
88
-
89
-
90
-
91
-
92
-
93
-
94
-
95
-
96
-
97
-
98
-
99
-
100
-
101
-
102
-
103
-
104
-
105
-
106
-
107
-
108
-
109
-
110
-
111
-
112
-
113
-
114
-
115
-
116
-
117
-
118
-
119
-
120
-
121
-
122
-
123
-
124
-
125
-
126
-
127
-
128
-
129
-
130
-
131
-
132
-
133
-
134
-
135
-
136
-
137
-
138
-
139
-
140
 |
 |