HP Officejet Pro X476 HP Officejet X Series - Software Technical Reference - Page 62
Use Scan to Email, Save and, Outgoing Email Profile List, Email Address Book, Group, Email Options
 |
View all HP Officejet Pro X476 manuals
Add to My Manuals
Save this manual to your list of manuals |
Page 62 highlights
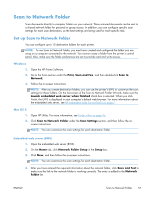
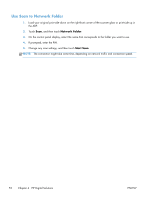
c. Click New, and then follow the on-screen instructions. d. After you have entered the required information about the network folder, click Save and Test to make sure the email configuration is working correctly. The entry is added to the Outgoing Email Profile List. 2. Add email addresses to the Email Address Book Manage the list of people to whom you can send email messages from the printer. You can add up to 15 email addresses with their corresponding contact names. You can also create email groups. To add email addresses, you can use the printer's embedded web server (EWS) or the printer's control panel. a. Open the embedded web server (EWS). b. On the Scan tab, click Email Address Book. c. Click New to add a single email address or click Group to create an email distribution list. NOTE: Before you can create an email distribution list, you must have already added at least one email address to the Email Address Book. d. Follow the on-screen instructions. The entry is added to the Email Address Book. NOTE: Contact names appear on the printer's control panel display and in your email application. 3. Configure other email options To configure other email options (such as configuring default SUBJECT and body text that is included in all email messages sent from the printer, as well as scan settings used when sending email from the printer), complete the following steps: a. Open the embedded web server (EWS). b. On the Scan tab, click Email Options. c. Change any settings, and then click Apply. Use Scan to Email 1. Load your original on the scanner glass or print-side up in the ADF (available on select models). 2. Touch Scan, and then touch Email. 3. On the control panel display, select the name that corresponds to the Outgoing Email Profile you want to use. 4. If prompted, enter the PIN. 5. Select the TO email address (the email recipient) or enter an email address. 6. Enter or change the SUBJECT for the email message. 7. Change any scan settings, and then touch Start Scan. 54 Chapter 4 HP Digital Solutions ENWW
-
 1
1 -
2
-
3
-
4
-
5
-
6
-
7
-
8
-
9
-
10
-
11
-
12
-
13
-
14
-
15
-
16
-
17
-
18
-
19
-
20
-
21
-
22
-
23
-
24
-
25
-
26
-
27
-
28
-
29
-
30
-
31
-
32
-
33
-
34
-
35
-
36
-
37
-
38
-
39
-
40
-
41
-
42
-
43
-
44
-
45
-
46
-
47
-
48
-
49
-
50
-
51
-
52
-
53
-
54
-
55
-
56
-
 57
57 -
 58
58 -
 59
59 -
 60
60 -
 61
61 -
 62
62 -
 63
63 -
 64
64 -
 65
65 -
 66
66 -
 67
67 -
68
-
69
-
70
 |
 |
