HP Pavilion d4000 Upgrading and Servicing Guide - Page 6
After Closing the PC, Removing the Side Panel, Replacing the Side Panel, Removing the Front Panel - drivers
 |
View all HP Pavilion d4000 manuals
Add to My Manuals
Save this manual to your list of manuals |
Page 6 highlights
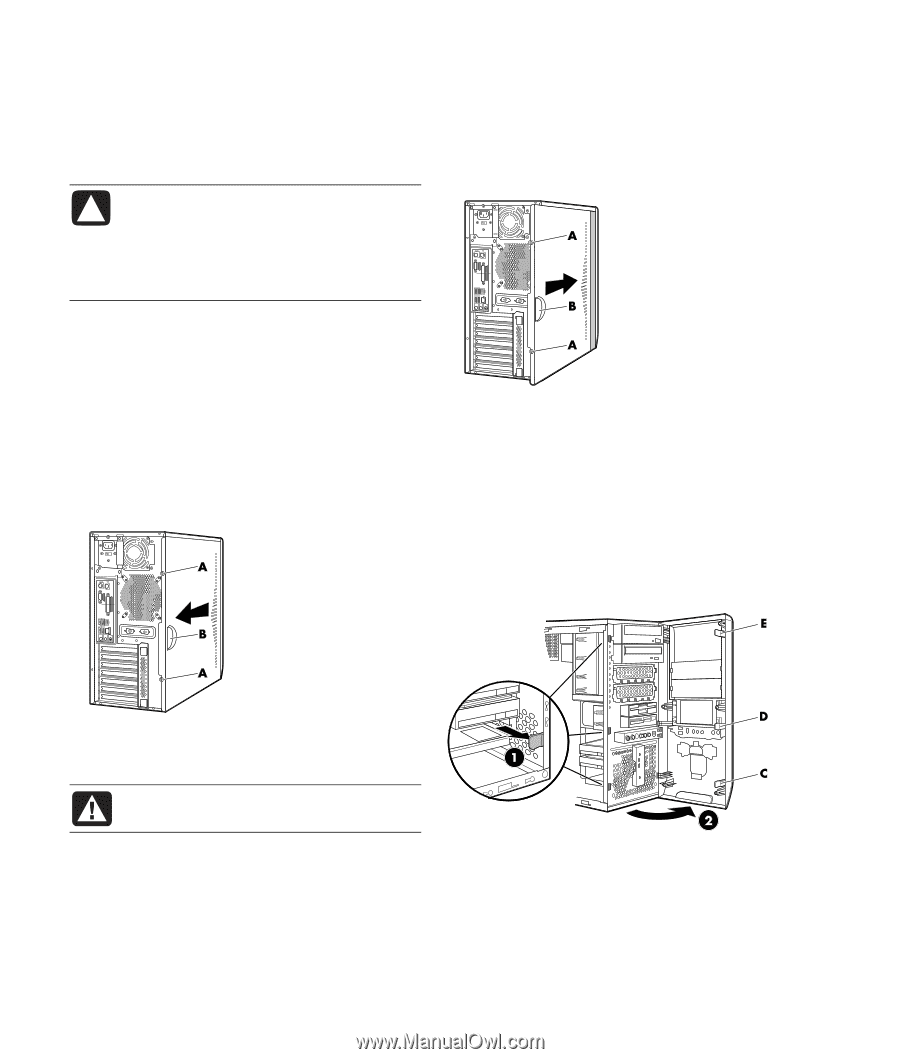
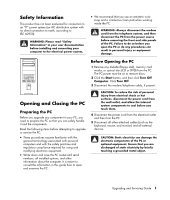
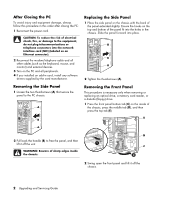
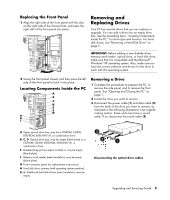
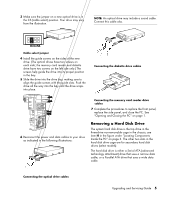
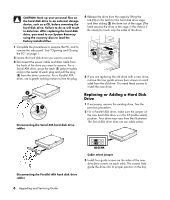
After Closing the PC To avoid injury and equipment damage, always follow this procedure in this order after closing the PC: 1 Reconnect the power cord. CAUTION: To reduce the risk of electrical shock, fire, or damage to the equipment, do not plug telecommunications or telephone connectors into the network interface card (NIC) (labeled as an Ethernet connector). 2 Reconnect the modem/telephone cable and all other cables (such as the keyboard, mouse, and monitor) and external devices. 3 Turn on the PC and all peripherals. 4 If you installed an add-in card, install any software drivers supplied by the card manufacturer. Removing the Side Panel 1 Loosen the two thumbscrews (A) that secure the panel to the PC chassis. Replacing the Side Panel 1 Place the side panel on the chassis with the back of the panel extended slightly. Ensure the hooks on the top and bottom of the panel fit into the holes in the chassis. Slide the panel forward into place. 2 Tighten the thumbscrews (A). Removing the Front Panel This procedure is necessary only when removing or replacing an optical drive, a memory card reader, or a diskette (floppy) drive. 1 Press the front panel bottom tab (C) on the inside of the chassis, press the middle tab (D), and then press the top tab (E). 2 Pull back the handle (B) to free the panel, and then lift it off the unit. WARNING: Beware of sharp edges inside the chassis. 2 Swing open the front panel and lift it off the chassis. 2 Upgrading and Servicing Guide
-
 1
1 -
 2
2 -
 3
3 -
 4
4 -
 5
5 -
 6
6 -
 7
7 -
 8
8 -
 9
9 -
 10
10 -
 11
11 -
 12
12 -
13
-
14
-
15
-
16
 |
 |