HP Pavilion d4000 Upgrading and Servicing Guide - Page 8
Replacing or Adding a Drive
 |
View all HP Pavilion d4000 manuals
Add to My Manuals
Save this manual to your list of manuals |
Page 8 highlights
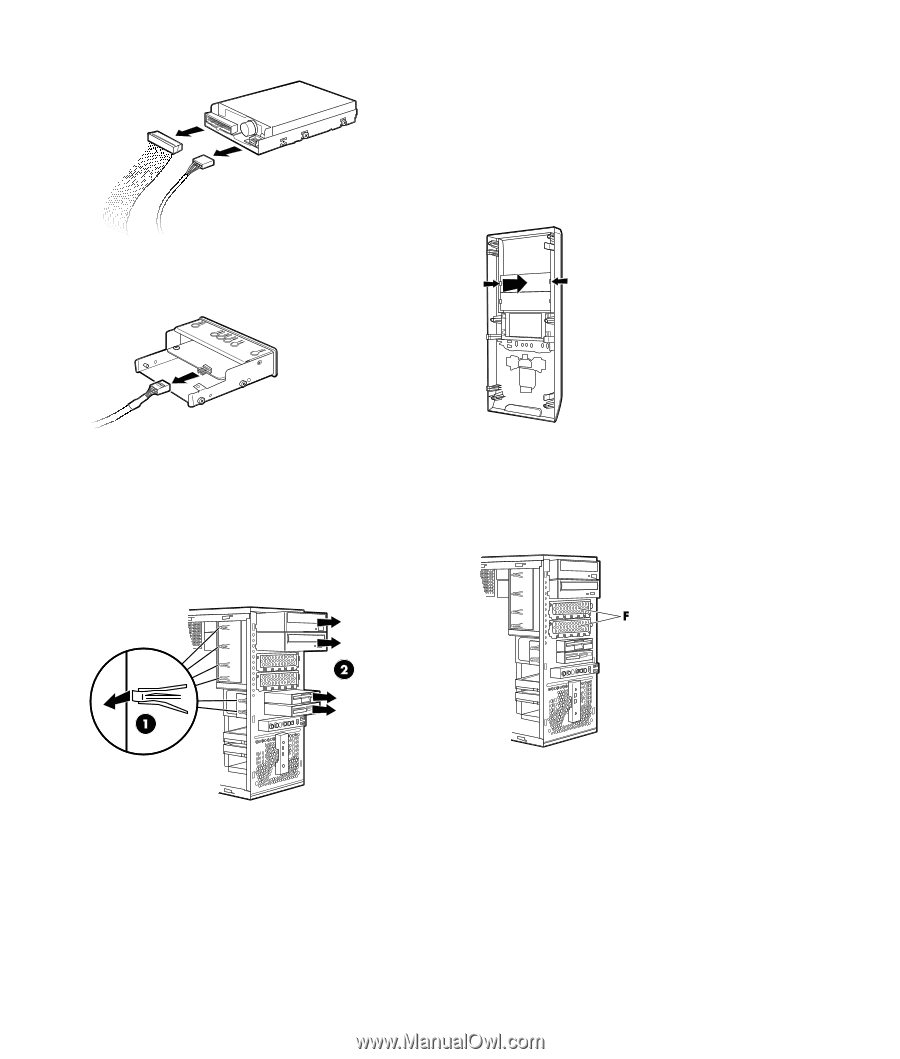
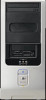
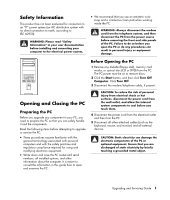
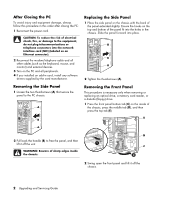
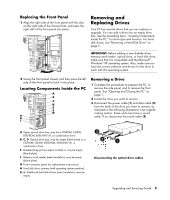
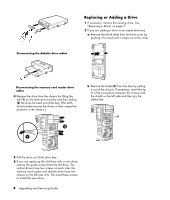
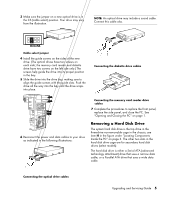
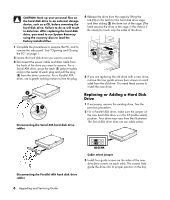
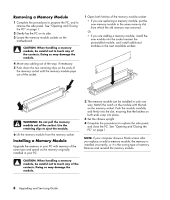
Disconnecting the diskette drive cables Replacing or Adding a Drive 1 If necessary, remove the existing drive. See "Removing a Drive" on page 3. 2 If you are adding a drive to an empty drive bay: a Remove the blank plate from the front cover by pushing it forward until it snaps out of the cover. Disconnecting the memory card reader drive cables 4 Release the drive from the chassis by lifting the tab (1) on the latch drive bracket and then sliding (2) the drive forward out of the bay. (The latch drive bracket secures the drives in their respective positions in the chassis.) b Remove the shield (F) from the bay by pulling it out of the chassis. If necessary, insert the tip of a flat screwdriver between the chassis and the shield on the left side and then pry the shield free. 5 Pull the drive out of the drive bay. 6 If you are replacing the old drive with a new drive, remove the guide screws from the old drive. The optical drives have two screws on each side; the memory card reader and diskette drive have two screws on the left side only. You need these screws to install the new drive. 4 Upgrading and Servicing Guide
-
 1
1 -
2
-
 3
3 -
 4
4 -
 5
5 -
 6
6 -
 7
7 -
 8
8 -
 9
9 -
 10
10 -
 11
11 -
 12
12 -
 13
13 -
14
-
15
-
16
 |
 |