HP Pavilion d4000 Upgrading and Servicing Guide - Page 7
Removing and, Replacing Drives - driver
 |
View all HP Pavilion d4000 manuals
Add to My Manuals
Save this manual to your list of manuals |
Page 7 highlights
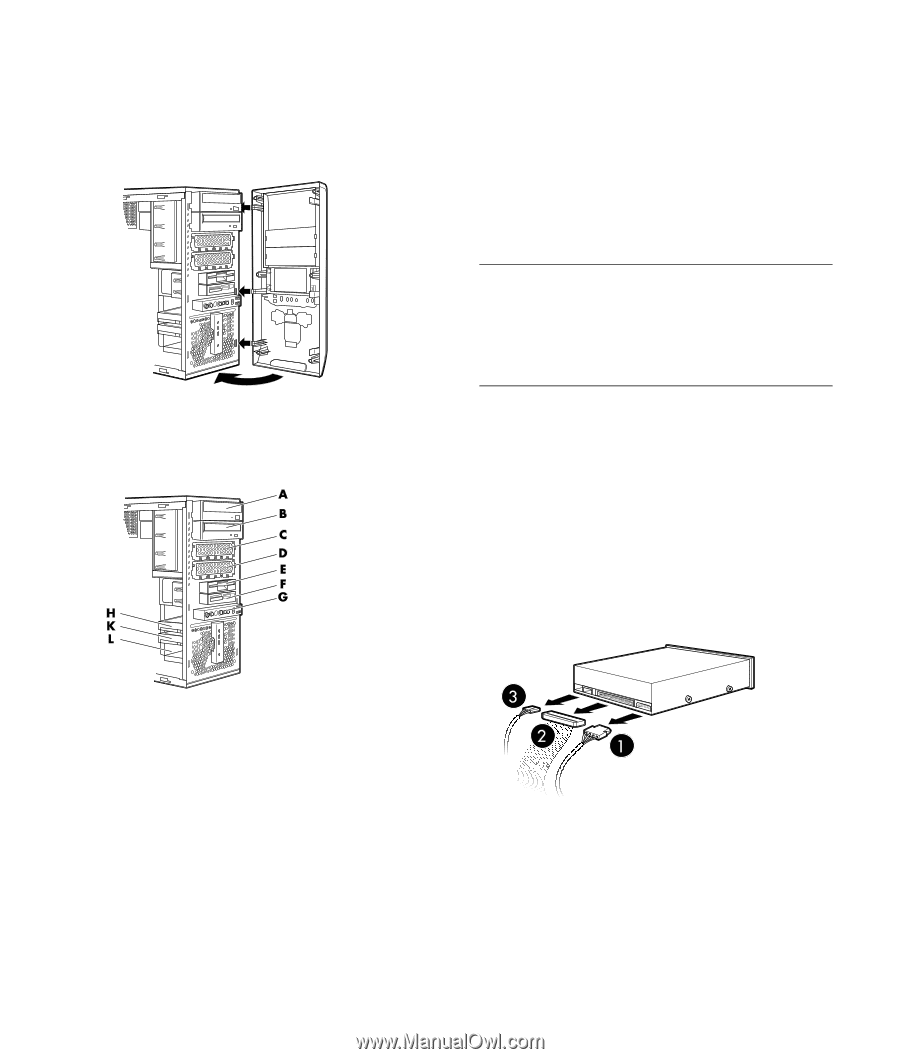
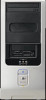
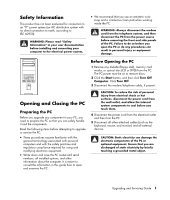
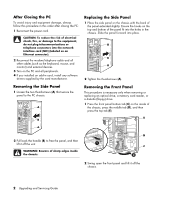
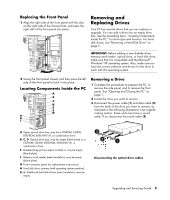
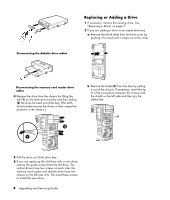
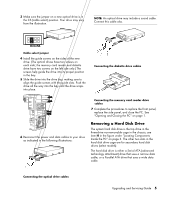
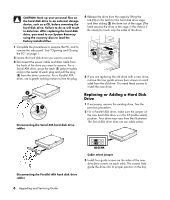
Replacing the Front Panel 1 Align the right side of the front panel with the slots on the right side of the chassis front, and press the right side of the front panel into place. Removing and Replacing Drives Your PC has several drives that you can replace or upgrade. You can add a drive into an empty drive bay. See the preceding topic, "Locating Components Inside the PC," for drive type and location. For hard disk drives, see "Removing a Hard Disk Drive" on page 5. IMPORTANT: Before adding a new diskette drive, memory card reader, optical drive, or hard disk drive, make sure that it is compatible with the Microsoft® Windows® XP operating system. Also, make sure you have the correct software and drivers for the drive to work with the operating system. 2 Swing the front panel closed, and then press the left side of the front panel to latch it into place. Locating Components Inside the PC Removing a Drive 1 Complete the procedures to prepare the PC, to remove the side panel, and to remove the front panel. See "Opening and Closing the PC" on page 1. 2 Locate the drive you want to remove. 3 Disconnect the power cable (1) and data cable (2) from the back of the drive you want to remove, as indicated in the following illustrations. Use a gentle rocking motion. Some units may have a sound cable. If so, disconnect the sound cable (3). A Upper optical drive bay; may be a CD-ROM, CD-RW, DVD-ROM, DVD+RW/+R, or combination drive. B, C, D Optical drive bay; may be empty (blank plate) or a CD-ROM, CD-RW, DVD-ROM, DVD+RW/+R, or combination drive. E Diskette (floppy) drive (select models) or may be empty (blank plate). F Memory card reader (select models) or may be empty (blank plate). G Front connector panel (no replacement instructions). H Hard disk drive, primary (with operating system partition). K, L Additional hard disk drives (select models) or may be empty. Disconnecting the optical drive cables Upgrading and Servicing Guide 3
-
 1
1 -
 2
2 -
 3
3 -
 4
4 -
 5
5 -
 6
6 -
 7
7 -
 8
8 -
 9
9 -
 10
10 -
 11
11 -
 12
12 -
13
-
14
-
15
-
16
 |
 |