HP Photosmart C4100 Setup Guide - Page 6
Inserte el CD de Mac del dispositivo HP All-in-One.
 |
View all HP Photosmart C4100 manuals
Add to My Manuals
Save this manual to your list of manuals |
Page 6 highlights
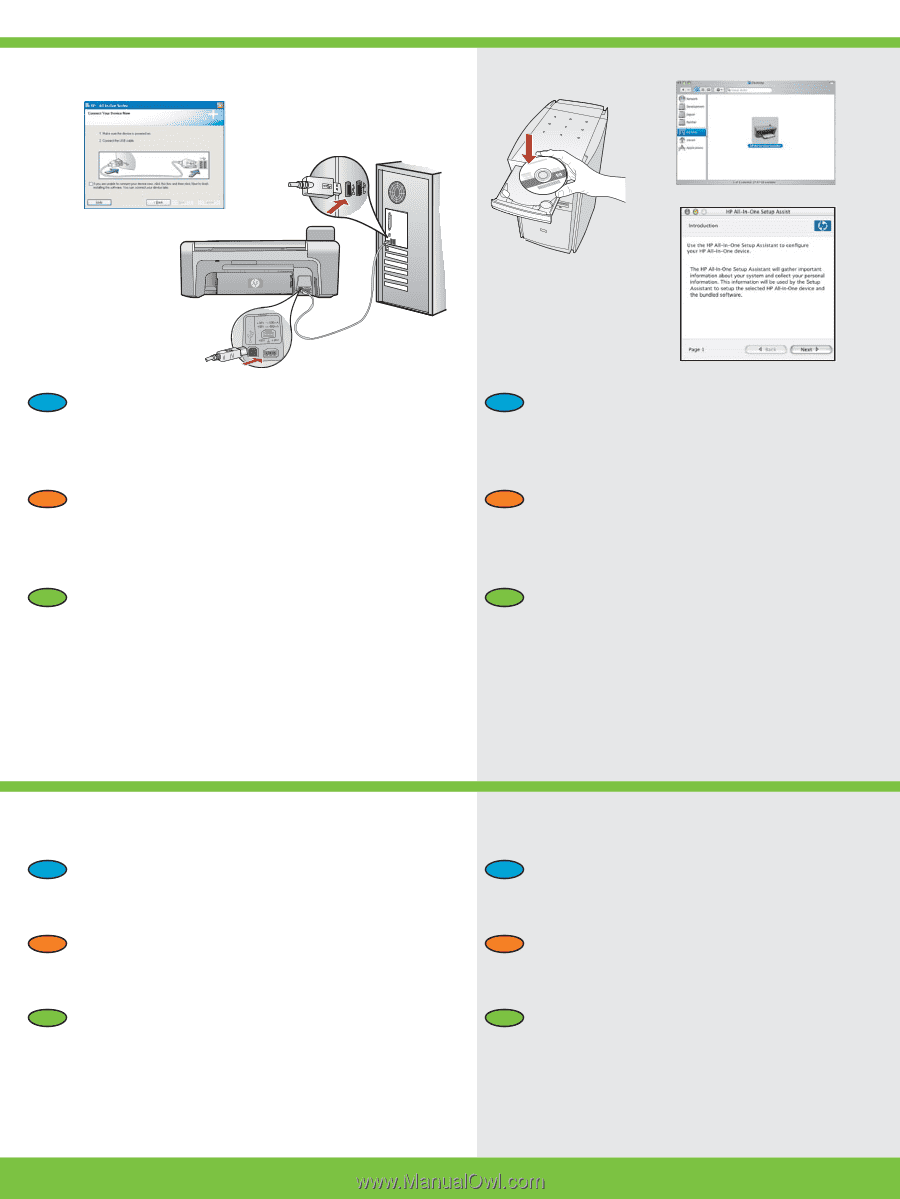
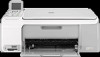
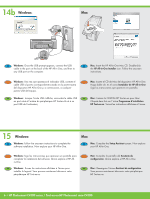
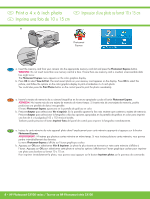
14b Windows: Mac: EN Windows: Once the USB prompt appears, connect the USB cable to the port on the back of the HP All-in-One, and then to any USB port on the computer. EN Mac: Insert the HP All-in-One Mac CD. Double-click the HP All-in-One Installer icon. Follow the onscreen instructions. ES Windows: Una vez que aparezca el indicador USB, conecte el cable USB al puerto correspondiente situado en la parte trasera del dispositivo HP All-in-One y, a continuación, a cualquier puerto USB del equipo. FR Windows : Lorsque l'invite USB s'affiche, raccordez le câble USB au port situé à l'arrière du périphérique HP Tout-en-Un et à un port USB de l'ordinateur; ES Mac: Inserte el CD de Mac del dispositivo HP All-in-One. Haga doble clic en el icono Instalador de HP All-in-One. Siga las instrucciones que aparecen en pantalla. FR Mac : Insérez le CD-ROM HP Tout-en-un pour Mac. Cliquez deux fois sur l'icône Programme d'installation HP Tout-en-un. Suivez les instructions affichées à l'écran. 15 Windows: EN Windows: Follow the onscreen instructions to complete the software installation. Now explore your HP All-in-One. Mac: EN Mac: Complete the Setup Assistant screen. Now explore your HP All-in-One. ES Windows: Siga las instrucciones que aparecen en pantalla para completar la instalación del software. Ahora explore el HP Allin-One. FR Windows : Suivez les instructions affichées à l'écran pour installer le logiciel. Vous pouvez maintenant découvrir votre périphérique HP Tout-en-un. ES Mac: Complete la pantalla del Asistente de configuración. Ahora explore el HP All-in-One. FR Mac : Renseignez l'écran Assistant de configuration. Vous pouvez maintenant découvrir votre périphérique HP Tout-en-un. 6 • HP Photosmart C4100 series / Tout-en-un HP Photosmart série C4100
-
 1
1 -
 2
2 -
 3
3 -
 4
4 -
 5
5 -
 6
6 -
 7
7 -
 8
8 -
 9
9 -
 10
10 -
 11
11 -
 12
12
 |
 |