HP W2338h HP 2210i/2310i/2510i LCD Monitors - User Guide - Page 15
WARNING, Installing the Monitor - power supply
 |
UPC - 884420172529
View all HP W2338h manuals
Add to My Manuals
Save this manual to your list of manuals |
Page 15 highlights
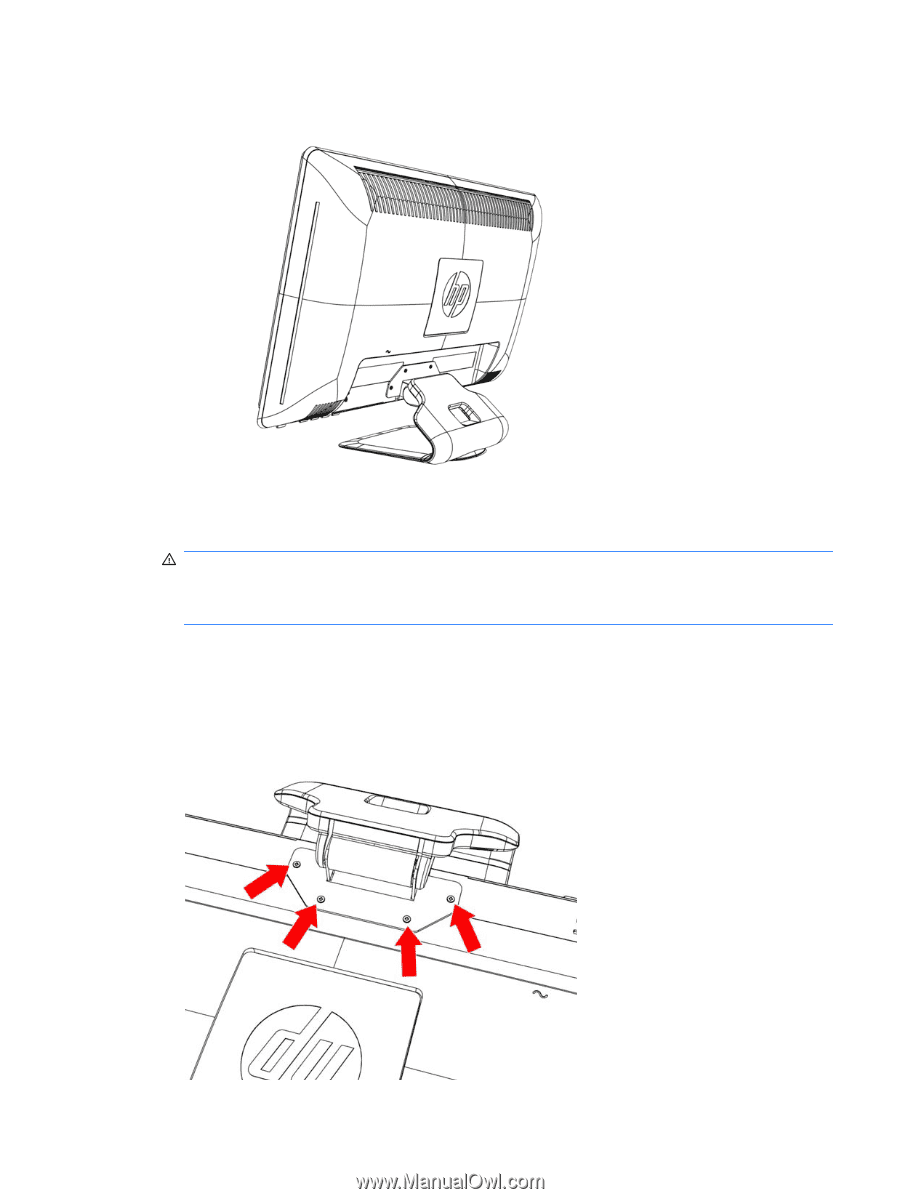
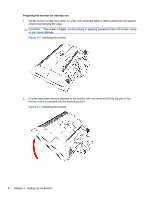
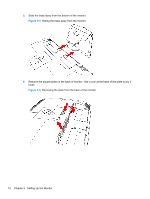
3. Lift the monitor to an upright position and place on a flat, stable surface. Figure 3-3 Monitor in upright position Preparing the monitor for wall-mounting 1. Check the stability of the wall-mounting fixture. WARNING! To reduce the risk of personal injury or of damage to the equipment, check that the wall-mounting fixture is adequately installed and secured before attaching the monitor. Refer to the instructions supplied with the wall-mounting fixture and check that it is capable of supporting the monitor. 2. Disconnect the power cable and any other cables from the monitor. 3. Place the monitor face down on a flat, protected surface. 4. Remove the four screws that fasten the monitor base to the monitor. Figure 3-4 Location of screws securing base to monitor Installing the Monitor 9
-
 1
1 -
2
-
3
-
4
-
5
-
6
-
7
-
8
-
9
-
 10
10 -
 11
11 -
 12
12 -
 13
13 -
 14
14 -
 15
15 -
 16
16 -
 17
17 -
 18
18 -
 19
19 -
 20
20 -
21
-
22
-
23
-
24
-
25
-
26
-
27
-
28
-
29
-
30
-
31
-
32
-
33
-
34
-
35
-
36
-
37
-
38
-
39
-
40
-
41
-
42
-
43
-
44
-
45
-
46
-
47
-
48
-
49
 |
 |