HP ap5000 Quick Setup & Getting Started HP ap5000 All-In-One Point of Sale
HP ap5000 - All-in-One Point of Sale System Manual
 |
View all HP ap5000 manuals
Add to My Manuals
Save this manual to your list of manuals |
HP ap5000 manual content summary:
- HP ap5000 | Quick Setup & Getting Started HP ap5000 All-In-One Point of Sale - Page 1
Quick Setup & Getting Started HP ap5000 All-In-One Point of Sale System - HP ap5000 | Quick Setup & Getting Started HP ap5000 All-In-One Point of Sale - Page 2
by copyright. No part of this document may be photocopied, reproduced, or translated to another language without the prior written consent of Hewlett-Packard Company. Quick Setup & Getting Started HP ap5000 All-In-One Point of Sale System First Edition (January 2010) Document Part Number: 592988-001 - HP ap5000 | Quick Setup & Getting Started HP ap5000 All-In-One Point of Sale - Page 3
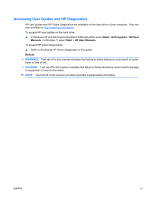
drive of your computer. They are also available at http://www.hp.com/support. To access HP user guides on the hard drive: ▲ In Windows XP and Windows Embedded POSReady 2009, select Start > All Programs > HP User Manuals. In Windows 7, select Start > HP User Manuals. To access HP Vision Diagnostics - HP ap5000 | Quick Setup & Getting Started HP ap5000 All-In-One Point of Sale - Page 4
iv Accessing User Guides and HP Diagnostics ENWW - HP ap5000 | Quick Setup & Getting Started HP ap5000 All-In-One Point of Sale - Page 5
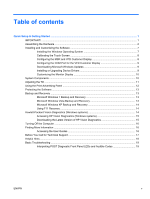
Operating System 7 Calibrating the Touch Screen 8 Configuring the MSR and VFD Customer Display 8 Configuring the COM Port for the VFD Customer Display 9 Downloading Microsoft Windows Updates 9 Installing or Upgrading Device Drivers 9 Customizing the Monitor Display 10 System Components ...10 - HP ap5000 | Quick Setup & Getting Started HP ap5000 All-In-One Point of Sale - Page 6
vi ENWW - HP ap5000 | Quick Setup & Getting Started HP ap5000 All-In-One Point of Sale - Page 7
Quick Setup & Getting Started IMPORTANT! A PS/2 or USB keyboard (not included) is required during the software unbundling process and MUST be connected before turning on power for the first time. A mouse (not included) is recommended. Figure 1 Connecting a Keyboard (not included) ENWW IMPORTANT! 1 - HP ap5000 | Quick Setup & Getting Started HP ap5000 All-In-One Point of Sale - Page 8
all the way back to its horizontal position and lay the unit face down on a soft, clean, dry cloth to avoid scratching the touch screen. b. Loosen the thumbscrew that secures the power supply bracket to the bottom of the unit (1), then slide the bracket to the side and lift the bracket off the unit - HP ap5000 | Quick Setup & Getting Started HP ap5000 All-In-One Point of Sale - Page 9
cord to an electrical outlet and turn on power to the system. Figure 4 Connecting the Power Cord d. Replace the power supply bracket by sliding the slotted end into frame (1) and tightening the thumbscrew (2). Figure 5 Replacing the Power Supply Bracket e. Turn the unit over and onto its base - HP ap5000 | Quick Setup & Getting Started HP ap5000 All-In-One Point of Sale - Page 10
components to the I/O connectors on the bottom and side of the display. a. If connecting peripherals to the side I/O connectors, remove connectors. Figure 7 Side I/O Connectors 1 Audio Line-Out Connector 3 Universal Serial Bus (green) (USB) Connector 2 Microphone Connector (pink) 4 Quick Setup - HP ap5000 | Quick Setup & Getting Started HP ap5000 All-In-One Point of Sale - Page 11
c. If connecting peripherals to the I/O connectors under the display, remove the I/O cover by pressing downward on the two tabs at the top of the cover (1) and rotating the cover off (2). Figure 8 Removing the Bottom I/O - HP ap5000 | Quick Setup & Getting Started HP ap5000 All-In-One Point of Sale - Page 12
Connector (COM1, 5V) 5V) 3 Parallel Connector 9 Serial Connector (COM3, 12V) 4 RJ-45 Network Connector 10 VGA Connector 5 24V USB+POWER Connector 11 Universal Serial Bus (USB) Connectors 6 Power Button 12 Power Cord Connector f. Replace the rear cover by inserting the bottom of the cover - HP ap5000 | Quick Setup & Getting Started HP ap5000 All-In-One Point of Sale - Page 13
system is loaded you will need to calibrate the touch screen, configure the MSR, and configure the two-line customer facing vacuum fluorescent display (VFD). The COM2 port for the VFD is pre-configured for 5 volts from the factory. CAUTION: The keyboard must be connected before turning on power - HP ap5000 | Quick Setup & Getting Started HP ap5000 All-In-One Point of Sale - Page 14
for each corner of the screen. When the process is complete, the utility will close and return you to the Windows desktop. Configuring the MSR and VFD Customer Display To configure the MSR and VFD, refer to the HP Point of Sale Configuration Guide (available in English only). The guide is available - HP ap5000 | Quick Setup & Getting Started HP ap5000 All-In-One Point of Sale - Page 15
power button to turn off the computer. 2. Press the power button again to turn on the computer and press the F10 key before the system boots to the operating system to enter the Computer Setup utility. 3. Note which COM port (COM1 or COM2) on the rear panel is connected to the VFD customer display - HP ap5000 | Quick Setup & Getting Started HP ap5000 All-In-One Point of Sale - Page 16
controller utility or the documentation that came with your monitor. System Components Figure 14 System Components 1 Touch Screen 7 Adjustable Touch Screen Hinge 2 Power LED 8 Print Advertisement Panel 3 Magnetic Stripe Reader 9 Base and Power Supply (MSR) Housing 4 VFD Customer Display 10 - HP ap5000 | Quick Setup & Getting Started HP ap5000 All-In-One Point of Sale - Page 17
Adjusting the Tilt The main touch screen display has a 90 degree tilt range. The VFD customer display has an 80 degree tilt range. Figure 15 Adjusting the Touch Screen Display Tilt Figure 16 Adjusting the VFD Customer Display Tilt ENWW Adjusting the Tilt 11 - HP ap5000 | Quick Setup & Getting Started HP ap5000 All-In-One Point of Sale - Page 18
a print advertisement behind the panel cover. NOTE: A print advertisement panel template is available on the system's hard drive. In Windows XP or Windows Embedded POSReady 2009, select Start > All Programs > HP Point of Sale Information to access the template. In Windows 7, select Start > HP Point - HP ap5000 | Quick Setup & Getting Started HP ap5000 All-In-One Point of Sale - Page 19
the Troubleshooting Guide. Microsoft Windows 7 Backup and Recovery In Microsoft Windows 7, use Windows Backup and Restore to back up individual files and folders, back up your entire hard drive (select models only), create system repair discs (select models only), or create system restore points. In - HP ap5000 | Quick Setup & Getting Started HP ap5000 All-In-One Point of Sale - Page 20
on some models). 3. If the HP Recovery partition is listed, restart the computer, and then press F11 as soon as the "Press for recovery" message is displayed on the screen. 4. Follow the on-screen instructions. Hewlett-Packard Vision Diagnostics (Windows systems) NOTE: HP Vision Diagnostics - HP ap5000 | Quick Setup & Getting Started HP ap5000 All-In-One Point of Sale - Page 21
them so that you have printed reports available before placing a call to the Customer Support Center. NOTE: Third party devices may not be detected by HP Vision Diagnostics. Accessing HP Vision Diagnostics (Windows systems) To access HP Vision Diagnostics, you must burn the utility onto a CD or copy - HP ap5000 | Quick Setup & Getting Started HP ap5000 All-In-One Point of Sale - Page 22
data. To force the computer off manually and bypass the "standby state," press and hold the power button for four seconds. On some models, you can reconfigure the power button to work in On/Off mode by running Computer Setup. Refer to the Maintenance and Service Guide (available in English only - HP ap5000 | Quick Setup & Getting Started HP ap5000 All-In-One Point of Sale - Page 23
monitor is powered on, that the monitor is plugged into the VGA video port on the rear panel, and that the VGA connector is enabled in the Computer Setup utility. ● If you are working on a network, plug another computer with a different cable into the network connection. There may be a problem with - HP ap5000 | Quick Setup & Getting Started HP ap5000 All-In-One Point of Sale - Page 24
do the following to ensure that your service call is handled properly: ● Be in front of your system when you call. ● Write down the system serial number and product ID number before calling. ● Spend time troubleshooting the problem with the service technician. ● Remove any hardware that was recently - HP ap5000 | Quick Setup & Getting Started HP ap5000 All-In-One Point of Sale - Page 25
, select See support and troubleshooting information, enter the model number of the system, and press Enter. Interpreting POST Diagnostic Front Panel LEDs and Audible Codes If you see flashing LEDs on the front of the computer or if you hear beeps, see the Maintenance and Service Guide (available in
-
 1
1 -
 2
2 -
 3
3 -
 4
4 -
 5
5 -
 6
6 -
 7
7 -
8
-
9
-
10
-
11
-
12
-
13
-
14
-
15
-
16
-
17
-
18
-
19
-
20
-
21
-
22
-
23
-
24
-
25
 |
 |

Quick Setup & Getting Started
HP ap5000 All-In-One Point of Sale System