Hitachi DZ-MV200A Owners Guide
Hitachi DZ-MV200A - Camcorder Manual
 |
View all Hitachi DZ-MV200A manuals
Add to My Manuals
Save this manual to your list of manuals |
Hitachi DZ-MV200A manual content summary:
- Hitachi DZ-MV200A | Owners Guide - Page 1
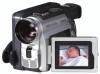
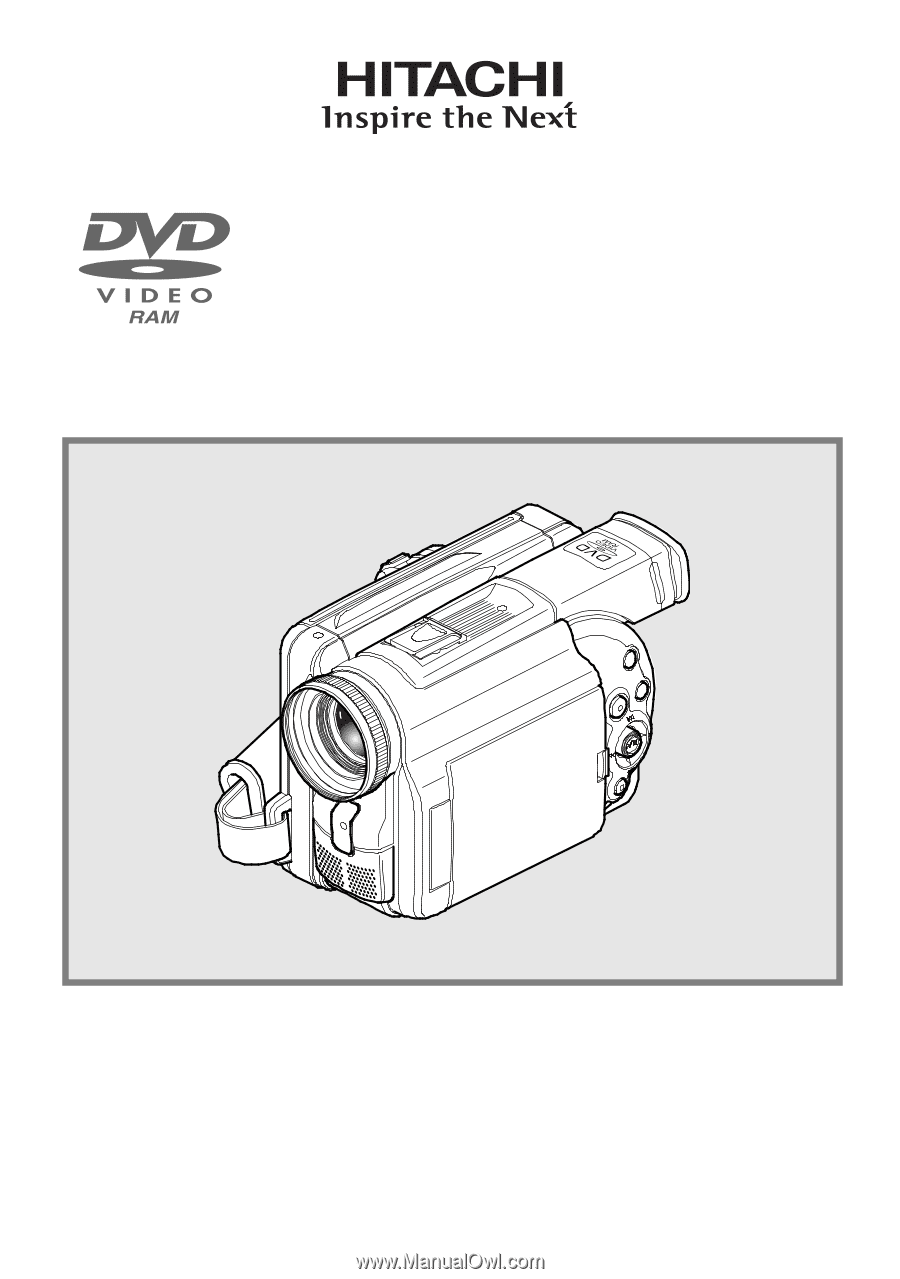
Instruction Manual DZ-MV230A DZ-MV200A HITACHI AMERICA, LTD. HOME ELECTRONICS DIVISION 1855 Dornoch Court San Diego, CA 92154-7225 Tel. 1-800-HITACHI (1-800-448-2244) HITACHI CANADA LTD. DIGITAL MEDIA DIVISION 6740 Campobello Road Mississauga, Ontario L5N 2L8 CANADA Tel. 1-800-HITACHI (1-800-448- - Hitachi DZ-MV200A | Owners Guide - Page 2
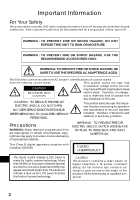
USE THE RECOMMENDED ACCESSORIES ONLY. WARNING: TO PREVENT FIRE OR SHOCK HAZARD, BE SURE TO USE THE SPECIFIED AC ADAPTER (DZ-ACE1). The DVD video camera/recorder and AC adapter Identifications of caution marks have the following caution marks. This symbol warns the user that CAUTION uninsulated - Hitachi DZ-MV200A | Owners Guide - Page 3
, if not installed and used in accordance with the instructions, may cause harmful interference to radio communications. However, user: Changes or modifications not expressly approved by the manufacturer void the user's authority to operate the equipment. Microsoft, MS, MS-DOS, Windows and Windows - Hitachi DZ-MV200A | Owners Guide - Page 4
your enjoyment and proper use of DVD video camera/recorder and accessory equipment. Please read it carefully power company. For video products intended to operate from battery power, or other sources, refer to the operating instructions. Overloading - Do not overload wall outlets and extension cords - Hitachi DZ-MV200A | Owners Guide - Page 5
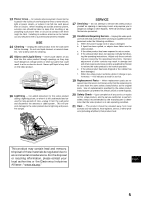
voltage or other hazards. Refer all servicing to qualified service personnel. 18 Conditions Requiring Service - Unplug this video prod- uct from the wall outlet and refer servicing to qualified service personnel under the following conditions. a. When the power-supply cord or plug is damaged. b. If - Hitachi DZ-MV200A | Owners Guide - Page 6
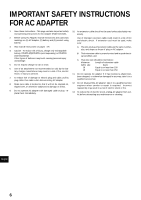
instructions for AC Adapter Model DZ-ACE1. 2. Before using AC Adapter, read all instructions and cautionary markings on (1) AC Adapter, (2) battery and (3) product using battery. 3. Also read all instructions If extension cord must be used adapter: take it to a qualified service engineer when service - Hitachi DZ-MV200A | Owners Guide - Page 7
to specific information quickly (page 8~9). Get to know your DVD video camera/recorder by using this manual, and get to know Hitachi. We appreciate your business. Quick Index Charging Battery 31 Recording Movie 42 Immediately Checking Recorded Scene ... 44 Functions Available with Disc Navigation - Hitachi DZ-MV200A | Owners Guide - Page 8
4 IMPORTANT SAFETY INSTRUCTIONS FOR AC ADAPTER 6 Read This First 7 About This Manual 10 Checking Provided Accessories 11 Names of Parts 12 Viewing Demonstration 16 Features of DVD video camera/recorder ...... 17 Versatile Functions Available 17 Recording on Disc 18 Recording Movie - Hitachi DZ-MV200A | Owners Guide - Page 9
DZ-WINPC3(W) PC kit 95 Using Disc on PC 97 Subsidiary Information Cleaning 98 If dust adheres to viewfinder lens 98 Trouble Messages 99 Troubleshooting 104 System Reset 109 Major Specifications 110 Introduction to Optional Accessories ......... 111 Camera Accessories 111 Power Supplies - Hitachi DZ-MV200A | Owners Guide - Page 10
DZ-MV230A displays are used for the following explanation. Some items do not appear with the DZ-MV200A. ● About joystick: Operation Notation in this manual You : This DVD video camera/recorder has some functions available only with DVD-RAM disc, or operation only necessary for DVD-R disc. Refer - Hitachi DZ-MV200A | Owners Guide - Page 11
you have all the following accessories in package: Battery (model DZ-BP14(R)): Portable power supply for this DVD video camera/recorder. Charge it before use. Ac adapter (model DZ-ACE1): Connect this device to the DVD video camera/recorder to power it from AC outlet. Power cable: Connect between - Hitachi DZ-MV200A | Owners Guide - Page 12
% 1 Optical 12x zoom lens (p. 47) 2 Lens hood (p. 48) 3 Accessory shoe (p. 43) Slide the cover to remove it, and then attach the optional video flash, etc., here. (See the instruction manual of device to be attached for details.) 4 Disc guide (p. 37) 5 SELECT button (p. 70) 6 MENU button (p. 54, 71 - Hitachi DZ-MV200A | Owners Guide - Page 13
the disc guide. , CHARGE/ACCESS indicator (p. 21, 31) Will blink or light during charging, or while the DVD video camera/ recorder is operating. - Zoom lever (p. 47) Push the lever to the T side for telephoto, or to the W side for wideangle. . Battery attachment platform (p. 30) / DC cord connection - Hitachi DZ-MV200A | Owners Guide - Page 14
?@ [\ SELECT DISC NAVIGATION MENU DISPLAY LCD BRIGHT EXPOSURE FOCUS RESET VOL. ]^_{ | } ? Speaker (p. 50) Press this button to adjust the exposure. { FOCUS button (p. 49) To switch between manual focus and auto-focus. | Volume control buttons (VOL)/ buttons (p. 41, 44) To adjust the volume - Hitachi DZ-MV200A | Owners Guide - Page 15
3 4 DISPLAY REC DIGITAL ZOOM ZOOM DISC NAVIGATION SELECT MENU DELETE DZ-RM2W 5 6 7 8 9 ! " # $ V DISPLAY button (p. 52) 0 DIG. ZOOM button (p. 57) 1 DISC NAVIGATION button (p. 69) 2 REVERSE SEARCH on remote control will function the same as those on DVD video camera/recorder. English 15 - Hitachi DZ-MV200A | Owners Guide - Page 16
step 2 on page 31, connect the DVD video camera/recorder, AC adapter and power cable to power the DVD video camera/recorder from AC outlet. 1 Press the button. The demo mode will end when the DVD video camera/recorder is turned off or the DISC EJECT button is pressed down. 2 Choose "Initial Setup - Hitachi DZ-MV200A | Owners Guide - Page 17
Beep \ \ 63 Initial Setup Power Save \ \ 63 Record LED DZ-MV230A only) Disc Scene Program Play List Function Switch Play Create Edit Title Delete Switch Play Title Delete Edit Skip Select Detail Capacity Format Disc Update Control Info. Finalize Disc Disc used Reference DVD-RAM DVD - Hitachi DZ-MV200A | Owners Guide - Page 18
and sports, in the same way as with conventional camcorders. It can also record stills on a DVD-RAM disc, as with a digital still camera. With CCD of 1,100,000 pixels (680,000 pixels for DZ-MV200A), high-quality movies and stills (on DVD-RAM disc only) can be recorded. In both recordings of movie - Hitachi DZ-MV200A | Owners Guide - Page 19
power is turned on. The normal brightness will be restored when the temperature inside the DVD video camera/recorder rises. Hold the DVD DVD video cam- era/recorder or AC adapter could cause it to malfunction. No water or oil! • Water or oil entering the DVD video camera/ recorder or AC adapter - Hitachi DZ-MV200A | Owners Guide - Page 20
sulfide, could corrode the battery connecting terminals, which could result in loss of power. Do not use the DVD video camera/ recorder on the lens and/or inside the DVD video camera/recorder. If condensation occurs, do not open the cover of disc insertion block if possible. If condensation occurs - Hitachi DZ-MV200A | Owners Guide - Page 21
the data: • Disconnect AC adapter. • Plug or unplug PC connection cable. • Remove disc. • Subject disc to severe vibrations or impact. If the DVD video camera/recorder is turned off while the CHARGE/ACCESS indicator is blinking, turn it on again with the disc cartridge or caddy loaded in it: Repair - Hitachi DZ-MV200A | Owners Guide - Page 22
battery from DVD video camera/recorder and store it in a cool place: • Leaving the battery attached or storing it at high temperature could shorten its life. Do not store the DVD DVD video camera/recorder cannot be restored. • It is recommended that you use DVD-RAM disc for: • Hitachi will not - Hitachi DZ-MV200A | Owners Guide - Page 23
/recorder to play back the DVD-R disc. * To play back the finalized DVD-R disc on PC, you will need DVD playback software. The DVD playback software "PowerDVD XP" is supplied with the optional DZ-WINPC3(W). ● Handling Disc If you use a DVD-RAM disc or DVD-R disc to which dirt or dust adheres - Hitachi DZ-MV200A | Owners Guide - Page 24
caddy and used with DVD-RAM drives, DVD players and DVD recorders that are compatible with 8 cm DVD-RAM discs. The finalized DVD-R disc can also be removed from the cartridge or caddy and used with DVD players and DVD recorders that are compatible for 8 cm DVD-R discs. Refer to the disc instruction - Hitachi DZ-MV200A | Owners Guide - Page 25
from cartridge or caddy. Note: If there are dust, scratches or dirt on the surface of disc, block noise may appear in image or sound may be interrupted. Take great care when handling discs so that no dirt or fingerprints adheres to them. Note: This DVD video camera/recorder has a function - Hitachi DZ-MV200A | Owners Guide - Page 26
stills that can be recorded on an 8 cm disc used in this DVD video camera/recorder are as follows: Prepare discs according to the scheduled recording time and conditions. ● DVD-RAM disc storage capacity Recordable time of movies on DVD-RAM disc Movie quality mode XTRA (VBR*1) FINE (MPEG2, approx - Hitachi DZ-MV200A | Owners Guide - Page 27
Setups This section explains preparations for recording - setting up the DVD video camera/recorder and battery pack. Setting Up the DVD video camera/recorder Holding DVD video camera/recorder Insert your right hand from the bottom of DVD video camera/recorder up to the base of your thumb. Put your - Hitachi DZ-MV200A | Owners Guide - Page 28
/recorder. 2 Push the both sides of cap inward and attach it over the lens. Note: Always keep the lens cap on when not using the DVD video camera/recorder, to protect the lens. Note: When recording, attach the lens cap to the hand strap by hooking the tab inside the cap - Hitachi DZ-MV200A | Owners Guide - Page 29
camera/recorder, remote control may not be possible. Note: The DVD video camera/recorder uses the "VCR2" remote control code of Hitachi VCRs. If you use a Hitachi VCR, etc. with remote control code set to "VCR2", a VCR placed near the DVD video camera/recorder will also be operated by the remote - Hitachi DZ-MV200A | Owners Guide - Page 30
securely attached: Incomplete attachment could cause the battery to fall, resulting in damage. Removing Battery After using the DVD video camera/recorder, remove the battery from it. 1 Set the power switch to "POWER OFF" to turn the DVD video camera/recorder off. 2 Raise the viewfinder. 3 While - Hitachi DZ-MV200A | Owners Guide - Page 31
DVD video camera/recorder, the pin of power cable cannot be completely inserted into the DC IN 8.4V jack, but this does not indicate a malfunction. Do not insert the power cable with undue force: Doing so could result in malfunction. CHARGE/ACCESS indicator Power cable AC adapter ● Battery pack - Hitachi DZ-MV200A | Owners Guide - Page 32
model DZ-BP28 (sold separately)): Battery DZ-BP14(R)/ DZ-BP28 DZ-BP16(Sold (Sold separately) separately) DVD- DVD-R DVD- DVD-R RAM RAM When the battery may be dead: Replace it. - Charging does not start within 10 seconds (the CHARGE/ACCESS indicator does not light) - The battery cannot be - Hitachi DZ-MV200A | Owners Guide - Page 33
do not need to completely discharge the battery before charging it. Note: When you are not using the DVD video camera/recorder, remove the battery and store it in a dark, cool place. If you store it in a place where the temperature is high, the battery life will be shortened. Especially be sure not - Hitachi DZ-MV200A | Owners Guide - Page 34
use the AC adapter to power the DVD video camera/recorder when finalizing a disc. Note: Be sure to use the specified AC adapter to power the DVD video camera/er corder. Using other AC adapters could cause electric shock or result in fire. CHARGE/ACCESS indicator Power cable AC adapter 1 Set the - Hitachi DZ-MV200A | Owners Guide - Page 35
Power switch 1 Set the power switch to " VIDEO" or " PHOTO" to turn the DVD DVD video camera/recorder incorporates a rechargeable battery to store the date and time in memory. If this built-in battery is exhausted, the date and time will be reset. To prevent this, connect the AC adapter to DVD - Hitachi DZ-MV200A | Owners Guide - Page 36
Changing Display Format of Date and Time You can select one of three date display formats: month/day/year, day/month/year or year/month/ day. Associated with the selected date display, the time display format will also change as follows: Display format M/D/Y D/M/Y Y/M/D Example of display 5:30PM - Hitachi DZ-MV200A | Owners Guide - Page 37
audio are stored on DVD-RAM* or DVD-R disc. * When using an uninitialized DVD-RAM disc, it must be formatted (see p. 87). 1 Make sure that the DVD video camera/ recorder is turned off. Set the power switch to "POWER OFF". 2 Press down the DISC EJECT button. The cover of disc insertion block (hand - Hitachi DZ-MV200A | Owners Guide - Page 38
inserted from the wrong direction, the DVD video camera/recorder, or cartridge or caddy could be damaged. Note: When using a one-sided recordable disc, insert it with the recording surface facing the inside of DVD video camera/recorder. G When using DVD-RAM disc The subject image will appear in the - Hitachi DZ-MV200A | Owners Guide - Page 39
. Note: Do not insert anything other than the 8 cm DVD-RAM disc or DVD-R disc into the disc insertion block: Doing so could cause malfunctions. Note: Set the power switch to "POWER OFF" to turn the DVD video camera/recorder off. Do not remove the battery to turn the camera/recorder off: If you do so - Hitachi DZ-MV200A | Owners Guide - Page 40
switch to set it to " VIDEO" or " PHOTO". Note: When power is turned on, the self-diagnosis function of DVD video camera/recorder may work, and some message may appear. If any message appears, refer to "Trouble Messages" (p. 99). Power switch Opening LCD Monitor If you open the LCD monitor, you - Hitachi DZ-MV200A | Owners Guide - Page 41
"BRIGHT" bar scale. Closing LCD Monitor Before closing the LCD monitor, be sure to reset it at right angles to the DVD video camera/recorder. Replace the LCD monitor on the DVD video camera/recorder with the LCD screen facing inward until a click is heard. Note: Be sure to return the LCD - Hitachi DZ-MV200A | Owners Guide - Page 42
Movie Insert a recordable DVD-RAM or DVD-R disc into this DVD video camera/recorder. CHARGE/ACCESS LOCK switch indicator REC button Power switch 1 Set the power switch to " VIDEO". Once the DVD video camera/recorder starts to recognize the disc, the CHARGE/ACCESS indicator will light. When - Hitachi DZ-MV200A | Owners Guide - Page 43
DZ-MV200A)]. Note: Recording of still images is possible only on DVD-RAM disc. 1 Set the power switch to " PHOTO" to turn the DVD video camera/recorder on. Once the DVD video camera/recorder starts to recognize the disc, the CHARGE/ACCESS to the instruction manual of Video Flash for details. 2 Check - Hitachi DZ-MV200A | Owners Guide - Page 44
last. When playback is finished, the DVD video camera/recorder will enter the pause status at the last image on disc. Note: When the LCD monitor is is finished, the mark will appear at the last image. If the DVD video cam- era/recorder is left without being operated, it will return to the - Hitachi DZ-MV200A | Owners Guide - Page 45
scenes from playback or playback pause, the screen will be dark briefly. Note: If the temperature inside the DVD video camera/recorder is high, it may not operate normally. In such a case, tur n the DVD video camera/recorder off, wait for a while, and then turn it on again. Frame Advance/Frame Back - Hitachi DZ-MV200A | Owners Guide - Page 46
one-minute units. : To move the cursor toward the start of first scene on disc in units of a minute. English (When the start of scene is selected) 3 Press the button to enter the selection. The DVD video camera/recorder will go to the specified point and enter the playback pause status. To - Hitachi DZ-MV200A | Owners Guide - Page 47
Zooming This DVD video camera/recorder can optically zoom in on subject up to 12 powers, digitally multiplied by 20 powers for movie recording and 4 powers for still recording. Move the zoom lever down to "T" control side, and the subject image will gradually become telescopic: Move the zoom lever - Hitachi DZ-MV200A | Owners Guide - Page 48
screw of the DVD video camera/recorder. Note: Be careful not to lose the lens hood. Note: If the optional tele-conversion lens (DZ-TL1) is attached from the lens surface, magnifying the image to fill the screen. Aim the DVD video camera/recorder at the subject, and press down the zoom lever to "W" - Hitachi DZ-MV200A | Owners Guide - Page 49
be incorr ect when you zoom up to the subject. Note: Manual focus is released when the DVD video camera/recorder is turned off. When you turn the DVD video camera/recorder on next time, auto focus will be restored. Manually focus the following objects, which may not be automatically focused (see - Hitachi DZ-MV200A | Owners Guide - Page 50
Adjusting Exposure Manually This DVD video camera/recorder measures the subject brightness and automatically adjusts the exposure. You can also adjust the exposure manually when the subject is lit from rear or for special effects recording. 1 Press the EXPOSURE button in the recording pause status. - Hitachi DZ-MV200A | Owners Guide - Page 51
: DVD-R : DVD-RAM (write-protected) : DVD-R (write-protected) : DVD-R disc already finalized on this DVD video camera/recorder : DVD-R disc finalized on a device other than this DVD video camera/recorder No display**** Movie recording mode XTRA : Highest quality (only when using DVD-RAM disc in DZ - Hitachi DZ-MV200A | Owners Guide - Page 52
user. The message can be checked when returning the LCD monitor 180° to the original status from the status in which the LCD screen was facing the same direction as the lens. : The disc has almost no free space. : Write-protected disc is loaded. : You are attempting to record a still on DVD-R disc - Hitachi DZ-MV200A | Owners Guide - Page 53
page 44 for how to operate. The " " mark will appear on the first image on disc. The " " mark will appear on the last image on disc. • Playback information display: Shows the status of DVD video camera/recorder during playback. • Recording date/time display: Shows the date/ time when recording - Hitachi DZ-MV200A | Owners Guide - Page 54
mode set as above will be stored in memory even if the DVD video camera/ recorder is turned off. MENU button Joystick Auto : such as at the seaside in midsummer or on a ski slope. Low Light : Allows user to record in a dark place even with decreased lighting: However, an after-image will appear - Hitachi DZ-MV200A | Owners Guide - Page 55
White Balance (Auto/Hold) With this DVD video camera/recorder you can switch the white balance between Auto and Hold. Mode Auto Hold the MENU button. The menu scree will disappear. The white balance setting will always be "Auto" when the DVD video camera/recorder is turned off. English 55 - Hitachi DZ-MV200A | Owners Guide - Page 56
during still recording, the setting will be effective only during movie recording. Note: It is recommended that you specify "EIS Off" when using the DVD video camera/recorder on a desk or tripod. Note: When "EIS On" is specified, there will be a slight difference between the actual movement and the - Hitachi DZ-MV200A | Owners Guide - Page 57
"240x", "48x" or "Off" setting will be stored in memory even if the DVD video camera/recorder is turned off. Note: The subject image will be slightly r ougher "240x", "48x" or "Off" by pressing the DISPLAY button and reviewing the on-screen information. Note: You can also use the DIGITAL ZOOM - Hitachi DZ-MV200A | Owners Guide - Page 58
quality from "XTRA" (only with DVD-RAM disc on DZ-MV230A), "FINE", "STD" and "LPCM" (only with DVD-R disc). However, it is recommended that you record critical subjects in the "XTRA" or "FINE" mode when you are using a DVD-RAM disc, or in the "FINE" mode with a DVD-R disc. 1 Press the MENU button - Hitachi DZ-MV200A | Owners Guide - Page 59
mode Disc used DVD-RAM DVD-R XTRA* approx. 18~60 min - FINE approx. 30 min approx. 30 min STD approx. 60 min approx. 60 min LPCM - approx. 30 min The recordable times are only for reference. * The XTRA mode can be set on the DZ-MV230A only: The recordable times will vary depending - Hitachi DZ-MV200A | Owners Guide - Page 60
record stills of externally input images on a DVD-RAM disc in the Frame or Field mode. The DVD video camera/recorder can record an external image the still recording format of external input image by reviewing the onscreen information. Still external input mode 4 Press the MENU button. - Hitachi DZ-MV200A | Owners Guide - Page 61
screen will disappear. You can also check that self-timer has been set by reviewing the on-screen information. Options will be displayed on the right to "Self 5 Press the REC button. The recording indicator at the front of DVD video camera/recorder will blink. The self-timer indicator will start to - Hitachi DZ-MV200A | Owners Guide - Page 62
desired option and press the button. 4 Press the MENU button. The menu screen will disappear. The "OSD Output" setting will not change even if the DVD video camera/recorder is turned off. Note: Even if "Off" is chosen, the on-screen information will appear during playback. See page 53 for playback - Hitachi DZ-MV200A | Owners Guide - Page 63
to use up the battery when you have no intention of using the DVD video camera/recorder for a long time, specify "Power Save: Off". Note: To turn the DVD video camera/recorder on English again from automatic off activated by the power save function, set the power switch to "POWER OFF", and then set - Hitachi DZ-MV200A | Owners Guide - Page 64
. The menu screen will disappear. The Record LED setting will not appear on the onscreen information display, and will not change even if the DVD video camera/recorder is turned off. Note: Specify "Record LED: Off" when recording subject behind a glass or water tank that will reflect the recording - Hitachi DZ-MV200A | Owners Guide - Page 65
Initializing All Settings to Defaults You can restore all camera menu settings to defaults (initial settings at the factory). (The date and time will not be reset.) 1 Press the MENU button. The menu screen will appear. 3 If you are sure that you wish to reset, use the joystick to choose "YES", - Hitachi DZ-MV200A | Owners Guide - Page 66
a program or a scene. You can also fade the image recorded on the DVD video camera/recorder, and rearrange the order of scenes. Note: Thumbnails (first different from that for the same scene when a specific program is displayed. Note: Disc Navigation thumbnail screen, skip and title attached to - Hitachi DZ-MV200A | Owners Guide - Page 67
can also update the control information of disc. G Finalizing disc If you wish to view a DVD-R disc that was recorded with this DVD video camera/recorder on other devices that are compatible with 8 cm DVD-R disc, the recorded DVD-R disc must be finalized. G Repeat playback If "Repeat Play: On" is - Hitachi DZ-MV200A | Owners Guide - Page 68
Edit Play List You can display all programs or a specific program, select scenes, and create up to 99 or delete a play list, the original scenes will not be erased from the disc. Since scenes are not duplicated, the disc capacity will not decrease. Example: To select scenes from program No. 1 and - Hitachi DZ-MV200A | Owners Guide - Page 69
message appears, the thumbnail display screen will appear. Note: If the following discs are inserted, the Disc Navigation screen will appear or some message will be displayed: - Write-protected disc - Finalized DVD-R disc Selected scene number/ Number of all scenes Bar graph (current page position - Hitachi DZ-MV200A | Owners Guide - Page 70
, and after approx. 5 minutes the thumbnail screen will be restored. G Playback of still images (with DVD-RAM disc only): Still images will be displayed for approx. 3 seconds. Note: Press the button to temporarily stop playback. Pressing again will start from that point. Note: - Hitachi DZ-MV200A | Owners Guide - Page 71
explaining each separate function. Play List Switch (p. 75) Play Disc Others Capacity (p. 87) Format Disc (p. 87) Update Control Info. (p. 88) Repeat Play (p. 89) Program Switch (p. 72) Play (p. 72) Disc * Capacity (p. 87) Finalize Disc - Hitachi DZ-MV200A | Owners Guide - Page 72
as "programs" for each recording date, selecting a program will allow you to display only the scenes on a specific date. 1 Press the DISC NAVIGATION button. 2 Press the MENU button. The Disc Navigation menu screen will appear. 3 Use the joystick to choose "Switch" on the "Program" menu screen - Hitachi DZ-MV200A | Owners Guide - Page 73
to any desired title. 1 Press the DISC NAVIGATION button and then the MENU button. The Disc Navigation menu screen will appear. 2 Use the input mode and then press the button, or press the DISPLAY button on the DVD video camera/recorder. The screen for entering a title will appear. Input mode - Hitachi DZ-MV200A | Owners Guide - Page 74
page 70. With the created play list, you can also add scenes recorded on another day or unnecessary scenes afterwards. 2 Press the MENU button. The Disc Navigation menu screen will appear. 3 Use the joystick to choose "Create" on the "Play List" menu screen, and then press the button. The "Create - Hitachi DZ-MV200A | Owners Guide - Page 75
choose "All Programs" on the "Switch Program" screen. The "Switch Play List" screen will appear. Playing Back A Play List 1 Press the MENU button. The Disc Navigation menu screen will appear. 2 Use the joystick to choose "Play" on the "Play List" menu screen, and then press the button: The "Start - Hitachi DZ-MV200A | Owners Guide - Page 76
to be added to the play list, and then press the MENU button. See "Switching to Thumbnail Display of Specific Data (Selecting Program)" on page 72 for how to display the thumbnails. The Disc Navigation menu screen will appear. 2 Use the joystick to choose "Edit" on the "Play List" menu screen, and - Hitachi DZ-MV200A | Owners Guide - Page 77
Deleting Scenes from Play List 1 Display the "Edit Play List" menu screen of the play list to be edited. 3 If you are sure that you wish to delete the scene, press the button: The screen being deleted will appear. Perform steps 1 - 3 on page 76. 2 From the play list in lower row, point the cursor - Hitachi DZ-MV200A | Owners Guide - Page 78
Editing Play List (Deleting Scenes Using Menu) If, by mistake, you insert undesired scenes to the play list to be edited in "Editing Play List (Adding Scenes using Menu)" on page 77, or if there are unnecessary scenes in the play list to be edited, you can delete the scenes without exiting the - Hitachi DZ-MV200A | Owners Guide - Page 79
was the recording date/time set on this DVD video camera/recorder. 1 Press the MENU button. The Disc Navigation menu screen will appear. 2 Use the to enter a title. Deleting Play List 1 Press the MENU button. The Disc Navigation menu screen will appear. 2 Use the joystick to choose "Delete" on - Hitachi DZ-MV200A | Owners Guide - Page 80
"YES", and then press and then press the MENU button. the button. The Disc Navigation menu screen will appear. 2 Use the joystick to choose "Delete" on the Random Scenes" on page 70. Note: If you delete all data on disc, initializing the disc will be r ecommended (see p. 87). Note: If even one - Hitachi DZ-MV200A | Owners Guide - Page 81
Adding Special Effects (Fade) When switching scenes, you can add fading to the beginning and/or end of scene. There are three types of special effects: White: Fades in from white screen, fades out to white screen Fade In Fade Out Wipe: Fades in from black screen to vertical direction of screen, - Hitachi DZ-MV200A | Owners Guide - Page 82
1 Select the scene for adding special effects and press the MENU button. The Disc Navigation menu screen will appear. 2 Use the joystick to choose, "Scene", "Edit", "Fade", and then press the button. The fade setting screen will appear. The - Hitachi DZ-MV200A | Owners Guide - Page 83
: The first scene before combination will appear as a thumbnail. The Disc Navigation menu screen will appear. 2 Use the joystick to choose, to select the scene to be divided, and then press the MENU button. The Disc Navigation menu screen will appear. 3 When you reach the point where you want - Hitachi DZ-MV200A | Owners Guide - Page 84
the scene to be divided is being played back in step 2, the DVD video camera/recorder will enter the playback pause status, and the "Go want. 1 Select the scene to be moved, and then press the MENU button. The Disc Navigation menu screen will appear. 2 Use the joystick to choose "Scene", "Edit", - Hitachi DZ-MV200A | Owners Guide - Page 85
to play back: The selected scenes will be skipped. 1 Use the joystick to select a scene to be skipped, and then press the MENU button. The Disc Navigation menu screen will appear. A skip mark " " will be attached to the scene for which skip- ping has been set. 2 Use the joystick to choose - Hitachi DZ-MV200A | Owners Guide - Page 86
will display information on the following scene; tilting the joystick to left will display information on the preceding scene. * ** *** (When using DVD-RAM disc) * With DVD-R disc, the quality mode (FINE, STD or LPCM) selected first will appear. The XTRA mode will appear only with the DZMV230A - Hitachi DZ-MV200A | Owners Guide - Page 87
a write-protected or finalized disc, the remaining space will always be displayed as "0". Note: The displayed remaining free space is only for the side being currently recorded. * ** (When using DVD-RAM disc) * With DVD-R disc: The quality mode first used for re- cording with disc will appear. The - Hitachi DZ-MV200A | Owners Guide - Page 88
will appear. 2 Use the joystick to choose "Update Con- trol Info." on the "Disc" menu screen, and then press the button. Note: Be sure to use the AC adapter when updating the control information so that the DVD video camera/recorder is not turned off midway. If updating of control information - Hitachi DZ-MV200A | Owners Guide - Page 89
Note: Be sure to use the AC adapter when finalizing disc so that the DVD video camera/recorder is not turned off midway. Finalization cannot be executed using a battery pack. If finalization is interrupted by power off, the disc will not be finalized correctly, or it may be damaged. Note: The time - Hitachi DZ-MV200A | Owners Guide - Page 90
video being recorded on the TV screen. This is also useful when editing or playing back with Disc Navigation. Connecting to a TV Use the provided AV input/output cable to connect the DVD video camera/recorder to a TV as follows: S-VIDEO cable S-VIDEO Input Jacks VIDEO AUDIO R L To S-VIDEO - Hitachi DZ-MV200A | Owners Guide - Page 91
selector to "VCR" whichever applicable Video input. Refer to the TV instruction manual for how to switch the TV input. 2 Set the power switch to " VIDEO" or " PHOTO" to turn the DVD video camera/ recorder on. The image that the DVD video camera/recorder is seeing will appear on the TV screen. You - Hitachi DZ-MV200A | Owners Guide - Page 92
/audio output jacks of VCR Yellow Red White Note: If you use a Hitachi VCR, it will be operated by the remote control provided with the DVD video camera/recorder. When recording an image from a Hitachi VCR, change the remote control code of the VCR to other than "VCR2". Note: If you increase the - Hitachi DZ-MV200A | Owners Guide - Page 93
DVD video camera/ recorder. The operation of this line-input recording is the same as for recording movie (video). Note: Still images can also be r ecorded on DVDRAM disc be read by this DVD video camera/recorder is present - even in images recorded on camcorder for personal enjoyment without - Hitachi DZ-MV200A | Owners Guide - Page 94
be CD-ROM in the following cases: • When a DVD-RAM disc or DVD-R disc is not set in DVD video camera/recorder. • When an unformatted DVD-RAM disc or a disc other than UDF formatted is in DVD video camera/recorder. • When a DVD-R disc is not finalized. The mode for connection to PC may not function - Hitachi DZ-MV200A | Owners Guide - Page 95
to your PC*. You can also write video data edited on the PC to disc. See the instruction manual of DZ-WINPC3(W) PC kit for details. * There are numerous types of PC, including those personally assembled. Hitachi will occasionally update compatibility information on Internet for PCs with which the PC - Hitachi DZ-MV200A | Owners Guide - Page 96
in the viewfinder or on the LCD screen. The CHARGE/ACCESS indicator will blink only while the disc is being accessed. Note: If you wish to transfer data recorded on DVD-R disc with this DVD video camera/recorder to PC, finalize the DVD-R disc (see page 89). Note: After transferring the data on - Hitachi DZ-MV200A | Owners Guide - Page 97
you can immediately use a disc removed from the cartridge or caddy on PC. ● Making use of recorded still images (with DVD-RAM disc only) Still images are stored in the "DCIM"-"100HPNX1" folder of disc as JPEG images (1280 × 960 pixels on DZ-MV230A, or 1024 × 768 pixels on DZMV200A)*. Use the still - Hitachi DZ-MV200A | Owners Guide - Page 98
Cleaning Be sure to set the power switch to "POWER OFF" before cleaning this DVD video camera/recorder. ● Cleaning LCD moist cloth which has been completely wrung out. When using chemical cleaning cloth, follow instructions for use. If dust adheres to viewfinder lens Use a cotton swab to wipe it - Hitachi DZ-MV200A | Owners Guide - Page 99
& Troubleshooting Reference page Error has occurred. Try to restart the DVD video camera/recorder using the following methods: (1) Turn power off, remove the battery pack or AC adapter and reattach it, and then turn power on again. (2) Turn power off, and reinsert the disc. Then turn power on - Hitachi DZ-MV200A | Owners Guide - Page 100
the instructions on screen. If the battery is being used to power the DVD video camera/recorder, the message "Use AC adapter." will appear. If an AC adapter is not handy, press the stop ( ) button, and then remove the disc. If the disc is inserted when the AC adapter is later used to power the DVD - Hitachi DZ-MV200A | Owners Guide - Page 101
cannot be repaired when the DVD video cam- era/recorder is powered by a battery. If the AC adapter is unavailable in handy place, re- move the disc, use the opposite side, or use another 34 disc. To repair the removed disc, insert the disc into the DVD video camera/recorder afterwards, and - Hitachi DZ-MV200A | Owners Guide - Page 102
. 38 With DVD-R disc, the movie quality mode once used for recording cannot be changed. 58 Instantaneous shutoff occurred during finalizing, after which power was supplied and disc was inserted. 89 Disc error occurred during finalizing, and finalizing failed. Replace the disc. 89 An - Hitachi DZ-MV200A | Owners Guide - Page 103
Message COPY PROTECTED CHECK DISC UNFORMAT DISC END OF DISC DISC ALMOST FULL DISC ACCESS NO DISC CANNOT RECORD PHOTOS Cause & Troubleshooting Reference page The video signal input to this DVD video camera/re- corder may be copy-guarded. Some prerecorded video materials, such as movies, are - Hitachi DZ-MV200A | Owners Guide - Page 104
" VIDEO". You can also specify "Power Save: Off" to stop automatic power off. Remove the battery or AC adapter. In this case, the disc cannot be removed. To remove the disc, reattach the battery or AC adapter and turn the DVD video camera/ recorder on again. Is DVD video camera/recorder connected to - Hitachi DZ-MV200A | Owners Guide - Page 105
ACCESS indicator lit or blinking during charging? The battery might have been attached incorrectly to the battery attachment platform on DVD video camera/re- 31 corder: Remove the battery image cannot be re- 93 corded on this DVD video camera/recorder. Has brightness of LCD screen been - Hitachi DZ-MV200A | Owners Guide - Page 106
connections. Is input selector of this DVD video camera/recorder set to "LINE"? 59 Change it to "CAMERA" mode. Is disc scratched or does dirt or fingerprint adhere to it? Clean the disc. 23 Was the image input from analog VCR (VHS, 8 mm) and recorded? The problem may be improved if a VCR - Hitachi DZ-MV200A | Owners Guide - Page 107
the battery or AC adapter, and operate the DVD video camera/recorder. Resetting the DVD video battery or AC adapter before setting the power switch to "POWER OFF". Connect the battery pack or AC adapter, set the power 39 switch to " VIDEO" and then "POWER OFF", and remove the disc after the disc - Hitachi DZ-MV200A | Owners Guide - Page 108
control? Also check the polarities of batteries. The batteries could be dead: Try replacing them. Is the DVD video camera/recorder powered? Turn it on. Is disc correctly inserted? Was disc inserted until it locked? Was disc inserted from wrong direction? Remove the disc and then reinsert it. This - Hitachi DZ-MV200A | Owners Guide - Page 109
Mode DZ-MV200A: FINE/STD DVD-R VIDEO Mode FINE/STD/LPCM DVD-RAM Input Source CAMERA/LINE DVD-R DVD-RAM PHOTO Input Frame/Field Self Timer On/Off DVD-RAM DVD-R OSD Output On/Off DVD-RAM Date Mode M/D/Y / D/M/Y / Y/M/D DVD-R Date Set 1/1/2002 12:00AM DVD-RAM Beep On/Off DVD-R Power Save - Hitachi DZ-MV200A | Owners Guide - Page 110
, 1,024 × 768 pixels on DZ-MV200A) Movie: Conforming to DVD video recording standard (when MPEG Audio layer 2 or LPCM is selected) MPEG Audio layer 2, linear PCM, Dolby AC3 8 cm DVD-RAM disc (conforming to DVD-RAM Ver. 2.1 Book 2.1) 8 cm DVD-R disc (conforming to DVD-R for General Ver. 2.0) Video - Hitachi DZ-MV200A | Owners Guide - Page 111
Power Supplies Battery pack (DZ-BP16) Battery pack (DZ-BP28) • If you use the video light, you will need a battery pack (DZ-BP16, DZ-BP28 (sold separately)), in addition to the battery used in the DVD video camera/recorder. • When using optional accessories, be sure to read the instruction manuals - Hitachi DZ-MV200A | Owners Guide - Page 112
HITACHI (1-800-448-2244) FOR AUTHORIZED HITACHI SERVICE FACILITY IN CANADA Please consult the following telephone number: 1-800-HITACHI (1-800-448-2244) TO ORDER ACCESSORIES (Canada only) BY PHONE HITACHI : DVD VIDEO CAMERA/RECORDER Models : DZ-MV230A/DZ-MV200A Trade Name : HITACHI This - Hitachi DZ-MV200A | Owners Guide - Page 113
.zoom 57 8 cm DVD-R disc 23 8 cm DVD-RAM disc 23 A AC adapter 34 Accessory shoe 111 Add (edit 77 All programs 72 Auto (program AE 54 Auto (white bal 55 Auto-focus 49 A/V input/output jack 90 B B/W 81 Battery attachment platform 30 Battery eject button 30 Battery pack 30 Attaching to - Hitachi DZ-MV200A | Owners Guide - Page 114
(program 72 P PC connection terminal 96 Photo input 60 Play (play list 75 Play (program 72 Play list 74 Portrait (program AE 54 Power save 63 Power switch 35, 40 Program 72 Play 72 Switch 72 Title 73 Program AE 54 R Record button 42 Record functions setup 17 Recording indicator
-
 1
1 -
 2
2 -
 3
3 -
 4
4 -
 5
5 -
 6
6 -
 7
7 -
8
-
9
-
10
-
11
-
12
-
13
-
14
-
15
-
16
-
17
-
18
-
19
-
20
-
21
-
22
-
23
-
24
-
25
-
26
-
27
-
28
-
29
-
30
-
31
-
32
-
33
-
34
-
35
-
36
-
37
-
38
-
39
-
40
-
41
-
42
-
43
-
44
-
45
-
46
-
47
-
48
-
49
-
50
-
51
-
52
-
53
-
54
-
55
-
56
-
57
-
58
-
59
-
60
-
61
-
62
-
63
-
64
-
65
-
66
-
67
-
68
-
69
-
70
-
71
-
72
-
73
-
74
-
75
-
76
-
77
-
78
-
79
-
80
-
81
-
82
-
83
-
84
-
85
-
86
-
87
-
88
-
89
-
90
-
91
-
92
-
93
-
94
-
95
-
96
-
97
-
98
-
99
-
100
-
101
-
102
-
103
-
104
-
105
-
106
-
107
-
108
-
109
-
110
-
111
-
112
-
113
-
114
 |
 |
Instruction Manual
HITACHI AMERICA, LTD.
HOME ELECTRONICS DIVISION
1855 Dornoch Court
San Diego, CA 92154-7225
Tel. 1-800-HITACHI
(1-800-448-2244)
HITACHI CANADA LTD.
DIGITAL MEDIA DIVISION
6740 Campobello Road
Mississauga, Ontario L5N 2L8
CANADA
Tel. 1-800-HITACHI
(1-800-448-2244)
Thank you for buying a Hitachi product. Please take time to become familiar with the manual and
how it is set up. Keep it handy for future reference.
QR34014 ©Hitachi, Ltd. 2002
Printed in Japan OF-G(Y)
DZ-MV230A
DZ-MV200A