Hoover FH50240RM Product Manual - Page 11
Clean, Surge°, Button, Picking, Spills, Cleaning, Floors
 |
View all Hoover FH50240RM manuals
Add to My Manuals
Save this manual to your list of manuals |
Page 11 highlights
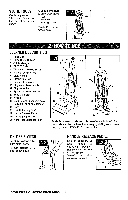
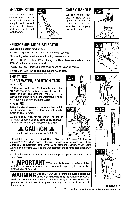
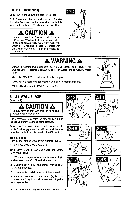
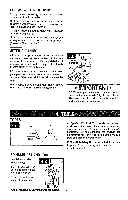
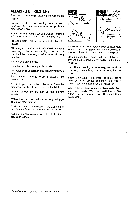
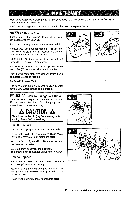
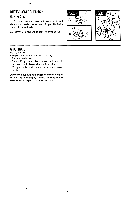
CLEAN SURGE° BUTTON (Available on select models only) The Clean Surge® button can be used to dispense extra solution when cleaning particularly soiled areas of carpet or spots. To use, press Clean Surges button while squeezing solution trigger. For normal solution spray, release button and continue to squeeze solution trigger. PICKING UP SPILLS Your HOOVER® carpet cleaner may also be used to pick up small liquid spills (one gallon br less, never to exceed 1/8" in depth). Do not submerge unit in liquid. Place the floor nozzle with the SpinScrub® mode selector to SPILL PICK-UP in front of the spill, pull the nozzle very slowly over the spill. When finished picking up spills, follow "After Cleaning" instructions. CLEANING HARD FLOORS How to Attach Squeegee for Hard Floor Cleaning (Available on select models only) A CAUTION A Do not use the carpet cleaner to pick up flammable or combustible liquids or chemicals. (c A CAUTION A To reduce the risk of injury from moving parts, unplug cleaner. To prevent possible leaking, remove clean water tank (Fig. 2.8) and Dirty Water Tank (Fig. 2.13). Set tanks aside (do not set tank on furniture). 1. Fill clean water tank according to instructions for Fig. 2.9. With handle in upright position, tilt cleaner back so 2. Fill detergent container with HOOVER® Hard Floor that handle rests on the floor. Cleaner according to instructions for Hg. 2.10. 3.4 Position the squeegee, larger lip facing up, on bottom of nozzle until it snaps securely into place. Make sure the outside edges are pushed up tight against the nozzle. Remove squeegee to return to cleaning carpets. Read "Before you begin cleaning" instructions on page 9. 3. Slide SpinScrub selector to GENTLE SCRUB. 4. Dry hands and plug cleaner into a properly grounded outlet 5. Step on handle release pedal and lower handle to operating position. 6. Set Wash/Rinse Setting switch to WASH (Wash/ Auto-Rinse' when available). Turn cleaner on. A CAUTION A Do not use the carpet cleaner on unsealed hardwood floors. To prevent damage to wood floors, follow the flooring manufacturer's cleaning recommendations. If using cleaner on sealed wood floors, inspect floor surface for worn finish, bare wood or separated joints. It is not recommended to use the cleaner on wood floors if any of these conditions exist 7. To release solution, press trigger. Slowly move cleaner forward and backward over area to be cleaned. Water and detergent will be released on the forward stroke. For models with Auto-Rinse feature, a water-only rinse will automatically be released on the reverse stroke. 8. To pick up dirty solution, release trigger and slowly move cleaner over area where solution has just been dispensed. Use both forward and reverse strokes. 9. If rinsing the floor is desired, set Wash/Rinse Setting switch to RINSE. Repeat steps 7 & 8. This setting provides a water-only rinse in both the forward and reverse strokes. Continue» 11 Actual model may vary from images shown.
-
 1
1 -
2
-
3
-
4
-
5
-
 6
6 -
 7
7 -
 8
8 -
 9
9 -
 10
10 -
 11
11 -
 12
12 -
 13
13 -
 14
14 -
 15
15 -
 16
16 -
17
-
18
-
19
-
20
-
21
-
22
-
23
-
24
-
25
-
26
-
27
-
28
-
29
-
30
-
31
-
32
-
33
-
34
-
35
-
36
-
37
-
38
 |
 |
