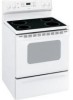
Hotpoint RB790DPWW Owners Manual - Page 2
I Warning
 |
View all Hotpoint RB790DPWW manuals
Add to My Manuals
Save this manual to your list of manuals |
Page 2 highlights
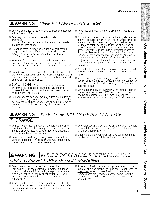
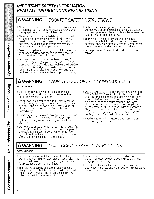
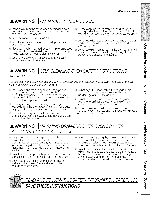
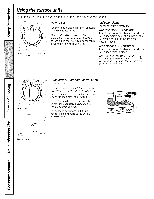
IMPORTANTSAFETYINFORP/AT/ON. READ ALL INSTRUCTIONSBEFOREUSING. I WARNING Read all safety instructions before using the product. Failure to follow these instructions may result in fire, electric shock, serious injury or death. ANTI-TIP DEVICE • All ranges can tip. • BURNS or other SERIOUS INJURIES can result. • INSTALL and CHECK the ANTI-TIP bracket following the instructions supplied with the bracket. Toreduce the risk of tipping the range, the range must be secured by a properly installed anti-tip bracket. Seeinstallation instructions shipped with the bracket for complete details before attempting to install. For Freestanding Ranges: Tocheck if the bracket is installed and engaged properly, remove the storage drawer or kick panel and look underneath the range to seethat the leveling leg is engaged in the bracket. On models without a storage drawer or kick panel, carefully tip the range forward. The bracket should stop the range within 4 inches.If it does not, the bracket must be reinstalled. If the range ispulled from the wall for any reason,always repeat this procedure to verify the range is properly secured by the anti-tip bracket. Never completely remove the levelinglegs or the range will not be secured to the anti-tip deviceproperly. For Slide-In Ranges: To check if the bracket is installed and engaged properly, remove the storage drawer or kick panel and look underneath the range to see that the leveling leg is engaged in the bracket. For Drop-In Ranges: To check if the bracket is installed and engaged properly, lower the oven door and gently apply medium force at the handle end until movement of the range is detected. Continue pressing until the anti-tip bracket is engaged and movement stops. A small amount of movement is acceptable at the back of the range top, but it should be stable and not tip once the anti-tip bracket is engaged. If it does not, the bracket must be reinstalled. If you did not receive an anti-tip bracket with your purchase, call 1.800.626.877/4to receive one at no cost (in Canada, call 1.800.561.33/44)F. or installation instructions of the bracket, visit GEAppliances.com(in Canada, GEAppliances.ca). WARNING I IMPORTANT SAFETY NOTICE TheCalifornia Safe Drinking Water and ToxicEnforcementAct requires the Governor of California to publish a list of substances known to the state to cause cancer,birth defects or other reproductive harm, and requires businessesto warn customers of potential exposure to such substances. Thefiberglass insulation in self-clean ovens gives off a very small amount of carbon monoxide during the cleaning cycle. Exposure can be minimized by venting with an open window or using a ventilation fan or hood.
-
 1
1 -
 2
2 -
 3
3 -
 4
4 -
 5
5 -
 6
6 -
 7
7 -
 8
8 -
9
-
10
-
11
-
12
-
13
-
14
-
15
-
16
-
17
-
18
-
19
-
20
-
21
-
22
-
23
-
24
-
25
-
26
-
27
-
28
-
29
-
30
-
31
-
32
-
33
-
34
-
35
-
36
-
37
-
38
-
39
-
40
 |
 |
