Husqvarna W520 Owner Manual - Page 12
Assembly
 |
View all Husqvarna W520 manuals
Add to My Manuals
Save this manual to your list of manuals |
Page 12 highlights
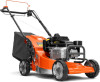
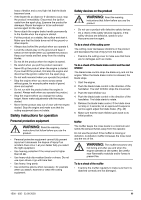
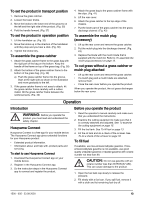
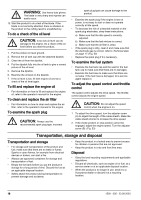
Fuel safety WARNING: Read the warning instructions that follow before you use the product. • Do not start the product if there is fuel or engine oil on the product. Remove the unwanted fuel/oil and let the product dry. • If you spill fuel on your clothing, change clothing immediately. • Do not get fuel on your body, it can cause injury. If you get fuel on your body, use soap and water to remove the fuel. • Do not start the product if the engine has a leak. Examine the engine for leaks regularly. • Be careful with fuel. Fuel is flammable and the fumes are explosive and can cause injuries or death. • Do not breathe in the fuel fumes, it can cause injury. Make sure that there is a sufficient airflow. • Do not smoke near the fuel or the engine. • Do not put warm objects near the fuel or the engine. • Do not add the fuel when the engine is on. • Make sure that the engine is cool before you refuel. • Before you refuel, open the fuel tank cap slowly and release the pressure carefully. • Do not add fuel to the engine in an indoor area. Not sufficient airflow can cause injury or death because of asphyxiation or carbon monoxide. • Tighten the fuel tank cap fully. If the fuel tank cap is not tightened, there is a risk of fire. • Move the product a minimum of 3 m / 10 ft from the position where you filled the tank before a start. • Do not fill the fuel tank fully. Heat causes the fuel to expand. Keep a space at the top of the fuel tank. Safety instructions for maintenance WARNING: Read the warning instructions that follow before you use the product. • The exhaust fumes from the engine contain carbon monoxide, an odourless, poisonous and very dangerous gas. Do not start the engine indoors or in closed spaces. • Before you do the maintenance on the product, stop the engine and remove the ignition cable from the spark plug. • Use protective gloves when you do maintenance on the cutting equipment. The blade is very sharp and cuts can easily occur. • Accessories and changes to the product that are not approved by the manufacturer, can cause serious injury or death. Do not change the product. Always use accessories that are approved by the manufacturer. • If the maintenance is not done correctly and regularly, the risk of injury and damage to the product increases. • Only do the maintenance as given in this owner's manual. All other servicing must be done by an approved Husqvarna service agent. • Let an approved Husqvarna service agent do servicing on the product regularly. • Replace damaged, worn or broken parts. Assembly Introduction WARNING: Before you assemble the product, you must read and understand the safety chapter. WARNING: Remove the spark plug cable from the spark plug before you assemble the product. To assemble the handle 1. Loosen the lower knobs on the left and the right side of the product. Make sure that the plastic washer is in the recess in the handle bracket. (Fig. 30) 2. Install the handle folded forward as shown in the illustration. (Fig. 31) a) Make sure that the plastic washer is between the handle and the handle bracket. b) Attach the handle to the handle bracket. 3. Lift the handle up. (Fig. 32) 4. Tighten the knobs fully. To adjust the handle height, refer to To adjust the handle height on page 12. 5. Put the wires in the cable brackets. Make sure that the wires are not twisted. Attach the cable brackets to the handle. (Fig. 33) 6. Use a cable tie to attach the cables to the handle bracket. (Fig. 34) To adjust the handle height 1. Loosen the lower knobs. 2. Move the knobs to the lower end of the grooves on the left and the right side of the product. (Fig. 35) 3. Set the handle height in 1 of the 2 available positions. 4. Move the knobs up in the direction of the handlebar until they stop and you hear a click. (Fig. 36) 5. Tighten the knobs fully. 12 1500 - 005 - 23.09.2020
-
 1
1 -
2
-
3
-
4
-
5
-
6
-
 7
7 -
 8
8 -
 9
9 -
 10
10 -
 11
11 -
 12
12 -
 13
13 -
 14
14 -
 15
15 -
 16
16 -
 17
17 -
18
-
19
-
20
-
21
-
22
-
23
-
24
-
25
-
26
-
27
-
28
-
29
-
30
-
31
-
32
-
33
-
34
-
35
-
36
-
37
-
38
-
39
-
40
-
41
-
42
-
43
-
44
 |
 |
