Husqvarna W520 Owner Manual - Page 14
Maintenance
 |
View all Husqvarna W520 manuals
Add to My Manuals
Save this manual to your list of manuals |
Page 14 highlights
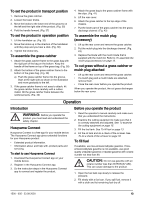
3. Clean the area around the fuel tank cap. 4. Tighten the fuel tank cap fully. If the fuel tank cap is not tightened, there is a risk of fire. 5. Move the product a minimum of 3 m (10 ft) from the position where you filled the tank before a start. To set the cutting height The cutting height can be adjusted in 6 levels. 1. Push the cutting height control in the direction of the wheel and then rearward to increase the cutting height. 2. Push the cutting height control in the direction of the wheel and then forward to decrease the cutting height. (Fig. 44) CAUTION: Do not set the cutting height too low. The blades can hit the ground if the surface of the lawn is not level. To start the product 1. Make sure that the ignition cable is connected to the spark plug. 2. Stay behind the product. 3. Adjust the throttle control. a) If the engine is cold, set the throttle control to the choke position. (Fig. 45) b) If the engine is warm, do not set the throttle control to the choke position. 4. Hold the starter rope handle with your right hand. 5. Slowly pull out the starter rope until you feel some resistance. 6. Pull with force to start the engine. 7. Set the throttle control to full throttle. 8. Release the start inhibitor. 9. Push the blade brake control in the direction of the handlebar to start the blades. To use the drive on the wheels • Pull the drive bail in the direction of the handlebar. (Fig. 46) • Adjust the drive speed with the speed control on the left side of the handle. Move the speed control forward to increase the speed and rearward to decrease the speed. (Fig. 47) • Before you pull the product rearward, disengage the drive and push the product forward approximately 10 cm. • Release the drive bail to disengage the drive, for example when you go near an obstacle. To stop the product • To stop the drive only, release the drive bail. • To stop the engine, move the throttle control to the stop position. To get a good result • Always use a sharp blade. A blunt blade gives an irregular result and the cut surface of the grass becomes yellow. A sharp blade also uses less energy than a blunt blade. • Do not cut more than ⅓ of the length of the grass. Cut first with the cutting height set high. Examine the result and lower the cutting height to an applicable level. If the grass is very long, drive slowly and cut 2 times if necessary. • Cut in different directions each time to prevent stripes in the lawn. Introduction Maintenance Maintenance schedule WARNING: Before you do maintenance, you must read and understand the safety chapter. CAUTION: Make sure that the air filter is up and not against the ground when you tilt the product. Risk of engine damage. For all servicing and repair work on the product, special training is necessary. We guarantee the availability of professional repairs and servicing. If your dealer is not a service agent, speak to them for information about the nearest service agent. The maintenance intervals are calculated from daily use of the product. The intervals change if the product is not used daily. For maintenance identified with * refer to instructions in Safety devices on the product on page 11. Maintenance Do a general inspection Examine the oil level Daily X X Weekly Monthly 14 1500 - 005 - 23.09.2020
-
 1
1 -
2
-
3
-
4
-
5
-
6
-
7
-
8
-
 9
9 -
 10
10 -
 11
11 -
 12
12 -
 13
13 -
 14
14 -
 15
15 -
 16
16 -
 17
17 -
 18
18 -
 19
19 -
20
-
21
-
22
-
23
-
24
-
25
-
26
-
27
-
28
-
29
-
30
-
31
-
32
-
33
-
34
-
35
-
36
-
37
-
38
-
39
-
40
-
41
-
42
-
43
-
44
 |
 |
