Insignia NS-DSC7P09 User Manual (English) - Page 6
Making initial settings - 7 0 megapixel digital camera
 |
UPC - 600603118876
View all Insignia NS-DSC7P09 manuals
Add to My Manuals
Save this manual to your list of manuals |
Page 6 highlights
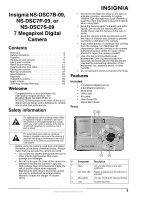
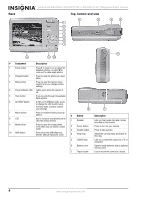
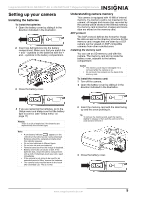
Insignia NS-DSC7B-09, NS-DSC7P-09, or NS-DSC7S-09 7 Megapixel Digital Camera Making initial settings When using the camera for the first time, make sure that you choose a language and set the date and time before using the camera. To set the display language: 1 Turn the power on. 2 Press PLAY, then press MENU. The initial menu is displayed on the LCD monitor. 3 Press , , , or to select SETUP , then press SET. The Setup Menu opens. To set the date and time: 1 Turn the power on. 2 Press PLAY, then press MENU. The initial menu is displayed on the LCD monitor. 3 Press , , , or to select SETUP, then press SET. The Setup Menu opens. 4 Press or to select Date & Time, then press SET. The Date & Time menu opens with the year highlighted. 4 Press or to select Language, then press SET. The Language sub-menu opens. 5 Press or to select the language you want, then press or SET to apply the setting. 6 Press MENU to exit the menu. 5 Press or to change the year, then press or to move to the next setting. Tips • • Hold down or to change the settings continuously. See "Setting the date stamp" on page 18 to add a date stamp to your photos. 6 Repeat Step 4 for all settings, then press SET or MENU to apply the settings. Note If the batteries are removed for longer than 48 hours, the date and time must be reset. 6 www.insignia-products.com
-
 1
1 -
 2
2 -
 3
3 -
 4
4 -
 5
5 -
 6
6 -
 7
7 -
 8
8 -
 9
9 -
 10
10 -
 11
11 -
 12
12 -
13
-
14
-
15
-
16
-
17
-
18
-
19
-
20
-
21
-
22
-
23
-
24
-
25
-
26
-
27
-
28
-
29
-
30
-
31
-
32
 |
 |
