Intel D102GGC2 Product Guide - Page 45
Setting the BIOS Configuration Jumper
 |
View all Intel D102GGC2 manuals
Add to My Manuals
Save this manual to your list of manuals |
Page 45 highlights
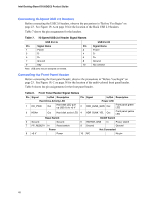
Installing and Replacing Desktop Board Components Setting the BIOS Configuration Jumper NOTE Always turn off the power and unplug the power cord from the computer before changing the jumper. Moving the jumper with the power on may result in unreliable computer operation. Figure 24 shows the location of the desktop board's BIOS configuration jumper block. 1 2 3 BR1 OM19154 Figure 24. Location of the BIOS Configuration Jumper Block The three-pin BIOS jumper block enables all board configuration to be done in the BIOS Setup program. Table 9 shows the jumper settings for the Setup program modes. 45
-
 1
1 -
2
-
3
-
4
-
5
-
6
-
7
-
8
-
9
-
10
-
11
-
12
-
13
-
14
-
15
-
16
-
17
-
18
-
19
-
20
-
21
-
22
-
23
-
24
-
25
-
26
-
27
-
28
-
29
-
30
-
31
-
32
-
33
-
34
-
35
-
36
-
37
-
38
-
39
-
 40
40 -
 41
41 -
 42
42 -
 43
43 -
 44
44 -
 45
45 -
 46
46 -
 47
47 -
 48
48 -
 49
49 -
 50
50 -
51
-
52
-
53
-
54
-
55
-
56
-
57
-
58
-
59
-
60
-
61
-
62
-
63
-
64
 |
 |
Installing and Replacing Desktop Board Components
45
Setting the BIOS Configuration Jumper
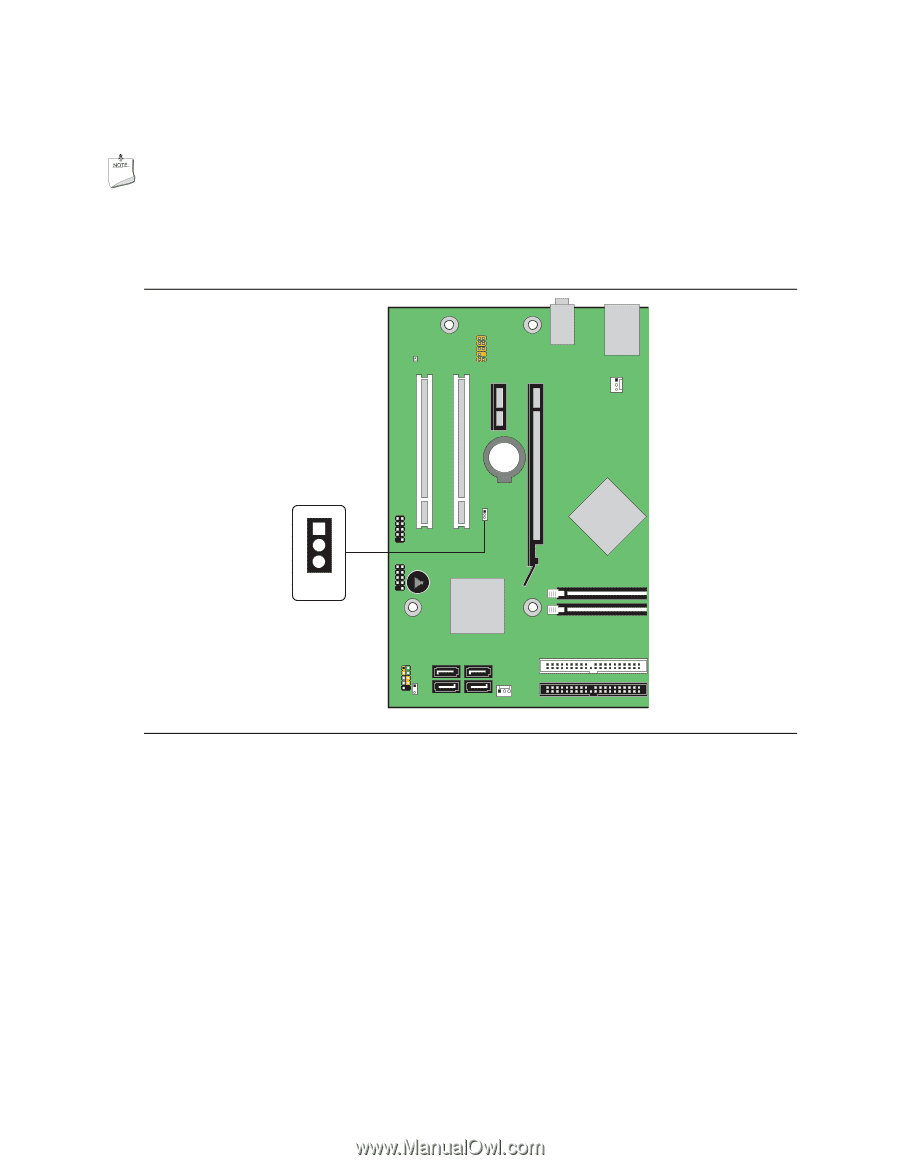
NOTE
Always turn off the power and unplug the power cord from the computer before changing the
jumper.
Moving the jumper with the power on may result in unreliable computer operation.
Figure 24 shows the location of the desktop board’s BIOS configuration jumper block.
OM19154
1
3
2
BR1
Figure 24.
Location of the BIOS Configuration Jumper Block
The three-pin BIOS jumper block enables all board configuration to be done in the BIOS Setup
program.
Table 9 shows the jumper settings for the Setup program modes.