JVC C11U Instruction Manual - Page 43
Step 3 Adjusting the Camera, 3-1 Back-focus Adjustment
 |
UPC - 046838325670
View all JVC C11U manuals
Add to My Manuals
Save this manual to your list of manuals |
Page 43 highlights
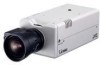
Preparations (Step 3 Adjusting the Camera) 3-1 Back-focus Adjustment At the factory, back-focus is set at the point for the widest range of use for CS-mount. However, it is necessary to readjust back focus if a zoom or C-mount lens is used or if focus cannot be attained using the focus ring of the lens. To adjust, follow the procedures described below. In order to adjust back-focus appropriately, use the iris adjustment function and an ND filter to release the lens iris before proceeding with the adjustment. (An ND filter acts to reduce the overall amount of light entering the lens equally over all wavelengths.) Connect the MONITOR OUT terminal on the rear panel to the monitor TV. To adjust, follow the procedures described below. Back focus adjustment ring Tighten Loosen Back focus locking screw (M2.6) Lens focus ring If focus cannot be attained using the focus ring of the lens, adjust the back-focus as follows. 1. Loosen the back-focus lock screw by turning it counterclockwise with a Phillips screwdriver. 2. Aim the camera at the object or a spot of detail somewhere away from the object while checking the image on the PC screen. 3. Turn the focus ring to . 4. Turn the back-focus adjustment ring to optimize the focus. 5. Tighten the back-focus lock screw securely by turning it clockwise. If the image gets out of focus when zoomed in/ out, adjust the camera as follows: 1. Loosen the back-focus locking screw by turning it counterclockwise with a Phillips screwdriver. 2. Aim the camera at the object or a spot of detail somewhere away from the object while checking the image on the PC screen. 3. Zoom in the lens and adjust the focus by turning the focus ring. 4. Zoom out the lens and adjust the focus by turning the focus ring. 5. Repeat steps 3 and 4 a few times. 6. Tighten the back-focus locking screw securely by turning it clockwise. 43
-
 1
1 -
2
-
3
-
4
-
5
-
6
-
7
-
8
-
9
-
10
-
11
-
12
-
13
-
14
-
15
-
16
-
17
-
18
-
19
-
20
-
21
-
22
-
23
-
24
-
25
-
26
-
27
-
28
-
29
-
30
-
31
-
32
-
33
-
34
-
35
-
36
-
37
-
 38
38 -
 39
39 -
 40
40 -
 41
41 -
 42
42 -
 43
43 -
 44
44 -
 45
45 -
 46
46 -
 47
47 -
 48
48 -
49
-
50
-
51
-
52
-
53
-
54
-
55
-
56
-
57
-
58
-
59
-
60
-
61
-
62
-
63
-
64
-
65
-
66
-
67
-
68
-
69
-
70
-
71
-
72
-
73
-
74
-
75
-
76
-
77
-
78
 |
 |
