JVC GR D90U Instructions
JVC GR D90U - MiniDV Camcorder With 3.5" LCD Manual
 |
UPC - 046838161018
View all JVC GR D90U manuals
Add to My Manuals
Save this manual to your list of manuals |
JVC GR D90U manual content summary:
- JVC GR D90U | Instructions - Page 1
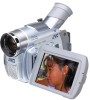
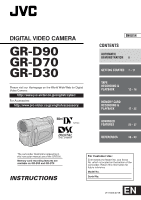
DIGITAL VIDEO CAMERA GR-D90 GR-D70 GR-D30 Please visit our Homepage on the World Wide Web for Digital Video Camera: http://www.jvc-victor.co.jp/english/cyber/ For Accessories: http://www.jvc-victor.co.jp/english/accessory/ ENGLISH CONTENTS AUTOMATIC DEMONSTRATION 6 GETTING STARTED 7 - 11 TAPE - JVC GR D90U | Instructions - Page 2
Manual White Balance Operation 27 USING MENUS FOR DETAILED ADJUSTMENT .... 28 - 32 For Recording Menu 28 - 31 For Playback Menu 31 - 32 DUBBING 33 - 34 Dubbing To Or From A VCR 33 Dubbing To Or From A Video Unit Equipped With A DV Connector (Digital Dubbing 34 USING THE REMOTE CONTROL UNIT (GR - JVC GR D90U | Instructions - Page 3
/viewfinder playback are possible anywhere. ● Use the JVC BN-V408U/V416U/V428U battery packs and, to recharge them or to supply power to the camcorder from an AC outlet, use the provided multi-voltage AC Adapter. (An appropriate conversion adapter may be necessary to accommodate different designs of - JVC GR D90U | Instructions - Page 4
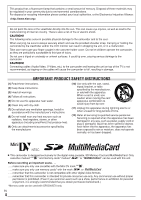
..... make sure you only use cassettes with the Mini DV mark . ..... make sure you only use memory cards* with the mark or . ..... remember that this camcorder is not compatible with other digital video formats. ..... remember that this camcorder is intended for private consumer use only. Any - JVC GR D90U | Instructions - Page 5
PROVIDED ACCESSORIES or AC Adapter AP-V11U or AP-V13U Battery Pack BN-V408U USB Cable (GR-D90/D70 only) CD-ROM (GR-D90/D70 only) Lens Cap (See below for attachment) Audio/Video Cable (ø3.5 mini-plug to RCA plug) Shoulder Strap Lithium Battery* CR2025 (GR-D90/D70 only) (for remote control - JVC GR D90U | Instructions - Page 6
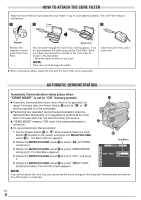
operation is performed for more than 3 minutes after that, the demonstration will resume. Ⅲ "DEMO MODE" remains "ON" even if the camcorder power is turned it twice. The normal screen appears. t y Sub Menu S Y S T EM DEMO MODE - OF F ON RETURN NOTE: If you do not detach the Lens Cap, you cannot see - JVC GR D90U | Instructions - Page 7
-V80U AC Power Adapter/Charger Read the kit's instruction manual before using. Also, by using the optional JVC VC-VBN856U DC Cord, it will be possible to connect BN-V840U or BN-V856U battery packs to the camcorder and supply power directly to the camcorder. NOTES: ● If the protective cap is attached - JVC GR D90U | Instructions - Page 8
areas. ● The following operation stops charging: • Set the Power Switch y to "PLAY", " " or " ". • Disconnect the AC Adapter from the camcorder. • Unplug the AC Adapter from the AC outlet. • Detach the battery from the camcorder. ● This camcorder will be automatically turned off if its power is - JVC GR D90U | Instructions - Page 9
not touch internal components. battery with a fully charged one before continuing. 3 Close the cassette holder cover firmly until it locks into place. Tripod Mounting CAUTION When attaching the camcorder to a tripod, extend its legs to stabilize the camcorder the window side is facing parts - JVC GR D90U | Instructions - Page 10
the LCD monitor fully or pull out the viewfinder fully. The POWER/CHARGE lamp r lights and the camcorder is turned on. 2 Press the MENU/VOLUME wheel % in to access the Menu Screen. 3 Rotate the MENU/VOLUME wheel % to select " (CAMERA DISPLAY)" and press it. 4 Rotate the MENU/VOLUME wheel % to select - JVC GR D90U | Instructions - Page 11
for your selection. 1 Set the VIDEO/DSC Switch 4 to "DSC", then set the Power Switch y to " " while pressing down the Lock Button t located on the switch. The POWER/ CHARGE lamp r lights and the camcorder turns on. 2 Press the MENU/VOLUME wheel % in. The Menu Screen appears. 3 Rotate the MENU/VOLUME - JVC GR D90U | Instructions - Page 12
lens cap. For GR-D90/D70 Owners: Open the LCD monitor (੬ pg. 47, u Monitor Open Button) and set the VIDEO/DSC Switch 4 to "VIDEO CHARGE lamp r lights and the camcorder enters the Record-Standby mode. "PAUSE . The Menu Screen appears. 2. Rotate the MENU/VOLUME wheel % to select " (CAMERA DISPLAY)" and - JVC GR D90U | Instructions - Page 13
. OFF (CHARGE): Allows you to switch off the camcorder. PLAY: • Allows you to play back a recording on the tape. • Allows you to access data stored on the memory card or to transfer a still image stored on the memory card to a computer. VIDEO/DSC Switch Position (GR-D90/D70 only) VIDEO: • Allows - JVC GR D90U | Instructions - Page 14
means the camcorder may record the remote control (provided with GR-D90/D70 only, ੬ pg. 35) To Control The Speaker Volume: Rotate the MENU/VOLUME wheel % so that the volume level indicator T on the display moves to obtain the appropriate volume. ATTENTION During Shuttle Search, parts of the picture - JVC GR D90U | Instructions - Page 15
image may not pause immediately while the camcorder stabilizes the still image. Blank Search Helps you find where you should start recording in the middle of a tape to avoid time code interruption (੬ pg. 14). 1 Load a tape (੬ pg. 9). 2 Set the VIDEO/DSC Switch 4 to "VIDEO" (GR-D90/ D70 only), then - JVC GR D90U | Instructions - Page 16
to use the AC Adapter as the power supply instead of the battery pack (੬ pg. 7). ● To monitor the picture and sound from the camcorder without inserting a tape or memory card†, set the camcorder's Power Switch y to " " or " ", then set your TV to the appropriate input mode. † GR-D90/D70 only ● Make - JVC GR D90U | Instructions - Page 17
your camcorder as a digital still camera for taking snapshots. Perform the procedures listed below before continuing. ● Power (੬ pg. 7) ● Grip Adjustment (੬ pg. 8) ● Viewfinder Adjustment (੬ pg. 8) ● Loading A Memory Card (੬ pg. 11) ● Picture Quality/Image Size Setting (੬ pg. 11) 1 Set the VIDEO/DSC - JVC GR D90U | Instructions - Page 18
T ; on the remote control to zoom in (up to 44X), or W A to zoom out. You can also magnify a particular part of an image (੬ pg. 35). By pressing 4/6 7, 3 8, 2 6, INDEX !, INFO 0 magnification returns to normal instantly. To Adjust The Brightness Of The Display 1. Make sure the VIDEO/DSC Switch 4 is - JVC GR D90U | Instructions - Page 19
: Image size (੬ pg. 11) QUALITY : Picture quality (੬ pg. 11) PROTECT : When set Operation mode indicator Folder and file number indicator 100 - 0010 Playback Screen Battery indicator Selected image 1 2 3 4 5 6 Index number 7 8 9 Index Screen MEMORY CARD PLAYBACK EN 19 (GR-D90 and GR - JVC GR D90U | Instructions - Page 20
. CAUTION Do not remove the memory card or perform any other operation (such as turning off the camcorder) during deletion. Also, be sure to use the provided AC Adapter, as the memory card may be corrupted if the battery becomes exhausted during deletion. If the memory card becomes corrupted - JVC GR D90U | Instructions - Page 21
remote control (੬ pg. 35). ● Images are dubbed in 640 x 480 pixels. Display V I DEO 46 COPY - OF F ON Menu Screen Setting Print Information (DPOF Setting) This camcorder is compatible with the DPOF (Digital Print Order Format) standard in order to support VIDEO/ Menu Screen appears Screen - JVC GR D90U | Instructions - Page 22
operation (such as turning off the camcorder) during initialization. Also, be sure to use the provided AC Adapter, as the memory card may be corrupted if the battery becomes exhausted during initialization. If the memory card becomes corrupted initialize it. EN ADVANCED FEATURES 22 (GR-D90 and GR - JVC GR D90U | Instructions - Page 23
CAMERA Menu (੬ pg. 29). • "DIS" in the MANUAL Menu (੬ pg. 29). ● During Night-Alive, it may be difficult to bring the camcorder into focus. To prevent this, use of manual in again. The Menu Screen closes. • The PROGRAM darker the picture becomes. Use -3 with the exposure control (੬ pg. 26). TWILIGHT - JVC GR D90U | Instructions - Page 24
/DSC Switch 4 to "VIDEO" (GR-D90/ D70 only), then set the Power Switch y to " " while pressing down the Lock Button t located on the switch. Open the LCD monitor fully or pull out the viewfinder fully. 2 Press the MENU/VOLUME wheel % in. The Menu Screen appears. 3 Rotate the MENU/VOLUME wheel % to - JVC GR D90U | Instructions - Page 25
"VIDEO" (GR-D90/ D70 only), then set the Power Switch y to " " while pressing down the Lock Button t located on the switch. Open the LCD monitor fully or pull out the viewfinder fully. 2 Press the MENU/VOLUME wheel % in. The Menu Screen appears. 3 Rotate the MENU/VOLUME wheel % to select " (CAMERA - JVC GR D90U | Instructions - Page 26
the camcorder will enter the focus adjustment mode again. NOTES: ● Be sure to focus the lens in the maximum telephoto position when you use the Manual Focus MENU/VOLUME wheel % to select "MANUAL", then press it. The Menu Screen disappears. The exposure control indicator appears. 5 Rotate the MENU - JVC GR D90U | Instructions - Page 27
is usually adjusted automatically. However, more advanced camcorder operators control this function manually to achieve a more professional color/tint reproduction. adjust white balance manually, the setting is retained even if the power is turned off or the battery removed. EN FOR RECORDING 27 - JVC GR D90U | Instructions - Page 28
Control" and "Iris Lock" (੬ pg. 26, 27). W.BALANCE Refer to "White Balance Adjustment" and "Manual White Balance Operation" (੬ pg. 27). CAMERA Settings made in the " CAMERA a maximum of 40X digital magnification. 700X: Allows you to use the Digital Zoom. By digitally processing and magnifying images - JVC GR D90U | Instructions - Page 29
using this mode, refer to your wide-screen TV's instruction manual. During playback/recording on 4:3 TVs/LCD monitor/viewfinder, the image is elongated vertically. • The "SQUEEZE" mode is effective only when the VIDEO/DSC Switch 4 is set to "VIDEO" (GR-D90/ D70 only). WIND CUT [OFF]: Disengages the - JVC GR D90U | Instructions - Page 30
on to signal the start of recording. REMOTE OFF: Disables the camcorder from receiving the remote control's beam signals. The camcorder cannot be operated by the remote control. [ON]: Enables the camcorder to receive the remote control's beam signals. • For GR-D30 Owners: It is recommended that this - JVC GR D90U | Instructions - Page 31
on the memory card (640 x 480 pixels). In this mode, the "SNAP MODE" selection in the CAMERA Menu is also applicable to memory card recording. For Playback Menu 1 Set the VIDEO/DSC Switch 4 to "VIDEO" (GR-D90/ D70 only), then set the Power Switch y to "PLAY" while pressing down the Lock Button - JVC GR D90U | Instructions - Page 32
SCREEN - LCD DATE / T I ME - OF F T I ME CODE - OF F RETURN NOTES: • For GR-D90/D70 Owners: You can also use the provided remote control's AUDIO button T to change the output sound (without having to access the Playback Menu). Make sure you point the remote control at the camcorder's remote sensor - JVC GR D90U | Instructions - Page 33
other than date/time and time code ..... set "ON SCREEN" to "LCD", "LCD/TV" or "OFF" in the Menu Screen (੬ pg. 30, 32). For GR-D90/D70 Owners: To Use This Camcorder As A Recorder 1. Set the VIDEO/DSC Switch 4 to "VIDEO", then set the camcorder's Power Switch y to "PLAY" while pressing down the Lock - JVC GR D90U | Instructions - Page 34
recording. NOTES: ● It is recommended to use the AC Adapter as the power supply instead of the battery pack (੬ pg. 7). ● If the remote control is used when both the player and recorder are JVC video units, both units will perform the same operation. To prevent this from happening, press the buttons - JVC GR D90U | Instructions - Page 35
. 2 Press the Zoom Button T ; or W A on the remote control. Make sure the remote control is pointed at the camcorder's remote sensor. Pressing T ; zooms in. 3 You can move the image on screen around to find a particular portion of the picture. While holding down SHIFT a, press * (Left) I, T(Right - JVC GR D90U | Instructions - Page 36
Press REW (2) I until the Edit-In point is located, then press PAUSE (6) Y. 3 Press and hold INSERT (w) O on the remote control, then press PAUSE (6) Y. "6w" 8 and the Time Code (min.:sec.) appear and the camcorder enters Insert-Pause mode. 4 Press START/STOP s to begin editing. • Confirm the insert - JVC GR D90U | Instructions - Page 37
of your capture board for driver's installation and operation instructions. [A] Using USB cable (GR-D90/D70 only) [B] Using DV cable y 4 OFF (CHARGE) PLAY To USB 9 OR USB cable (provided) To USB connector To DV @ Core filter DV cable (optional) Core filter To DV connector PC PC with - JVC GR D90U | Instructions - Page 38
if you can correct the problem yourself. The camcorder is a microcomputer-controlled device. External noise and interference (from a TV, a radio, etc.) might prevent it from functioning properly. In such cases, first disconnect its power supply unit (battery pack, AC Adapter, etc.) and wait a few - JVC GR D90U | Instructions - Page 39
the Menu Screen (੬ pg. 29). White Balance cannot be activated. • The Sepia or Monotone mode is activated. ¥ Turn off Sepia camcorder. • When the LCD monitor's fluorescent light reaches the end of its service life, images on the LCD monitor become dark. Consult your nearest JVC EN TROUBLESHOOTING 39 - JVC GR D90U | Instructions - Page 40
DV connector, the camcorder does not operate. • The DV cable was plugged/unplugged with power turned on. ¥ Turn the camcorder's power off and on again, then operate it. The memory card cannot be removed from the camcorder. ¥ Push in the memory card a few more times (੬ pg. 11). EN 40 TROUBLESHOOTING - JVC GR D90U | Instructions - Page 41
power cord to an AC wall outlet other than American National Standard C73 series type use an AC plug adapter, called a "Siemens Plug", as shown. For this AC plug adapter, consult your nearest JVC dealer. Plug adapter Ⅲ If there is dust or dirt on the AC Adapter, wipe it clean before using. Battery - JVC GR D90U | Instructions - Page 42
. ... place the camcorder with the LCD monitor on the bottom. 2. To prolong service life . . . problems still exist, consult your nearest JVC dealer. Mechanical moving parts used to move the video heads and video tape tend to become dirty and worn out over time. In order to maintain a clear picture - JVC GR D90U | Instructions - Page 43
and consult your local JVC dealer. The camcorder is a microcomputer-controlled device. External noise and interference (from a TV, a radio, etc.) might prevent it from functioning properly. In such cases, first disconnect its power supply unit (battery pack, AC Adapter, etc.) and wait a few - JVC GR D90U | Instructions - Page 44
For GR-D90US and GR-D70US Owners: Declaration of Conformity Model Number : GR-D90US/D70US Trade Name : JVC Responsible party : JVC AMERICAS CORP. Address : 1700 Valley Road Wayne, N. J. 07470 Telephone Number : 973-317-5000 This device complies with Part 15 of FCC Rules. Operation is - JVC GR D90U | Instructions - Page 45
measured, LCD panel/TFT active matrix system (GR-D90) 2.5" diagonally measured, LCD panel/TFT active matrix system (GR-D70/D30) Viewfinder : Electronic viewfinder with 0.24" black/white LCD Speaker : Monaural Digital Video Camera Format : DV format (SD mode) Signal format : NTSC standard - JVC GR D90U | Instructions - Page 46
diagram while reading the instructions. 1 4 5 6 789 LCD monitor 2 3 Viewfinder % ^&* ( ) Speaker 0 ! @ # $ q u w e r t OFF (CHARGE) PLAY y E R T Y U I O P a 6 9 0 2 4 3 w 5 e T W s d f g h j k l ; A EN 46 INDEX Remote Control (provided with GR-D90/D70 Only) Stereo microphone - JVC GR D90U | Instructions - Page 47
Play/Pause Button [4/6 pg. 14 8 Fast-Forward Button [3 pg. 14 9 USB (Universal Serial Bus) Connector (GR-D90/D70 only pg. 37 0 • INFO Button (GR-D90/D70 only pg. 19 • NIGHT Button pg. 23 ! • INDEX Button (GR-D90/D70 only pg. 19 • BACKLIGHT Button pg. 26 @ Digital Video Connector [DV] (i.Link - JVC GR D90U | Instructions - Page 48
SOUND 12b i t ! 15 : 55 09 87 During Memory Card Recording Only (GR-D90/D70 only) @ # $ %^ 1024 15 VOLUME 116 : 21 : 25 YT DEC 25 ' 03 10 : 00 AM Ru During Memory Card Playback (GR-D90/D70 only) U I 100 - 0011 During Both Tape And Memory Card Recording er ty - JVC GR D90U | Instructions - Page 49
Appears when the Insert Editing (w) or Insert Editing Pause (6w) mode is engaged (GR-D90/D70 only pg. 36 9 Displays the sound mode for approx. 5 seconds after turning on the camcorder pg. 28 0 Displays the Time Code pg. 14, 31 ! Appears when Digital Image Stabilizer ("DIS") is engaged pg. 29 - JVC GR D90U | Instructions - Page 50
" " and the VIDEO/DSC Switch 4 (GR-D90/D70 only) is set to "VIDEO". (੬ pg. 9) HEAD CLEANING REQUIRED USE CLEANING CASSETTE Appears if dirt is detected on the heads during recording or playback. Use an optional cleaning cassette. (੬ pg. 42) CONDENSATION, OPERATION PAUSED PLEASE WAIT Appears - JVC GR D90U | Instructions - Page 51
operation using a SD Memory Card with its write/ erase protection tab in the "LOCK" position. E01, E02 or E06 UNIT IN SAFEGUARD MODE REMOVE AND REATTACH BATTERY The error indications (E01, E02 or E06) show what type of malfunction has occured. When an error indication appears, the camcorder turns - JVC GR D90U | Instructions - Page 52
Focus pg. 26 Memory Card pg. 11, 41 Menu Screen, CAMERA pg. 28, 29 Menu Screen, CAMERA DISPLAY pg. 30, 31 Menu Screen, DSC pg. 11, 31 Menu Screen, MANUAL pg. 29 Menu Screen, SYSTEM pg. 30 Menu Screen, VIDEO pg. 31 Menu Screen, VIDEO DISPLAY pg. 32 Monotone pg. 23 Motor Drive Mode pg - JVC GR D90U | Instructions - Page 53
Operation pg. 13 Power Switch Position pg. 13 Program AE With Special Effects pg. 23 Protecting Files pg. 20 Provided Accessories pg. 5 R Record-Standby pg. 12 Recording Mode pg. 10 Remote Control Twilight pg. 23 U Unload A Tape pg. 9 V VIDEO/DSC Switch Position pg. 13 W White Balance pg. - JVC GR D90U | Instructions - Page 54
MEMO - JVC GR D90U | Instructions - Page 55
MEMO - JVC GR D90U | Instructions - Page 56
VICTOR COMPANY OF JAPAN, LIMITED COPYRIGHT© 2002 VICTOR COMPANY OF JAPAN, LTD. US Printed in Malaysia 1102-HO-UN-PJ
-
 1
1 -
 2
2 -
 3
3 -
 4
4 -
 5
5 -
 6
6 -
 7
7 -
8
-
9
-
10
-
11
-
12
-
13
-
14
-
15
-
16
-
17
-
18
-
19
-
20
-
21
-
22
-
23
-
24
-
25
-
26
-
27
-
28
-
29
-
30
-
31
-
32
-
33
-
34
-
35
-
36
-
37
-
38
-
39
-
40
-
41
-
42
-
43
-
44
-
45
-
46
-
47
-
48
-
49
-
50
-
51
-
52
-
53
-
54
-
55
-
56
 |
 |
Please visit our Homepage on the World Wide Web for Digital
Video Camera:
For Accessories:
For Customer Use:
Enter below the Model No. and Serial
No. which is located on the bottom of the
camcorder. Retain this information for
future reference.
Model No.
Serial No.
INSTRUCTIONS
GR-D90
GR-D70
GR-D30
DIGITAL VIDEO CAMERA
EN
LYT1069-001B
The camcorder illustrations appearing in
this instruction manual are of the GR-D90.
Memory card recording features are
available on GR-D90 and GR-D70
ENGLISH
CONTENTS
AUTOMATIC
DEMONSTRATION
6
GETTING STARTED
7 – 11
TAPE
RECORDING &
PLAYBACK
12 – 16
MEMORY CARD
RECORDING &
PLAYBACK
17 – 22
ADVANCED
FEATURES
23 – 37
REFERENCES
38 – 53