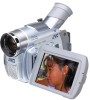
JVC GR D90U Instructions - Page 19
Memory Card Playback, Menu/volume, Index
 |
UPC - 046838161018
View all JVC GR D90U manuals
Add to My Manuals
Save this manual to your list of manuals |
Page 19 highlights
6 7 5 8 & %t y Viewing File Information You can get the relevant file information by pressing the INFO button 0 during normal playback or Index playback. 4 0! OFF (CHARGE) PLAY FOLDER : 1 0 0 J VCGR F I LE : DVC0 0 0 1 0 DATE : MAR 2 7 ' 0 3 S I ZE : 1024X768 QUAL I TY : F I NE PROTECT : OF F Info Screen Auto Playback You can run through all the images stored on memory automatically. 1 Perform steps 1 and 2 of "Normal Playback" (੬ pg. 18). 2 Press 4/6 7. • If you press 2 6 during Auto Playback, images are displayed in descending order. • If you press 3 8 during Auto Playback, images are displayed in ascending order. 3 To end Auto Playback, press 5 5. NOTE: Even if you shoot a new image after playing back a low-numbered one, this will not overwrite an existing image, because new images are automatically stored after the last-recorded one. Index Playback You can view several different files stored on the memory card at a time. This browsing capability makes it easy to locate a particular file you want. 1 Perform steps 1 and 2 of "Normal Playback" (੬ pg. 18). 2 Press INDEX !. The Index Screen appears. 3 Rotate the MENU/VOLUME wheel % to move the frame to the desired file. • Pressing 3 8 displays the next page and 2 6 displays the previous page. • Pressing INFO 0 gives you details on the currently selected file (੬ "Viewing File Information"). 4 Press the MENU/VOLUME wheel % in. The selected file is displayed. FOLDER : Folder name (੬ pg. 22) FILE : File name (੬ pg. 22) DATE : Date the file was made SIZE : Image size (੬ pg. 11) QUALITY : Picture quality (੬ pg. 11) PROTECT : When set to ON, the file is protected from accidental erasure (੬ pg. 20). • Press INFO 0 again to close the Info Screen. NOTE: With images shot with another device or processed on a PC, "QUALITY: - - -" will be displayed. Removing On-Screen Display 1 Perform steps 1 and 2 of "Normal Playback" (੬ pg. 18). 2 Press the MENU/VOLUME wheel % in. The Menu Screen appears. Rotate the MENU/VOLUME wheel % to select "DISPLAY", then press it. 3 Rotate the MENU/VOLUME wheel % to select "OFF", then press it. The operation mode indicator, folder/file number indicator and battery indicator ( ) disappear. • To display the indicators again, select "ON" in step 3. Operation mode indicator Folder and file number indicator 100 - 0010 Playback Screen Battery indicator Selected image 1 2 3 4 5 6 Index number 7 8 9 Index Screen MEMORY CARD PLAYBACK EN 19 (GR-D90 and GR-D70 only)
-
 1
1 -
2
-
3
-
4
-
5
-
6
-
7
-
8
-
9
-
10
-
11
-
12
-
13
-
 14
14 -
 15
15 -
 16
16 -
 17
17 -
 18
18 -
 19
19 -
 20
20 -
 21
21 -
 22
22 -
 23
23 -
 24
24 -
25
-
26
-
27
-
28
-
29
-
30
-
31
-
32
-
33
-
34
-
35
-
36
-
37
-
38
-
39
-
40
-
41
-
42
-
43
-
44
-
45
-
46
-
47
-
48
-
49
-
50
-
51
-
52
-
53
-
54
-
55
-
56
 |
 |
