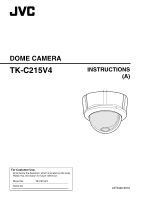
JVC TK-C215V4U Instructions - Page 6

Contents, Introduction, Installation and connection, Adjusting Image, Others

Page 6 highlights

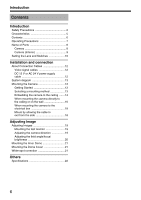
Introduction Contents Introduction Safety Precautions 2 Characteristics 5 Contents 6 Operating Precautions 7 Name of Parts 8 Camera 8 Camera (Interior 9 Setting the Lens and Switches 10 Installation and connection About Connection Cables 12 Video signal cables 12 DC 12 V or AC 24 V power supply cable 12 System diagram 13 Mounting the Camera 13 Getting Started 13 Selecting a mounting method 13 Embedding the camera to the ceiling ....... 14 When mounting the camera directly to the ceiling or on the wall 16 When mounting the camera to the electrical box 18 Mount by allowing the cable to exit from the side 18 Adjusting Image Adjusting Images 19 Mounting the test monitor 19 Adjusting the camera direction 19 Adjusting the field angle/focus/ brightness 20 Mounting the Inner Dome 21 Mounting the Dome Cover 21 White-spot correction 21 Others Specifications 22 6

  • 1
  • 2
  • 3
  • 4
  • 5
  • 6
  • 7
  • 8
  • 9
  • 10
  • 11
  • 12
  • 13
  • 14
  • 15
  • 16
  • 17
  • 18
  • 19
  • 20
  • 21
  • 22
  • 23
  • 24

6
Introduction
Introduction
Safety Precautions
.........................................
2
Characteristics
...............................................
5
Contents
.........................................................
6
Operating Precautions
...................................
7
Name of Parts
................................................
8
Camera
.......................................................
8
Camera (Interior)
........................................
9
Setting the Lens and Switches
.....................
10
Installation and connection
About Connection Cables
............................
12
Video signal cables
..................................
12
DC 12 V or AC 24 V power supply
cable
.........................................................
12
System diagram
...........................................
13
Mounting the Camera
...................................
13
Getting Started
.........................................
13
Selecting a mounting method
...................
13
Embedding the camera to the ceiling
.......
14
When mounting the camera directly to
the ceiling or on the wall
...........................
16
When mounting the camera to the
electrical box
............................................
18
Mount by allowing the cable to
exit from the side
......................................
18
Adjusting Image
Adjusting Images
..........................................
19
Mounting the test monitor
.........................
19
Adjusting the camera direction
.................
19
Adjusting the field angle/focus/
brightness
.................................................
20
Mounting the Inner Dome
.............................
21
Mounting the Dome Cover
...........................
21
White-spot correction
...................................
21
Others
Specifications
...............................................
22
Contents