Kenwood TH-D75 User Manual - Page 43
Fm Narrow, Bar Antenna, Tx Inhibit, Time-out Timer, Microphone Sensitivity, Mode], Ant Connector]
 |
View all Kenwood TH-D75 manuals
Add to My Manuals
Save this manual to your list of manuals |
Page 43 highlights
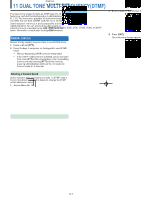
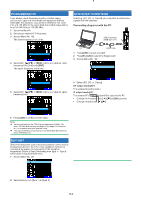
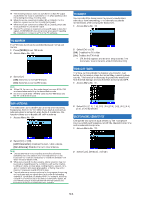
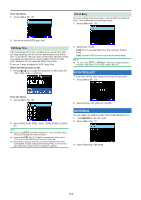
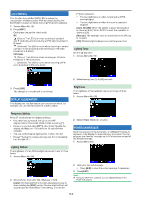
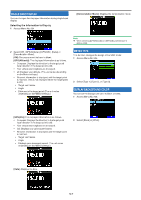
¡ The recording function does not work the other than AF output mode. When the mode is switched to either [IF] or [Detect] in the menu during recording, recording ends. ¡ When the mode is switched to either [IF] or [Detect], the IF or detection signal is output from the internal speaker. ¡ When the mode is switched to either [IF] or [Detect], beeps and voice guidance sound are not output. ¡ Special PC software is required to process IF signal or detection signal. JVCKENWOOD does not provide any support regarding the procedure to connect to a PC or the PC software. FM NARROW The FM mode band can be switched between normal and narrow. 1 Press [MODE] to set FM mode. 2 Access Menu No. 103. 2 Select [On]. [Off]: Switches to normal FM mode. [On]: Switches to narrow FM mode. Note ¡ When FM Narrow is on, the mode always becomes NFM if FM is selected when switching the demodulation mode. ¡ Set this for each of the 144 MHz band and 430 MHz band and the HF band of the B band. BAR ANTENNA The transceiver uses a built-in bar antenna when receiving frequencies from 0.1 to 10.1 MHz. If you wish to connect an external antenna instead of using the built-in antenna, this function allows you to disable the built-in antenna. 1 Access Menu No. 104. TX INHIBIT You can inhibit the transmission to prevent unauthorized individuals from transmitting, or to eliminate accidental transmissions while carrying the transceiver. 1 Access Menu No. 110 2 Select [On] or [Off]. [Off]: Disables the TX inhibit. [On]: Enables the TX inhibit. • [TX Inhibit] appears and an error beep sounds if the transceiver tries to transmit while TX Inhibit is [On]. TIME-OUT TIMER The Time-out Timer limits the duration you transmit. Just before the transceiver stops the transmitting, a warning beep sounds. This function is necessary to protect the transceiver from thermal damage and can therefore not be turned OFF. 1 Access Menu No. 111. 2 Select [0.5], [1.0], [1.5], [2.0], [2.5], [3.0], [3.5], [4.0], [4.5], [5.0], or [10.0] minutes. MICROPHONE SENSITIVITY Change the microphone input sensitivity. The microphone input sensitivity setting applies to both the internal microphone and an external microphone. 1 Access Menu No. 112. 2 Select [On] or [Off]. [ANT Connector]: Disables the built-in bar antenna. [Bar Antenna]: Enables the built-in bar antenna. Note ¡ The bar antenna is directional (has a sensitivity direction). Sensitivity becomes better in the front-back direction of the transceiver so orient the transceiver to match the direction from which the radio waves come. ¡ When receiving with the bar antenna, stable reception may not be possible depending on the conditions, such as the location, building structure, window glass, roofing material, season, time, and ionospheric radio wave propagation, or fading may occur, making the received sound difficult to hear. ¡ The bar antenna is a simple antenna for the purpose of receiving strong signals such as signals from high-power broadcasting stations or signals that are nearby. When, for example, receiving a signal from a station that is far away or a low-power signal, we recommend using a dedicated external antenna tuned to the frequency of the target signal whenever possible. 2 Select [Low], [Medium], or [High]. 12-3
-
 1
1 -
2
-
3
-
4
-
5
-
6
-
7
-
8
-
9
-
10
-
11
-
12
-
13
-
14
-
15
-
16
-
17
-
18
-
19
-
20
-
21
-
22
-
23
-
24
-
25
-
26
-
27
-
28
-
29
-
30
-
31
-
32
-
33
-
34
-
35
-
36
-
37
-
 38
38 -
 39
39 -
 40
40 -
 41
41 -
 42
42 -
 43
43 -
 44
44 -
 45
45 -
 46
46 -
 47
47 -
 48
48 -
49
-
50
-
51
-
52
-
53
-
54
-
55
-
56
-
57
-
58
-
59
-
60
-
61
-
62
-
63
-
64
-
65
-
66
-
67
-
68
-
69
-
70
-
71
-
72
-
73
-
74
-
75
-
76
-
77
-
78
-
79
-
80
-
81
-
82
-
83
-
84
-
85
-
86
-
87
-
88
-
89
-
90
-
91
-
92
-
93
-
94
-
95
-
96
-
97
-
98
-
99
-
100
-
101
-
102
-
103
-
104
-
105
-
106
-
107
-
108
-
109
-
110
-
111
-
112
-
113
-
114
-
115
-
116
-
117
-
118
-
119
-
120
-
121
-
122
-
123
-
124
-
125
-
126
-
127
-
128
-
129
-
130
-
131
-
132
-
133
 |
 |
