Kenwood TH-D75 User Manual - Page 46
LED CONTROL, DISPLAY ILLUMINATION, POWER ON MESSAGE, Temporary lighting, Lighting Method
 |
View all Kenwood TH-D75 manuals
Add to My Manuals
Save this manual to your list of manuals |
Page 46 highlights
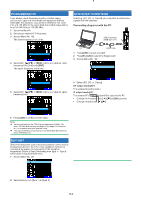
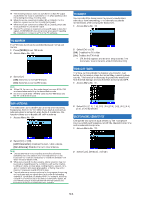
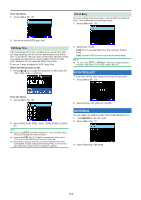
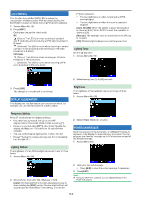
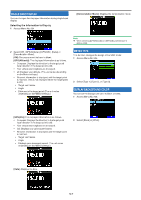
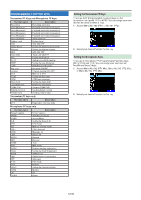
LED CONTROL This function turns off the BUSY LED to reduce the consumption of battery power. With the default setting, the BUSY LED is always on when receiving FM radio broadcasts. 1 Access Menu No. 181. 2 Press [ENT]. Each press change the check mark. RX (Check): The LED is on when receiving in bands A and B (including when receiving an FM radio broadcast in B-band). (Uncheck): The LED is not on when receiving in normal operation mode (including when receiving an FM radio broadcast in B-band). FM Radio (Check): The LED is on when receiving an FM radio broadcast in FM radio mode. (Uncheck): The LED is not on when receiving an FM radio broadcast in FM radio mode. [ ] key is pressed. • The backlight turns on when receiving the APRS interrupt signal. • The backlight turns on when the scan is paused or stopped. [Auto (DC-IN)]: When the battery is used, the operation is same as [Auto]. When DC-IN is used, the operation is same as [On]. [Manual]: The backlight turns on and off when the [ ] key is pressed. [On]: The backlight is always on while the power is on. Lighting Timer Set the lighting timer. 1 Access Menu No. 901. 2 Select among from [3] to [60] seconds. 3 Press [A/B]. The change of a check mark is confirmed. DISPLAY ILLUMINATION The display and key illumination can be turned on when, for example, you use the transceiver in a dark location. Brightness The brightness of the backlight can be set to any of three levels. 1 Access Menu No. 902. Temporary lighting Press [ ] to illuminate the display and keys. • If no other key is pressed, the light turns OFF approximately 10 seconds (default) after releasing [ ]. • Press any key (including [PTT]) other than [ ] while the display and keys are lit to restart the 10-second timer (default). • You can set the Display lighting time in Menu No. 901. • Press [ ] while the display and keys are lit to immediately turn the light OFF. Lighting Method The brightness of the LCD backlight can be set to any of three levels. 1 Access Menu No. 900. 2 Select [High], [Medium], or [Low]. POWER ON MESSAGE Each time you switch the transceiver on, [HELLO !!] (default) appears on the display for approximately 2 seconds. You can program your favorite message up to 16 characters instead of the default message. 1 Access Menu 903. 2 Select [Auto], [Auto (DC-IN)], [Manual], or [On]. [Auto]: The backlight turns on when operating any key or when rotating the [ENC] control. The backlight will turn off according to the Illumination Timer setting, or when the 2 Enter your desired message. • Press [A/B] to clear the entire message, if necessary. 3 Press [ENT]. Note: ¡ Using the MCP-D75 software, you can change Bitmap of the Power ON graphic. 12-6
-
 1
1 -
2
-
3
-
4
-
5
-
6
-
7
-
8
-
9
-
10
-
11
-
12
-
13
-
14
-
15
-
16
-
17
-
18
-
19
-
20
-
21
-
22
-
23
-
24
-
25
-
26
-
27
-
28
-
29
-
30
-
31
-
32
-
33
-
34
-
35
-
36
-
37
-
38
-
39
-
40
-
 41
41 -
 42
42 -
 43
43 -
 44
44 -
 45
45 -
 46
46 -
 47
47 -
 48
48 -
 49
49 -
 50
50 -
 51
51 -
52
-
53
-
54
-
55
-
56
-
57
-
58
-
59
-
60
-
61
-
62
-
63
-
64
-
65
-
66
-
67
-
68
-
69
-
70
-
71
-
72
-
73
-
74
-
75
-
76
-
77
-
78
-
79
-
80
-
81
-
82
-
83
-
84
-
85
-
86
-
87
-
88
-
89
-
90
-
91
-
92
-
93
-
94
-
95
-
96
-
97
-
98
-
99
-
100
-
101
-
102
-
103
-
104
-
105
-
106
-
107
-
108
-
109
-
110
-
111
-
112
-
113
-
114
-
115
-
116
-
117
-
118
-
119
-
120
-
121
-
122
-
123
-
124
-
125
-
126
-
127
-
128
-
129
-
130
-
131
-
132
-
133
 |
 |
