KitchenAid KEBS177SWH Use and Care Guide
KitchenAid KEBS177SWH - 27 Inch Single Electric Wall Oven Manual
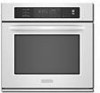 |
UPC - 883049034218
View all KitchenAid KEBS177SWH manuals
Add to My Manuals
Save this manual to your list of manuals |
KitchenAid KEBS177SWH manual content summary:
- KitchenAid KEBS177SWH | Use and Care Guide - Page 1
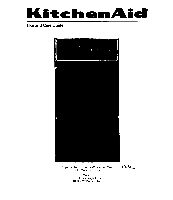
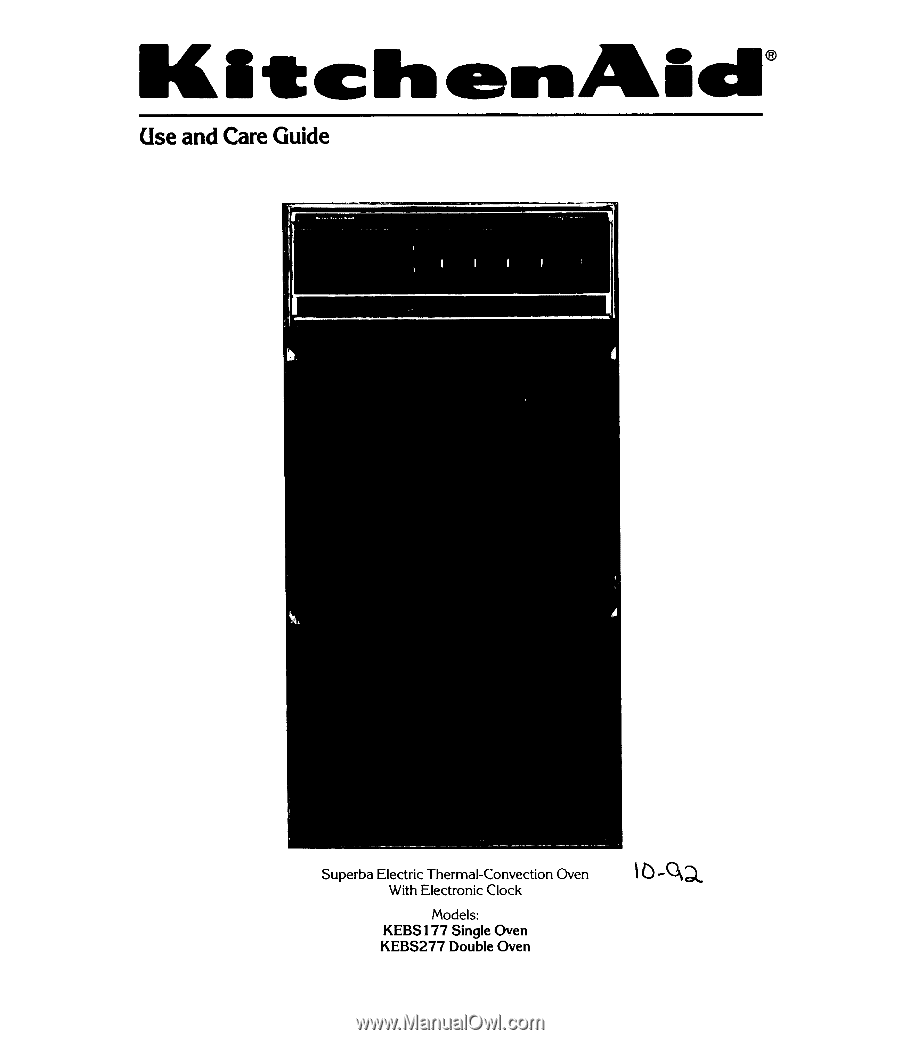
KitcheinAid® Use and Care Guide I I I , d Superba Electric Thermal-Convection Oven With Electronic Clock Models: KEBS177 Single Oven KEBS277 Double Oven - KitchenAid KEBS177SWH | Use and Care Guide - Page 2
, too. TABLE OF CONTENTS Important Safety Instructions Ownership Registration Built-In Oven Features Single Oven Control Panel Double Oven Control Panel Electronic Clock Operation Minute Timer How To Use the Single/Upper Oven How To Use the Lower Oven Baking and Convection Baking Rack Positions - KitchenAid KEBS177SWH | Use and Care Guide - Page 3
Do not repair or replace any part of this oven unless specifically recommended in this manual. All other servicing should be referred to a qualified technician. 10. This oven should be serviced only by qualified service personnel. Contact nearest authorized service facility for examination, repair - KitchenAid KEBS177SWH | Use and Care Guide - Page 4
No commercial oven cleaner or oven liner protective coating of any kind should be used in or around any part of the oven. 12. Before self-cleaning the oven, remove broiler pan, broiler grid, oven racks and other utensils. (Do not use your oven to clean miscellaneous parts.) SAVE THESE INSTRUCTIONS 4 - KitchenAid KEBS177SWH | Use and Care Guide - Page 5
. You will need it if your oven ever requires service. Model Number* Serial Numbers Date Purchased Date Installed Dealer's Name Address Phone *Model and serial numbers are located on a label at the left side of the door opening for single ovens, and on the lower oven door opening for double ovens. 5 - KitchenAid KEBS177SWH | Use and Care Guide - Page 6
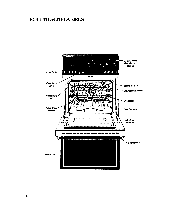
BUILT-IN OVEN FEATURES Oven Vents - ittittItifillrl • o, 44, tip • - - Control Panel (Detailed on page 7) Oven Lock Lever Meat Probe Jack Oven Door Gasket 11, AN 41..CNDMSMDINNUS UNIOS liEllMe IMO Broiler Element Convection Element Oven Rack Bake Element Bake View Window OM Oil I Door - KitchenAid KEBS177SWH | Use and Care Guide - Page 7
/Mwd Broil Knob Selector Clean Indicator Light Temperature Control Lock Indicator Light Meat Temperature Control DOUBLE OVEN CONTROL PANEL Electronic Clock Auto Time/ Manual Knob Upper Oven Lower Oven Temperature Control Indicator Light Start I Stop Button Button 4genc.4. 'me MIMI= Upper - KitchenAid KEBS177SWH | Use and Care Guide - Page 8
precise timing of short and long-term cooking, or any other activity. The Minute Timer is only an audible reminder and will not turn the oven ON or OFF. To use it, turn the TIME knob to the right; the display will immediately change to : 5 and "TIMER" will be displayed. Continue - KitchenAid KEBS177SWH | Use and Care Guide - Page 9
operates at 25 percent power to aid in more uniform baking and does are turned to "OFF" when the oven is not in use. Econo/Maxi Broil double broil element. AutoTime/Manual Knob AUTO TIME-Use with clock for automatic cooking. 2 hr • tart socal Auto Time Manual Econo Broil I Maxi Broil MANUAL - KitchenAid KEBS177SWH | Use and Care Guide - Page 10
to cool electronic components. HOW TO USE THE LOWER OVEN (For Double Ovens Only) The lower oven is a thermal oven which can be used for broiling, baking and will come on. The upper element operates at 25 percent power to aid in more uniform baking and does not turn red like the lower element - KitchenAid KEBS177SWH | Use and Care Guide - Page 11
. Your KitchenAid oven has four rack positions. Rack position 4 is the highest position, or farthest from the bottom of the oven, and position 1 is closest to the bottom of the oven. Be sure to arrange the oven rack(s) before putting foods into the oven or turning the oven on. Single/Upper Oven rack - KitchenAid KEBS177SWH | Use and Care Guide - Page 12
broiler pan, turn the pan so that the long side is parallel to the oven door for the best heat distribution and air flow. Bakeware Tips • Use the sheets with no sides or very low sides. Using Aluminum Foil Correctly in the Oven If you wish to use foil to catch possible spillovers, cut a piece - KitchenAid KEBS177SWH | Use and Care Guide - Page 13
Baking When baking at high altitudes, recipes and baking times vary. For accurate information, write the Extension Service of your state college or university, or Extension Service, Colorado State University, Fort Collins, Colorado, 80523. There may be a cost for the bulletins -do specify the - KitchenAid KEBS177SWH | Use and Care Guide - Page 14
CAUSES Problems Cookies and biscuits: • too brown on top • brown more on one side than the other Cakes: • rises higher on one side • burns on the sides • cracks on top Pies: • burns around the edges • Too light in color on the top Causes • the pan was set too high in the oven - KitchenAid KEBS177SWH | Use and Care Guide - Page 15
of the food to be roasted. Meat juices may overflow sides of a pan that is too small, and a too large pan will result in increased oven spatter. • Spatter can be reduced by lining the bottom of the roasting pan with lightly crushed aluminum foil. • For convection roasting, do not use roasting - KitchenAid KEBS177SWH | Use and Care Guide - Page 16
ROASTING CHART Type of Meat Weight in Thermal Approx. Roasting Time and Cut Pounds Temp (°F) (minutes per pound) BEEF Rolled Rib rare 5-6 325 30 medium 5-6 325 35 well done 5-6 325 45 Standing Rib rare 6-7 325 25 medium 6-7 325 30 well done 6-7 325 40 Rump Roast - KitchenAid KEBS177SWH | Use and Care Guide - Page 17
CONVECTION ROASTING CHART Type of Meat Weight in Convection Approx. Roasting Time Meat Thermometer and Cut Pounds Temp (°F) (minutes per pound) Temp (°F) BEEF Rolled Rib rare 3-5 300 23-25 140 medium 3-5 300 25 150 well done 3-5 300 30 170 Standing Rib rare 6-7 300 20 140 - KitchenAid KEBS177SWH | Use and Care Guide - Page 18
Open the Meat Probe cover located on the left side of the oven wall. Insert plug into jack. (Keep the top of the probe as far as possible from the heat source.) 4. Close the oven door. 5. Set the Meat Thermometer Guide to the desired setting. See roasting chart for internal meat temperatures, pages - KitchenAid KEBS177SWH | Use and Care Guide - Page 19
broiler pan and place in center of the oven rack. Turn the pan so that the long side is parallel to the oven door for the best heat distribution and air Temperature Control to OFF when cooking has been completed. CAUTION: The Oven Lock Lever should always be unlocked (positioned to the far left) - KitchenAid KEBS177SWH | Use and Care Guide - Page 20
BROILING CHART Recommended rack position numbered lowest (1) to highest (4) Food Steak-1" thick rare medium well done Steak-1 12/ " thick rare medium well done Hamburger Patties-'/" thick Lamb Chops-1" thick Ham Slice-1" thick Bacon Frankfurters Chicken Pieces Fish Calves Liver Tomato Halves - KitchenAid KEBS177SWH | Use and Care Guide - Page 21
Oven) • Turns the oven on automatically-either now or later in the day -and turns it off automatically. • On double oven models, both the upper and lower oven different temperatures. INSTRUCTIONS 1. Arrange oven racks in desired positions and place food in oven. 2. Single/Upper Oven -Set the - KitchenAid KEBS177SWH | Use and Care Guide - Page 22
Window if the program has been delayed. "AUTO" will stop flashing once the delayed cooking program has started. What Happens During This Selection? • The oven will come on at the time selected and maintain the temperature set on the Temperature Control until the selected stop time. • At the end of - KitchenAid KEBS177SWH | Use and Care Guide - Page 23
to continue cooking in the single/upper oven, the AUTO TIME/MANUAL knob must be turned to the MANUAL setting. The lower oven Selector must be manually reset to BAKE or BROIL to continue cooking. DEHYDRATING (Single/Upper Oven) Your KitchenAid Thermal-Convection Oven can be used to dehydrate fruits - KitchenAid KEBS177SWH | Use and Care Guide - Page 24
to prevent damage to the finish. The care of the inside of the oven and door are explained in detail on the pages that follow. Part Broiler Pan Finish Porcelain Enamel Oven Racks Broiler Pan Grid, Oven Front Frame Nickel Plating Chrome Plating Porcelain Door Panel Porcelain Enamel Satin Chrome - KitchenAid KEBS177SWH | Use and Care Guide - Page 25
and scouring soil baked onto the oven interior. Food spatters on the oven wall become harder to remove each time the oven is heated, but because the Self-Clean Cycle heats these soils to a higher temperature (850°F-900°F), soil is "burned off." Your KitchenAid Oven offers four self-cleaning cycle - KitchenAid KEBS177SWH | Use and Care Guide - Page 26
that the Electronic Clock is set to the correct time of day. If not, reset to the correct time following the instructions on page 8. 3. Set the Selector to CLEAN. 4' m 4. Slide the Oven Lock Lever all the way to the right. You will hear a loud click and "START TIME" will appear in the - KitchenAid KEBS177SWH | Use and Care Guide - Page 27
cycle is in progress, "AUTO" will appear continuously. No end of cycle tone will be given. • Extending the Automatic Self-Clean Cycle If your oven is excessively dirty and requires longer cleaning time, the Automatic Self-Clean cycle can be extended for up to 4 hours. Follow steps1,2,3,4 and 5 under - KitchenAid KEBS177SWH | Use and Care Guide - Page 28
have been set on a non-delayed cycle, or after the delayed time has run out on a delayed cycle: • The Clean and Oven Lights will glow to tell you the oven is slowly heating to the clean tem- perature, and "AUTO" will appear continuously in the Display Window. • The Lock Light will come - KitchenAid KEBS177SWH | Use and Care Guide - Page 29
Bulb • CAUTION: Make sure oven is cool and power to the oven has been turned off before starting. SINGLE/UPPER OVEN • Unscrew lens from housing. • Unscrew light bulb and replace with special bulb available from dealer or servicing outlet. • Replace lens. I I LOWER OVEN • Remove three screws in - KitchenAid KEBS177SWH | Use and Care Guide - Page 30
/MANUAL knob in correct position? • Recheck suspected defect. 2. If the problem is not due to one of the above items, first call your dealer or repair service he recommends. • All service should be handled locally by the dealer from whom you purchased the oven or an authorized KitchenAid servicer - KitchenAid KEBS177SWH | Use and Care Guide - Page 31
LIMITED FROM DATE OF INSTALLATION TEN YEAR LIMITED WARRANTY PORCELAIN OVEN CAVITY/INNER DOOR KITCHENAID WILL PAY FOR: Replacement parts and repair labor to correct defects in materials or workmanship. Service must be provided by an authorized KitchenAid servicing outlet. Replacement of the electric - KitchenAid KEBS177SWH | Use and Care Guide - Page 32
ItitchenAid® For the way it's madeTMK 4174029 (F9145A) (K787)
-
 1
1 -
 2
2 -
 3
3 -
 4
4 -
 5
5 -
 6
6 -
 7
7 -
8
-
9
-
10
-
11
-
12
-
13
-
14
-
15
-
16
-
17
-
18
-
19
-
20
-
21
-
22
-
23
-
24
-
25
-
26
-
27
-
28
-
29
-
30
-
31
-
32
 |
 |
KitcheinAid®
Use
and
Care
Guide
I
I
I
,
d
Superba
Electric
Thermal
-Convection
Oven
With
Electronic
Clock
Models:
KEBS177
Single
Oven
KEBS277
Double
Oven