Konica Minolta fi-7180 fi-5900C Operations Guide
Konica Minolta fi-7180 Manual
 |
View all Konica Minolta fi-7180 manuals
Add to My Manuals
Save this manual to your list of manuals |
Konica Minolta fi-7180 manual content summary:
- Konica Minolta fi-7180 | fi-5900C Operations Guide - Page 1
P3PC-1432-02ENZ0 fi-5900C Image Scanner Operator's Guide Function Hopper Hegiht Thin Power Thickness Thick Send to Scan - Konica Minolta fi-7180 | fi-5900C Operations Guide - Page 2
- Konica Minolta fi-7180 | fi-5900C Operations Guide - Page 3
designed to scan various documents in large quantities. The fi-5900C has the following features. Improvement of color scanning . This gives you the opportunity to correct the scanning without too much troubles and loss of time. High image processing function The automatic detection function of - Konica Minolta fi-7180 | fi-5900C Operations Guide - Page 4
About this manual The manual provides the to replace consumables. 6. SOLVING COMMON PROBLEMS This chapter describes how to remedy document jams, other trouble, and items to check before Started" is supplied to this Scanner. This guide contains necessary information for getting started the scanner, also - Konica Minolta fi-7180 | fi-5900C Operations Guide - Page 5
. 2. INSTALLATION OF THE SCANNER This chapter describes how to install and connect the scanner, and how to install the scanner application. We hope that this manual is useful in taking full advantage of the fi-5900C Duplex Color Scanner's features. iii - Konica Minolta fi-7180 | fi-5900C Operations Guide - Page 6
. This equipment generates, uses, and can radiate radio frequency energy and, if not installed and used in accordance with the instruction manual, may cause harmful interference to radio communications. However, there is no guarantee that interference will not occur in a particular installation - Konica Minolta fi-7180 | fi-5900C Operations Guide - Page 7
Bescheimigung des Herstellers / Importeurs Für den fi-5900C wid folgendes bescheinigt: In Übereinsstimmung mit den Bestimmungen der EN45014(CE) funkentstört Maschinenlärminformationsverordnung 3.GPSGV: Der höchste Schalldruckpegel beträgt 70 dB (A) oder - Konica Minolta fi-7180 | fi-5900C Operations Guide - Page 8
different versions of the above operating system, the general term "Windows "is used. Adobe Acrobat Adobe® Acrobat® All the descriptions in this manual assume the usage of Adobe Acrobat bundled with this product. However, Adobe Acrobat may be upgraded without notice. If the descriptions differ - Konica Minolta fi-7180 | fi-5900C Operations Guide - Page 9
, UNEXPECTED INJURY MAY BE CAUSED TO USERS OR BYSTANDERS. Also, store this manual in a convenient and safe place so that it can be easily referred to by errors or omissions or by statements of any kind in this manual, its updates or supplements, whether such errors are omissions or statements - Konica Minolta fi-7180 | fi-5900C Operations Guide - Page 10
hazards to personnel or damage to equipment. Symbols Used In This Manual This manual uses the following symbols in explanations in addition to warning indications Outline characters on a colored background show instructions users should follow. It may also include the drawing that shows the specific - Konica Minolta fi-7180 | fi-5900C Operations Guide - Page 11
of the scanner application you are using. Furthermore, the screenshots in this manual are for the FUJITSU TWAIN32 scanner driver, ScandAll 21 Image Capturing Utility Software, FUJITSU ISIS scanner driver, QuickScanTM image capturing software and Adobe® Acrobat®. About Maintenance The user must - Konica Minolta fi-7180 | fi-5900C Operations Guide - Page 12
WARNING The following describes important warnings described in this manual. Do not touch the Power cable with wet provided with this scanner for other devices, since this might cause equipment failure and other troubles or an electric shock. Use this scanner only at the indicated power voltage. Do - Konica Minolta fi-7180 | fi-5900C Operations Guide - Page 13
the scanner. If you detect heat coming from the device or detect other problems such as smoke, strange smells or noises, immediately turn off the scanner the store where you purchased the scanner or an authorized FUJITSU scanner service provider. Turn the scanner OFF if it is damaged. If the - Konica Minolta fi-7180 | fi-5900C Operations Guide - Page 14
shock. CAUTION The following describes important cautions described in this manual. Do not install the scanner on unstable surfaces. Install to prevent it from tilting. Install the scanner on a strong surface that will support the weight of the scanner and any other devices on that surface. Firmly - Konica Minolta fi-7180 | fi-5900C Operations Guide - Page 15
Do not place heavy objects or stand on top of the scanner. Do not place heavy objects on the scanner or use the scanner's top surface for performing other work. Improper use may cause injuries. Before moving the scanner, disconnect the power plug from the power outlet. Do not move the scanner with - Konica Minolta fi-7180 | fi-5900C Operations Guide - Page 16
in the direct sunlight or near heating apparatus. Doing so might cause excessive heat to build up inside the scanner, causing fire or scanner trouble. Install the scanner in a well-ventilated location. Do not carry the scanner alone. When transporting the scanner, never carry it alone. The scanner - Konica Minolta fi-7180 | fi-5900C Operations Guide - Page 17
27 2.9 Setting the Paper Thickness 29 2.10 Scanning Documents 30 2.11 Starting Scanning with Button 33 2.12 Feeding Documents Manually 34 2.13 How to use the Scanner Driver 41 2.14 Before Using [Scan] / [Send to] button 64 2.15 Resuming from Power Saving Mode 68 3 SCANNING VARIOUS TYPES - Konica Minolta fi-7180 | fi-5900C Operations Guide - Page 18
Rollers 124 5.6 Replacing the Brake roller 127 6 SOLVING COMMON PROBLEMS .......... 129 6.1 Clearing Document Jams 130 6.2 Error messages of the Operator panel 132 6.3 Troubleshooting 135 6.4 Before Contacting a Service Provider 148 6.5 Labels on the Scanner 150 7 DOCUMENT SPECIFICATIONS - Konica Minolta fi-7180 | fi-5900C Operations Guide - Page 19
Detection Outside of Scannable Area When Transporting 191 8.16 Imprinter Selection 192 8.17 Timeout for Manual Feeding 193 9 OPTIONS 195 9.1 Options 196 9.2 fi-590PRF (Pre-imprinter 197 9.3 fi-590PRB (Post-imprinter 198 9.4 Other Options 199 10 SCANNER SPECIFICATIONS 201 10.1 Basic Product - Konica Minolta fi-7180 | fi-5900C Operations Guide - Page 20
xviii - Konica Minolta fi-7180 | fi-5900C Operations Guide - Page 21
1 NAMES AND FUNCTIONS OF PARTS This chapter describes names and functions of various parts of the scanner. 1.1 Names and Functions of Parts 2 1.2 Operator panel 5 1 - Konica Minolta fi-7180 | fi-5900C Operations Guide - Page 22
fed sheet by sheet for scanning. Pull the Hopper extension out for loading long documents. Documents to be scanned are loaded onto the Hopper. Sheet Guides used to make sure that the paper to be scanned is fed into the scanner straight, avoiding skew. Switch the scanner ON&OFF. 2 1.1 Names and - Konica Minolta fi-7180 | fi-5900C Operations Guide - Page 23
NAMES AND FUNCTIONS OF PARTS ■ Rear side 1 2 1 3 4 5 6 7 8 No. Name 1 Main power switch 2 Power connector 3 SCSI ID Switch 4 SCSI connector 5 USB connector 6 Extended memory slot 7 VRS slot 8 Extended slot Function For switching the power supply ON/OFF. For connecting the AC cable. Sets - Konica Minolta fi-7180 | fi-5900C Operations Guide - Page 24
■ Removable Parts 1 Function Hopper Heihgt Thin Power Thickness Thick Send to Scan 2 3 4 5 No. Name 1 Document smoother 2 Pick Rollers 3 Separator rollers 4 Brake rollers 5 Pad Description Attached when the stacker position is set to align the ejected document by the leading - Konica Minolta fi-7180 | fi-5900C Operations Guide - Page 25
to start linked application. (* About the settings, refer to section "2.14 Before Using [Scan] / [Send to] button" on page 64, or the FUJITSU TWAIN32 scanner driver help. Power button Use this button to turn the power ON/OFF. When the power is turned on, the button is illuminated in blue - Konica Minolta fi-7180 | fi-5900C Operations Guide - Page 26
. If this alarm occurs, turn the power off and then on again. If the alarm is indicated after turning on the power again, contact your service engineer. 6 1.2 Operator panel - Konica Minolta fi-7180 | fi-5900C Operations Guide - Page 27
different from this manual. Be aware that when the FUJITSU TWAIN32 scanner driver, or the FUJITSU ISIS scanner driver is updated, the screens and operations noted in this chapter may be changed slightly. In this case, refer to the User's Guide - Konica Minolta fi-7180 | fi-5900C Operations Guide - Page 28
2.1 Turning the Scanner ON /OFF ■ Turning the Power ON 1. Press "I" side of the main power switch located on the back of the scanner. OFF ON 2. Open the Hopper. • Refer to "2.2 Opening and Closing the Hopper" on page 10 to open the HINT Hopper. • Be sure to open the Hopper before turning on - Konica Minolta fi-7180 | fi-5900C Operations Guide - Page 29
■ Turning the Power OFF Hold the Power button for at least two seconds. Thin Send to Scan 2 ⇒The Power button light goes off and the scanner becomes disconnected. If the scanner will not be used for an extended period, turn off the scanner's HINT main power switch on the back and unplug the - Konica Minolta fi-7180 | fi-5900C Operations Guide - Page 30
2.2 Opening and Closing the Hopper ■ Opening the Hopper 1. Hold the blue part located on the center of the Hopper. Function Hopper Height Thin Power Thickness Thick Send to Scan 2. Flip down the Hopper gently. p r Height Thin Power Thickness Thick Send to Scan Function Hopper Height - Konica Minolta fi-7180 | fi-5900C Operations Guide - Page 31
■ Closing the Hopper 1. Remove the document if there is any on the Hopper. 2. Slide the extension in the Hopper. 2 BASIC SCANNER OPERATIONS Hopper extension 3. Restore the original position of the hopper if the height of Hopper is adjusted. Lower the hopper to the bottom by pressing the button. ( - Konica Minolta fi-7180 | fi-5900C Operations Guide - Page 32
2.3 Opening and Closing ADF ■ Opening ADF 1. Remove the document if there is any on the stacker. Function Hopper Height Thin Power Thickness Thick Send to Scan 2. Press the ADF cover open button. Function Hopper Heihgt Thin PowerThickness Thick Send to Scan ⇒The cover is slowly opened. - Konica Minolta fi-7180 | fi-5900C Operations Guide - Page 33
■ Closing ADF 1. Hold the ADF cover with both hands and press it down slowly. 2 Press the ADF cover until it is fixed. ATTENTION • When closing the ADF, be sure nothing is left inside of the ADF. • Be careful not to pinch your fingers. BASIC SCANNER OPERATIONS 2.3 Opening and Closing ADF 13 - Konica Minolta fi-7180 | fi-5900C Operations Guide - Page 34
2.4 Opening and Closing Top Cover Under the Top cover, there are a storage tray for storing the consumables and cleaning goods and a space for installing the Post-Imprinter. When you use the tray or access the Post-Imprinter, open the top cover as follows. ■ Opening the Top Cover Press the tabs - Konica Minolta fi-7180 | fi-5900C Operations Guide - Page 35
2.5 Setting the Hopper Height BASIC SCANNER OPERATIONS When there is no alarm (the function number display is showing "1"), the Hopper height can be adjusted. When the scanning load is not very heavy, setting the hopper higher will shorten the time it moves to the feeding position. ATTENTION • - Konica Minolta fi-7180 | fi-5900C Operations Guide - Page 36
The adjustment is done by using the Operator Panel on the scanner. Function Function Hopper Height Thin Power Thickness Thick Send to Scan Hopper Height Paper Thickness Thin Thick Send to Scan When you press the button, the hopper is raised one step higher.(Low Middle High) When - Konica Minolta fi-7180 | fi-5900C Operations Guide - Page 37
2.6 Loading Documents on the Hopper ■ Preparing the Document 1. Align both edges of the documents. For how to scan the document with different widths, refer to "3.3 Scanning HINT Documents with different widths" on page 73. 2 2. Fan the documents. 1) Take a stack of documents about 15mm to - Konica Minolta fi-7180 | fi-5900C Operations Guide - Page 38
the center of the hopper 1. Load the document on the hopper. Place the document face-up on the hopper. 2. Adjust the Side guides to the document width. Pressing the lock lever, slide the Side guides so that they contact the document sides. If there is space between the document edges and the - Konica Minolta fi-7180 | fi-5900C Operations Guide - Page 39
document. For the details on how to scan using ScandAll 21, refer to "2.10 Scanning Documents" on page 30. (2)Setting the document by either Side Guide of the hopper. For scanning documents with pages of different sizes, see section "7.8 Scanning Mixed Documents" on page 162. 1. Move the hopper side - Konica Minolta fi-7180 | fi-5900C Operations Guide - Page 40
2. Lock the side guide not to be used. Flip up the lock switch on the front side of the side guide to lock it. Locked! Lock Switch 3. Move the other side guide to the desired position while pressing down the lock lever. 4. Set the document against the side guide. 20 2.6 Loading Documents on - Konica Minolta fi-7180 | fi-5900C Operations Guide - Page 41
to "2.10 Scanning Documents" on page 30 If you want to unlock side guides, follow the steps below: HINT • Release the locked side guide by flipping down the switch. Unlocked! Lock Switch • Move both side guides toward the center while pressing the lock lever. Lock Lever • Release the lever - Konica Minolta fi-7180 | fi-5900C Operations Guide - Page 42
for aligning the leading edge of the ejected documents also. Set up the Stacker by adjusting the Stacker extension, Stopper, Side Guides and Stacker's inclination. ■ Stacking the document 1. Pull out the stacker extension in accordance with document length. Stacker extension Stopper Function - Konica Minolta fi-7180 | fi-5900C Operations Guide - Page 43
below. Thick Paper Stopper Stacker Extension 2 (The scanner can scan documents up to 863mm long.) 2. Adjust the stacker side guides to the document width. ATTENTION Stacker side guide Be sure to set the stacker side guides a little wider than the document width. 2.7 Setting up the Stacker 23 - Konica Minolta fi-7180 | fi-5900C Operations Guide - Page 44
■ Switching the stacker's inclination Bottom edge alignment by horizontal stacker setting Leading edge alignment by tilting forward setting of stacker 1. Slide the stacker out towards you. 2. Push down the part of the stacker which is closer to you. ԙ - Konica Minolta fi-7180 | fi-5900C Operations Guide - Page 45
BASIC SCANNER OPERATIONS ⇒The stacker will be fixed in a position tilting forward. • When set to "Bottom edge" position, the stacker does not move up or HINT down and becomes immovable even during scanning operation. • In this position, the stacker's maximum load will be 200 sheets. • If the - Konica Minolta fi-7180 | fi-5900C Operations Guide - Page 46
⇒The stacker will be fixed in a horizontal position. • When set to the "bottom edge alignment" position, the stacker will auto- HINT matically adjust its height according to its load. • When set to the "Bottom edge alignment" position, the stacker's maximum load will be 500 sheets. ATTENTION - Konica Minolta fi-7180 | fi-5900C Operations Guide - Page 47
2.8 Using the Document smoother The ejected document may not stack correctly when the stacker's angle is adjusted to the tilting forward setting (see previous section), or when scanning document of different size pages (see page 73). If that is the case, install the Document Smoother as described - Konica Minolta fi-7180 | fi-5900C Operations Guide - Page 48
3. While bending the center part, insert the other tab into the scanner slit. ⇒It will look like this when installed. Document Smoother Function Hopper Heihgt Thin Power Thickness Thick Send to Scan 28 2.8 Using the Document smoother - Konica Minolta fi-7180 | fi-5900C Operations Guide - Page 49
level thinner. • Multifeeds, picking failures and paper jams can also occur due to worn-out of the consumables and dirt of the rollers. When such problems are not cleared, change the consumables or clean inside of the scanner. 2.9 Setting the Paper Thickness 29 - Konica Minolta fi-7180 | fi-5900C Operations Guide - Page 50
need to run the scanner driver using the application software. The you use an application other than ScandAll 21, refer to the manual attached to the application. 1. Load the documents on the hopper. box appears. Select [FUJITSU Fi-5900Cd] (for TWAIN32 V8, [FUJITSU TWAIN32]). Then click [Select - Konica Minolta fi-7180 | fi-5900C Operations Guide - Page 51
resolution, document size and other scan conditions, and 2 click the [Scan] button. For the details on settings in the [TWAIN Driver] dialog box, refer to the "Scanner Utility for Microsoft Windows User's Guide" on the scanner driver CD-ROM. BASIC SCANNER OPERATIONS 2.10 Scanning Documents 31 - Konica Minolta fi-7180 | fi-5900C Operations Guide - Page 52
The image of the scanned document appears on the ScandAll 21 screen. For details on scanning various types of documents, refer to "3 SCANNING VARIOUS TYPES OF DOCUMENTS" on page 69. For details on ScandAll 21 function and operations, refer to ScandAll 21 Help. 32 2.10 Scanning Documents - Konica Minolta fi-7180 | fi-5900C Operations Guide - Page 53
2.11 Starting Scanning with Button Pressing the [Scan] / [Send to] button can start an application previously linked. However, you need to set the application for [Scan] and [Send to] button referring to "2.14 Before Using [Scan] / [Send to] button" on page 64. 1. Load the documents on the hopper. - Konica Minolta fi-7180 | fi-5900C Operations Guide - Page 54
scans the document set on the hopper, the scanner can also scan documents in the "Manual Feed Mode". In addition, the "Manual Feed Mode" is divided into 2 types: Single Feed: Only one sheet is manually fed and scanned. This is suitable for •thick paper, envelopes and folded paper and other - Konica Minolta fi-7180 | fi-5900C Operations Guide - Page 55
up the small plate on the left side using your finger. Pick Roller Unit 2 Hopper Guide Plate BASIC SCANNER OPERATIONS ⇒The Pick roller unit will click into place. ⇒The hopper will move up to the manual feed position. ATTENTION • If there is any document loaded on the Hopper, remove it before - Konica Minolta fi-7180 | fi-5900C Operations Guide - Page 56
condition. For the information about how to run the scanner driver, refer to "2.10 Scanning Documents" on page 30. 4. Start scanning. When using the TWAIN driver, click the [Scan] button on the following screen. 5. and ejected onto the stacker after scanning. 36 2.12 Feeding Documents Manually - Konica Minolta fi-7180 | fi-5900C Operations Guide - Page 57
recognize it as "no document" and stop scanning. For setting the timeout for feeding the document manually, refer to section HINT "8.17 Timeout for Manual Feeding" on page 193. 2 7. To deactivate "Manual Feed Mode" (Single Feed), return the Pick roller unit to its original position. Flip down - Konica Minolta fi-7180 | fi-5900C Operations Guide - Page 58
in the mechanism when the hopper table moves up. • To deactivate the "Manual Feed Mode" (Continuous Feed) in the middle of an operation, press down application and display the scanner driver screen. Set the scanning condition. For the information about how to run the scanner driver, refer to "2.10 - Konica Minolta fi-7180 | fi-5900C Operations Guide - Page 59
5. Start scanning. When using the TWAIN driver, click the [Scan] button on the following BASIC SCANNER OPERATIONS The document is picked up and ejected onto the stacker after scanning. In "Manual Feed Mode" (Continuous Feed), even if multiple sheets are HINT mistakenly fed, the scanner will - Konica Minolta fi-7180 | fi-5900C Operations Guide - Page 60
it as "no document" and stop scanning. For setting the timeout for feeding the document manually, refer to section HINT "8.17 Timeout for Manual Feeding" on page 193. 8. To deactivate the "Manual Feed Mode" (Continuous Feed), press down the Hopper Height Button ( ) on the Operator Panel for - Konica Minolta fi-7180 | fi-5900C Operations Guide - Page 61
and the application software that supports the driver are required. There are two drivers; "FUJITSU TWAIN32 Scanner Driver" in compliance with the TWAIN regulation and "FUJITSU ISIS Scanner Driver" in compliance with the ISIS regulation, come with fi-5900C. This section explains how to use each - Konica Minolta fi-7180 | fi-5900C Operations Guide - Page 62
5. Open the TWAIN Driver window. Select [Scan To View] from the [Scan] menu. ScandAll 21 provides scanning methods as follows: HINT • [To View...]:Displays scanned refer to "ScandAll 21 Help". 6. Configure settings for scanning and click the [Scan] button. 42 2.13 How to use the Scanner Driver - Konica Minolta fi-7180 | fi-5900C Operations Guide - Page 63
OPERATIONS For details about the settings on this window, refer to "Setting Window for FUJITSU TWAIN32 Scanner Driver" on page 44. ⇒The images of scanned documents are displayed on the [ScandAll 21] window. the application. Select [Exit] from the [File] menu. 2.13 How to use the Scanner Driver 43 - Konica Minolta fi-7180 | fi-5900C Operations Guide - Page 64
on this window. The following describes the main setting items. •For details on each functions, refer to "FUJITSU TWAIN32 Scanner Driver Help" (appears by pressing [Help] or [F1] button). Resolution Specifies the resolution of scanning. It can be specified by selecting a default value from the - Konica Minolta fi-7180 | fi-5900C Operations Guide - Page 65
Saves the current settings and closes this window. [Reset] button Used to undo changes of settings. [Help] button Opens the "FUJITSU TWAIN32 Scanner Driver Help" window. The window also opens by pushing the [F1] key. [About...] button Opens an information window about the FUJITSU TWAIN32 Scanner - Konica Minolta fi-7180 | fi-5900C Operations Guide - Page 66
the Scanner Operation Panel. [Generic] tab Select this tab to change the unit displayed on the Setting Window for the FUJITSU TWAIN32 Scanner Driver. (Millimeters, Inches, and Pixels are available) [Filter] tab Select this tab for setting the image processing filter(s). Page Edge Filler: Fills up - Konica Minolta fi-7180 | fi-5900C Operations Guide - Page 67
File. From next scanning, the settings are quickly changed by using these Setting Files. For details of each function, refer to the "FUJITSU TWAIN32 Scanner Driver Help". 2 2.13 How to use the Scanner - Konica Minolta fi-7180 | fi-5900C Operations Guide - Page 68
procedure with examples of QuickScanTM for ordinary scanning by using this driver software. The procedure may vary depending on your application. If you use an application other than QuickScanTM, refer to its Guide or Help for further information. ● Procedure for Basic Scanning Operation 1. Start - Konica Minolta fi-7180 | fi-5900C Operations Guide - Page 69
profile's settings. ⇒Go to the procedure 9. 6. Select the [Scan] tab and click the [Scanner Settings] on the [Profile Editor] window. ⇒The configuration window of ISIS driver appears. 2.13 How to use the Scanner - Konica Minolta fi-7180 | fi-5900C Operations Guide - Page 70
7. Configure settings for scanning and click the [OK] button. For details on this dialog box, refer to "Configuration Window of FUJITSU ISIS Scanner Driver" on page 51. 8. On the [Profile Editor] window, click the [OK] button to return to [New batch...] dialog. 9. Load the documents on the hopper. - Konica Minolta fi-7180 | fi-5900C Operations Guide - Page 71
● Configuration Window of FUJITSU ISIS Scanner Driver [Main] tab 2 BASIC SCANNER OPERATIONS Camera Selects the document's side (front or back) to be scanned. The check-marked side Back) #1, you can select either color or gray scale mode for the same side #2. 2.13 How to use the Scanner Driver 51 - Konica Minolta fi-7180 | fi-5900C Operations Guide - Page 72
Image Processing Software Option User's Guide". To display the "Image Processing Software Option User's Guide", select [Start] > [All Programs] > [Image Processing Software Option] > [User's Guide]. Dots per inch Specifies the differences of color levels. 52 2.13 How to use the Scanner Driver - Konica Minolta fi-7180 | fi-5900C Operations Guide - Page 73
the range of 1 (low [soft]) to 100 (high [sharp]). Increasing this value makes the contrast sharper. 2 BASIC SCANNER OPERATIONS 2.13 How to use the Scanner Driver 53 - Konica Minolta fi-7180 | fi-5900C Operations Guide - Page 74
list. [Scan Area...] button Opens the [Scan Area] dialog box. You can specify the area to be scanned. 54 2.13 How to use the Scanner Driver - Konica Minolta fi-7180 | fi-5900C Operations Guide - Page 75
which have texts etc. and photos (e.g. magazines, brochures). Reverse Image Format Converts colors from/to negative to/from positive. 2.13 How to use the Scanner Driver 55 - Konica Minolta fi-7180 | fi-5900C Operations Guide - Page 76
background. (Line drawing mode) Off Scans the document with a predetermined value for the white bal- ance.(Photograph mode) 56 2.13 How to use the Scanner Driver - Konica Minolta fi-7180 | fi-5900C Operations Guide - Page 77
, you can set the scanner so that it continues scanning even if any Multi-feed or skew is detected. 2.13 How to use the Scanner Driver 57 - Konica Minolta fi-7180 | fi-5900C Operations Guide - Page 78
"Pattern" list. You can specify the numeric values of items such as "Gamma", "Brightness", "Contrast", "Shadow" and "Highlight". 58 2.13 How to use the Scanner Driver - Konica Minolta fi-7180 | fi-5900C Operations Guide - Page 79
output. Custom Color Dropout Any color to drop out can be specified when "Use Custom Color Dropout" is selected. 2.13 How to use the Scanner Driver 59 - Konica Minolta fi-7180 | fi-5900C Operations Guide - Page 80
Dropout color" window is closed. [Cancel] button Changes are voided and the "Select Dropout color" window is closed. 60 2.13 How to use the Scanner Driver - Konica Minolta fi-7180 | fi-5900C Operations Guide - Page 81
of YUV4:2:2 is smaller than that of images compressed by the ratio of YUV4:4:4. [About] tab You can check the version number of the ISIS driver as well as hardware information of the scanner connected to the personal computer. 2.13 How to use the Scanner - Konica Minolta fi-7180 | fi-5900C Operations Guide - Page 82
the date. Format: Delimiter: You can specify how to display the date. You can select delimiters (grouping separators). 62 2.13 How to use the Scanner Driver - Konica Minolta fi-7180 | fi-5900C Operations Guide - Page 83
to use for printing (Normal, Bold, or Narrow). Rotation: Specifies the orientation of strings of characters. BASIC SCANNER OPERATIONS 2.13 How to use the Scanner Driver 63 - Konica Minolta fi-7180 | fi-5900C Operations Guide - Page 84
[Printer and other hardware] and then click [Scanner and camera]. 3. Display the "fi-5900C" properties. For Windows ME and Windows XP, right-click the "fi-5900Cd" icon. For Windows 98 and Windows 2000, double-click the "fi-5900Cd" icon. 4. Select the [Event] tab. 5. Select the event to launch the - Konica Minolta fi-7180 | fi-5900C Operations Guide - Page 85
BASIC SCANNER OPERATIONS Scan button (When clicking on [Scan] button) Send to 1~9(When clicking the [Send to] button) 6. Select the application executed by the event. For Windows XP, select [Performing selected program] under [Performing] and then select the application to be processed. 7. Click OK - Konica Minolta fi-7180 | fi-5900C Operations Guide - Page 86
be omitted.) Specifies the display size of the application to be started. The argument that can be specified differs by application. Refer to the manual of the HINT application for details. If an argument is not specified, the application starts up but scanning does not. To start scanning after - Konica Minolta fi-7180 | fi-5900C Operations Guide - Page 87
/NOOPDLG Specifies not to show the following dialogbox that can be set from Scan-Option File setting dialog. FTP server setting dialog Print setting dialog Microsoft SharePoint Portal Server setting dialog Mail setting dialog 4. Click [OK]. 2 BASIC SCANNER OPERATIONS 2.14 Before Using [Scan] / [ - Konica Minolta fi-7180 | fi-5900C Operations Guide - Page 88
the Power button*). * If you press the power button for two seconds or longer, the power is turned off. •Execute any command from the scanner driver screen in the PC. The waiting time for entering the power saving mode can be set in a range HINT from 5 to 60 minutes in steps - Konica Minolta fi-7180 | fi-5900C Operations Guide - Page 89
be different from this manual. Be aware that when the FUJITSU TWAIN32 scanner driver or the FUJITSU ISIS scanner driver is updated, the screens and operations noted in this chapter may change. In that case, refer to the User's Guide - Konica Minolta fi-7180 | fi-5900C Operations Guide - Page 90
you want both sides of a document to be scanned at the same time, set the feeding option to "Duplex". Below is the procedure with TWAIN driver. 1. Set the document on the hopper. Refer to section "2.6 Loading Documents on the Hopper" on page 17. 2. Adjust stacker in accordance with document size - Konica Minolta fi-7180 | fi-5900C Operations Guide - Page 91
than A3, set the feeding option to "Long Page". This scanner can scan documents up to 863mm long. Below is the procedure with TWAIN driver. 1. Set the document on the hopper. Refer to section "2.6 Loading Documents on the Hopper" on page 17. 2. Adjust stacker in accordance with document size - Konica Minolta fi-7180 | fi-5900C Operations Guide - Page 92
4. Set [Scan Type:] to "Long Page (Front Side)" or "Long Page (Duplex)". Choose "Long Page (Front Side)" when scanning one side; "Long Page (Duplex)", both sides. ⇒The "Set the document size" screen will appear. 5. Click [OK] after setting the document 6. Set resolution and document size and so on, - Konica Minolta fi-7180 | fi-5900C Operations Guide - Page 93
When you scan a batch of documents with different widths, follow the instruction below. 1. Align the leading edge of the documents. Aligning the its left (or right) edge, refer to " (2)Setting the document by either Side Guide of the hopper." on page 19. 2. Load the documents on the center of the - Konica Minolta fi-7180 | fi-5900C Operations Guide - Page 94
roller. (If the documents are not placed below the Pick roller, the document feeding will not be possible.) Pick roller 3. Align the side guides to the width of the widest document. 原稿 幅 異 場合 4. Align the stacker's position. Refer to "2.7 Setting up the Stacker" on page 22 for details. 74 - Konica Minolta fi-7180 | fi-5900C Operations Guide - Page 95
Option] Screen [Rotation] tab) Select automatic paper size detection. For the ISIS driver Cropping: (on the [Main] tab) Select [Automatic]. 7. Scan ⇒The ATTENTION • When scanning mixed size document, because the hopper side guides will not function, the scanned images are easily skewed. We - Konica Minolta fi-7180 | fi-5900C Operations Guide - Page 96
, unexpected images may be output when: 1. Setting "Edge Shadow Removal" in Acrobat, and setting "Digital Endorser" or "Black Background" options in the TWAIN driver at the same time. Letter strings embedded in the image or the background may be missed. Solution 1: Set "Edge shadow removal" to "OFF - Konica Minolta fi-7180 | fi-5900C Operations Guide - Page 97
Program]-[Scanner Utility for Microsoft Windows]-[ScandAll21] from the [Start] menu. 3. From the [Scan] menu select [To Adobe PDF...]. 3 ⇒The [TWAIN Driver] dialog box appears. 4. Set the scan resolution, paper size etc., and then click the [Scan] button. SCANNING VARIOUS TYPES OF DOC- 5. When - Konica Minolta fi-7180 | fi-5900C Operations Guide - Page 98
6. Enter the file name and select the destination to save the scanned image. For details, refer to the descriptions in the [Help] menu of ScandAll 21. 78 3.4 Saving Scanned Images in PDF Format - Konica Minolta fi-7180 | fi-5900C Operations Guide - Page 99
Scanner]. 3 [Create PDF from Scanner] dialog box is displayed. SCANNING VARIOUS TYPES OF DOC- 4. Select "FUJITSU Fi-5900Cd" at [Scanner] and click [Scan] button. ⇒The [TWAIN driver] dialog box is displayed. ATTENTION Scanning with default settings may yield unexpected results. If that is the - Konica Minolta fi-7180 | fi-5900C Operations Guide - Page 100
⇒The scanning will be performed. 6. When scanning is finished, click the [Done] button. ⇒The scanned image is displayed. 80 3.4 Saving Scanned Images in PDF Format - Konica Minolta fi-7180 | fi-5900C Operations Guide - Page 101
SCANNING VARIOUS TYPES OF DOC- 7. Select [Save as...] or [Save] from [File] menu to save the scanned image. 3 For the details on Adobe Acrobat operations, refer to the Adobe Acrobat manual and Help. 3.4 Saving Scanned Images in PDF Format 81 - Konica Minolta fi-7180 | fi-5900C Operations Guide - Page 102
). ABC ABC Original Output Example: the result of "dropping out" green. To set the scanner to drop out a color, change the settings in the [TWAIN Driver] dialog box before scanning. The following shows the procedure for changing the settings in this dialog box. 1. Start TWAIN - Konica Minolta fi-7180 | fi-5900C Operations Guide - Page 103
SCANNING VARIOUS TYPES OF DOC- 3. Select the color to be dropped out from [Dropout Color] under [More]. For example, if the document contains black text in green frame, select [Green] so that the scanner only reads the text and eliminates the frames. If you do not wish to have any colors dropped - Konica Minolta fi-7180 | fi-5900C Operations Guide - Page 104
and the window is closed. [Cancel] button The settings made in this screen will be aborted and the window is closed. 4. Click [OK] button. [TWAIN Driver] dialog box will be redisplayed. Then, scan the documents using this dialog box. 84 3.5 Excluding a Color from the image (drop out color) - Konica Minolta fi-7180 | fi-5900C Operations Guide - Page 105
box to enable skipping blank pages at scanning documents. 1. Start TWAIN Driver from your scanning application. Refer to "2.13 How to use the Scanner Driver" on page 41. 2. Click the [Option...] button in the [TWAIN Driver] dialog box. 3 SCANNING VARIOUS TYPES OF DOC- ⇒The [Option] dialog box - Konica Minolta fi-7180 | fi-5900C Operations Guide - Page 106
4. Check the [Blank Page Skip] box. When the check box is marked, "Cache Mode" will change to "Ram cache" or "Use both memory". 5. Using the slider control under [Blank Page Skip], specify the Blank Page Skip degree. For white pages, use the [Black Dots Ratio] slider bar - Konica Minolta fi-7180 | fi-5900C Operations Guide - Page 107
The [TWAIN Driver] dialog box will be redisplayed. Then, perform the scanning likely a page will be detected as blank. 6. Click [OK] when done. The [TWAIN Driver] dialog box will return. continue from there. SCANNING VARIOUS TYPES OF DOC- 3.6 Skipping blank Pages 87 - Konica Minolta fi-7180 | fi-5900C Operations Guide - Page 108
to display an error message or ring the buzzer when the scanner detects a multifeed. Multifeed Detection can be set either through the scanner driver dialog box or through "Software Operation Panel". Refer to "8.4 Multifeed Detection" on page 175 for details on set up multifeed detection through - Konica Minolta fi-7180 | fi-5900C Operations Guide - Page 109
" on page 158 for detailed information about the document for multifeed detection. 5. Click the [OK] button. The display returns to the [TWAIN Driver] dialog box. Then, perform the scanning operation on the dialog box. ⇒The scanner will stop scanning if multifeed detection is enabled in the middle - Konica Minolta fi-7180 | fi-5900C Operations Guide - Page 110
and correct skewed documents that are fed into the ADF. The configuration is done through the scanner driver. The following shows the procedure for changing the setting from the [TWAIN Driver] dialog box. 1. Start TWAIN Driver from your scanning application. Refer to "2.13 How to use the Scanner - Konica Minolta fi-7180 | fi-5900C Operations Guide - Page 111
Size Detection] from the [Automatic Size and Skew Detection] menu. 3 5. Click the [OK] button. The display returns to the scanning operation [TWAIN Driver] dialog box. ATTENTION When using either of the following documents, the Automatic page size detection may not function correctly. 1. Paper of - Konica Minolta fi-7180 | fi-5900C Operations Guide - Page 112
with Multi Image. The MultiStream setting can be done on the Scanner Driver. The following operation uses the TWAIN driver. 1. Start TWAIN Driver from your scanning application. Refer to "2.13 How to use the Scanner Driver" on page 41. 2. Please check the [Enable Multi Image] checkbox in the - Konica Minolta fi-7180 | fi-5900C Operations Guide - Page 113
SCANNING VARIOUS TYPES OF DOC- 3 3. Select [Multi image output] under "Output mode". 4. Set the order of the output in "Order (for Multi image output)". Primary: Color/Grayscale Secondary: Binary The output order will be: [Color or Grey scale images] → [Binary monochrome images] Primary: Binary - Konica Minolta fi-7180 | fi-5900C Operations Guide - Page 114
6. Click the [Scan] button to scan the document. 94 3.9 Multi Image Output - Konica Minolta fi-7180 | fi-5900C Operations Guide - Page 115
properly. The settings for MultiStream can be done on the Scanner Driver. The following operation uses the TWAIN driver. 3 1. Start up TWAIN driver fromthe application you are using Refer to "2.13 How to use the Scanner Driver" on page 41. 2. Please check the [Enable Multi Image] checkbox in - Konica Minolta fi-7180 | fi-5900C Operations Guide - Page 116
3. Under [Output Mode Selection], check [Color/Monochrome Auto Detection]. 4. Select under [Current Side Selection] the side of your choice and perform then for each scan settings on the main configuration screen. The scan settings are done in advance, for the case documents are detected as [Color/ - Konica Minolta fi-7180 | fi-5900C Operations Guide - Page 117
SCANNING VARIOUS TYPES OF DOC- 5. Click the [Scan] button to scan the document. 3 3.10 Color/monochrome Auto Detection 97 - Konica Minolta fi-7180 | fi-5900C Operations Guide - Page 118
98 3.10 Color/monochrome Auto Detection - Konica Minolta fi-7180 | fi-5900C Operations Guide - Page 119
4 DAILY CARE This chapter describes how to clean the scanner. WARNING • Take care not to pinch your fingers inside the ADF. • The glass inside the ADF becomes hot during operation. Be careful not to get burned. 4.1 Cleaning Materials and Areas Requiring Cleaning .........100 4.2 Cleaning the Pad - Konica Minolta fi-7180 | fi-5900C Operations Guide - Page 120
4.1 Cleaning Materials and Areas Requiring Cleaning ■ Cleaning materials Cleaning materials Part No. Cleaning sheet CA99501-0016(*1) Remarks 20 sheets/pack Cleaner F1 (or isopropyl alcohol) CA99501-0013 (*1) 1 bottle, 100ml/bottle Moisten cloth with this fluid and wipe the scanner to clean. - Konica Minolta fi-7180 | fi-5900C Operations Guide - Page 121
. • You must clean the following area more thoroughly when you use fi590PRF or fi-590PRB imprinters. The imprinter ink tends to stick to the document transport path. • Removable sheet guide • Glass sheet guide • Feed rollers • Pinch rollers 4.1 Cleaning Materials and Areas Requiring Cleaning 101 - Konica Minolta fi-7180 | fi-5900C Operations Guide - Page 122
4.2 Cleaning the Pad 1. Open the ADF cover. For details, refer to "2.3 Opening and Closing ADF" on page 12. ADF cover Pad 2. Wipe the Pad (the parts of rubber) with a lint-free cloth, moistened with cleaner F1 (or isopropyl alcohol), in the direction indicated by the arrows. Pad 3. Close the ADF. - Konica Minolta fi-7180 | fi-5900C Operations Guide - Page 123
DAILY CARE 4.3 Cleaning the Rollers (using the cleaning sheet) Use the cleaning sheet to clean the upper and lower ADF transport path and the rollers. 1. Open the Pre-Imprinter Cover. Pre-Imprinter Cover 4 Scan 2. While pressing the [Scan] button , press the power button to switch on the scanner. ⇒ - Konica Minolta fi-7180 | fi-5900C Operations Guide - Page 124
5. Set the side guide of the hopper to B4 width. For details, refer to "2.6 Loading Documents on the Hopper" on the adhesive side facing up on the hopper table, aligning its left side with the side guide, as shown in the illustration below. 104 4.3 Cleaning the Rollers (using the cleaning sheet) - Konica Minolta fi-7180 | fi-5900C Operations Guide - Page 125
the stacker. 4 10. Place the same cleaning sheet with the adhesive side facing up on the hopper table, aligning the right side with the side guide, as shown in the illustration below. DAILY CARE Scan 11. Press the [Scan] button 3 times. ⇒The cleaning sheet will be fed and ejected into the - Konica Minolta fi-7180 | fi-5900C Operations Guide - Page 126
4.4 Cleaning the Rollers (with a lint-free cloth) 1. Move the Hopper down to the "low" position if it is set in an upper level. For details, refer to "2.5 Setting the Hopper Height" on page 15. 2. Open the ADF cover. For details, refer to "2.3 Opening and Closing ADF" on page 12 ADF Cover Roller - Konica Minolta fi-7180 | fi-5900C Operations Guide - Page 127
4. Clean the Pick roller and the rubber surface of the Separator rollers using the cleaner F1 or isopropyl alcohol. Pick roller 4 DAILY CARE Separator roller Roller cover 5. Close the roller cover after the cleaning is finished. 6. Open the Pad cover. Grab both sides of the cover, press to the - Konica Minolta fi-7180 | fi-5900C Operations Guide - Page 128
7. Remove the Brake roller. Move the roller slightly to the right, then pull it upwards to remove it, as shown below. Brake roller 8. Clean the rubber surface of the Brake roller using a lint-free cloth, moistened with the cleaner F1 or isopropyl alcohol. Brake roller 9. Install the Brake roller - Konica Minolta fi-7180 | fi-5900C Operations Guide - Page 129
11. Clean the Feed rollers (metal rollers, each set consists of 2 rollers, 9 locations) on the upper side of the lower transport path using a lint-free cloth moistened with the cleaner F2. Take care especially to remove black stains on the rollers, since such stains are deteriorating the feeding - Konica Minolta fi-7180 | fi-5900C Operations Guide - Page 130
4.5 Cleaning the Transport path and the sensors 1. Open the ADF cover. For details, refer to "2.3 Opening and Closing ADF" on page 12 2. Clean the whole transport path (stainless and glass parts) using a lint-free cloth moistened with the cleaner F1 or isopropyl alcohol. If the transport path is - Konica Minolta fi-7180 | fi-5900C Operations Guide - Page 131
DAILY CARE 3. Clean the Skew-detection sensor on the lower transport path (7 units at 1 location) using a lint-free cloth moistened with the cleaner F1 or isopropyl alcohol. 4 4. Clean the Skew-detection sensor on the upper transport path (7 units at 1 location) using a lint-free cloth moistened - Konica Minolta fi-7180 | fi-5900C Operations Guide - Page 132
5. Clean the Document sensors on the lower transport path (2 units at 3 locations) using a lint-free cloth moistened with the cleaner F1 or isopropyl alcohol. Document sensor 6. Clean the Document sensors on the upper transport path (2 units at 3 locations) using a lint-free cloth moistened with the - Konica Minolta fi-7180 | fi-5900C Operations Guide - Page 133
DAILY CARE 7. Clean the Document sensor on the upper transport path (1 unit at 1 location) using a cotton swab moistened with the cleaner F1 or isopropyl alcohol. 4 Document sensor 8. Close the ADF cover. For details, refer to "2.3 Opening and Closing ADF" on page 12. 4.5 Cleaning the Transport - Konica Minolta fi-7180 | fi-5900C Operations Guide - Page 134
114 4.5 Cleaning the Transport path and the sensors - Konica Minolta fi-7180 | fi-5900C Operations Guide - Page 135
5 REPLACEMENT OF CONSUMABLES This chapter describes how to replace consumables. 5.1 Consumables and Replacement Cycle 116 5.2 How to check and reset the Consumables Counter........ 117 5.3 Replacing the Pad 121 5.4 Replacing the Pick Roller 122 5.5 Replacing the Separator Rollers 124 5.6 - Konica Minolta fi-7180 | fi-5900C Operations Guide - Page 136
replacement cycle of the consumables. It is recommended that you stock extra consumables before the ones in the scanner reach the end of Their service life. The consumables must be replaced periodically. You can check the number of scanned pages for the Pad, the Pick roller, the Brake roller - Konica Minolta fi-7180 | fi-5900C Operations Guide - Page 137
5.2 How to check and reset the Consumables Counter For confirming the abrasion of consumables and resetting the counters, use [Software Operation Panel] on you PC as shown below. ■ Checking consumables 1. Turn on the scanner and confirm if it is connected correctly to you PC. 2. From the [Start] - Konica Minolta fi-7180 | fi-5900C Operations Guide - Page 138
3. Select the [Device Settings] tab. In this window, the following items can be confirmed. Number of scans (ADF): Pad: Brake roller: Pick rollers: Separator rollers: Remaining ink: The total number of scanned sheets. The number of sheets scanned since last exchange of the Pad. The number of - Konica Minolta fi-7180 | fi-5900C Operations Guide - Page 139
REPLACEMENT OF CONSUMABLES ■ Resetting of the consumable counters Reset the consumable counter(s) every time you replace the consumable(s), following the procedure given below. 1. Click the [Clear] button beside the replaced consumable. 5 2. Click the [OK] button on the displayed confirmation - Konica Minolta fi-7180 | fi-5900C Operations Guide - Page 140
■ Consumables replacement message The following message may appear while using the scanner: Replace consumables when this message is displayed. After clicking the [Ignore] button, this message will disappear and scanning will continue. Replace the consumable as soon as possible. As a default, this - Konica Minolta fi-7180 | fi-5900C Operations Guide - Page 141
REPLACEMENT OF CONSUMABLES 5.3 Replacing the Pad 1. Open the ADF cover. Refer to "2.3 Opening and Closing ADF" on page 12. 5 Pad 2. Move the Pad to the left, than pull it up in order to remove it from the scanner. 3. Install the new Pad in the reversed order of the removable. 4. Close the ADF cover - Konica Minolta fi-7180 | fi-5900C Operations Guide - Page 142
5.4 Replacing the Pick Roller 1. Open the ADF cover. Refer to "2.3 Opening and Closing ADF" on page 12. Roller cover 2. Open the roller cover. Put your fingers in the depression on the left and right side and pull the cover towards you to open it. Depression Roller cover 122 5.4 Replacing the - Konica Minolta fi-7180 | fi-5900C Operations Guide - Page 143
REPLACEMENT OF CONSUMABLES 3. While pulling up the tab away from the shaft, slide the Pick rollers (2 rollers, left and right) from the shaft for removal. Pick Roller r 5 4. Install the new Pick rollers (2 rollers, left and right) in the reversed order of the detachment. Put the roller correctly on - Konica Minolta fi-7180 | fi-5900C Operations Guide - Page 144
5.5 Replacing the Separator Rollers 1. Open the ADF cover. Refer to "2.3 Opening and Closing ADF" on page 12. Roller cover 2. Open the Roller cover. Put your fingers in the depressions on the left and right side and pull the cover towards you to open it. Depression Roller cover 124 5.5 Replacing - Konica Minolta fi-7180 | fi-5900C Operations Guide - Page 145
3. Slide Separator rollers (2 rollers, left and right) away from each other along the shafts for removal as shown below. REPLACEMENT OF CONSUMABLES Separator roller 5 Shaft ⇒The shaft will be locked in outer position and stays there. 4. Remove the rollers from their shafts. Remove both, the - Konica Minolta fi-7180 | fi-5900C Operations Guide - Page 146
6. Close the roller cover. ⇒The Separator rollers will move to their original position automatically. Roller cover Separator roller 7. Close the ADF cover. Refer to "2.3 Opening and Closing ADF" on page 12. 8. Reset the counter of the Separation roller. Refer to "5.2 How to check and reset the - Konica Minolta fi-7180 | fi-5900C Operations Guide - Page 147
REPLACEMENT OF CONSUMABLES 5.6 Replacing the Brake roller 1. Move the Hopper down to the "low" position if it is set in an upper level. For details, refer to "2.5 Setting the Hopper Height" on page 15. 2. Open the ADF cover. Refer to "2.3 Opening and Closing ADF" on page 12. 5 Pad cover 3. Open the - Konica Minolta fi-7180 | fi-5900C Operations Guide - Page 148
4. Remove the Brake roller Lift up the left side of the Brake roller and remove the left shaft. Then pull the right shaft out of its hole to remove it. Brake roller 5. Install the new Brake roller. After inserting the right end of the shaft into the hole, attach the left end. Brake roller 6. Close - Konica Minolta fi-7180 | fi-5900C Operations Guide - Page 149
, how to remedy other problems, items to be checked before contacting an authorized service provider and how to check labels on the scanner. 6.1 Clearing Document Jams 130 6.2 Error messages of the Operator panel 132 6.3 Troubleshooting 135 6.4 Before Contacting a Service Provider 148 6.5 Labels - Konica Minolta fi-7180 | fi-5900C Operations Guide - Page 150
6.1 Clearing Document Jams When documents have been jammed during scanning, use the following procedure to remove them from the scanner. CAUTION • Take care not to pinch your fingers inside the ADF. • The glass inside the ADF becomes hot during operation. Take care not to burn yourself. • Do not - Konica Minolta fi-7180 | fi-5900C Operations Guide - Page 151
3. Remove the jammed documents. 6 SOLVING COMMON PROBLEMS ATTENTION Clips and staples cause the documents to jam when fed through the scanner. Therefore, remove all staples and clips from the documents before scanning, - Konica Minolta fi-7180 | fi-5900C Operations Guide - Page 152
support from an authorized FUJITSU scanner service partner. Function number display [Function] button Function Function Hopper Heihgt Thin PowerThickness Thick Send to Scan Hopper Height Paper Thickness Thin Thick Send to Scan Operator panel When the Error Recovery Guide is installed - Konica Minolta fi-7180 | fi-5900C Operations Guide - Page 153
, the multi fed papers will be ejected. SOLVING COMMON PROBLEMS U4 The ADF or the Pre-Imprinter cover is opened. is used. Refer to the "fi-590PRF/fi-590PRB Imprinter Operator Guide" for further details. U8 One that the Pick roller is not set for manual feeding. 3. Verify that the both rollers - Konica Minolta fi-7180 | fi-5900C Operations Guide - Page 154
out. E5 The lamp fuse has blown out. E6 Operator panel error E7 Trouble occurred in the internal memory (EEPROM). E8 The SCSI fuse has blown out. the dealer where you purchased the scanner or an autho-rized FUJITSU scanner service provider. When you encounter any alarm, turn off and on the - Konica Minolta fi-7180 | fi-5900C Operations Guide - Page 155
6.3 Troubleshooting This section describes common troubles during usage and how to remedy the troubles. Before you ask for repair service, check the following flowchart to determine the trouble. If you can not resolve the trouble after following the flowcharts, check the items in section "6.4 - Konica Minolta fi-7180 | fi-5900C Operations Guide - Page 156
YES If the problem canot be resolved with this flowchart, refer to "6.4 Before contacting a service partner." After checking the items given in section 6.4, contact an authorized FUJITSU scanner service provider or your dealer. (*) Press any button except the Power button. 136 6.3 Troubleshooting - Konica Minolta fi-7180 | fi-5900C Operations Guide - Page 157
to "6.4 Before contacting a service partner." After checking the items given in section 6.4, contact an authorized FUJITSU scanner service provider or your dealer. SOLVING COMMON PROBLEMS 6 (*1) Refer to fi-5900C Getting Stated, "2.2 Connecting the scanner to your PC". 6.3 Troubleshooting 137 - Konica Minolta fi-7180 | fi-5900C Operations Guide - Page 158
inside the ADF clean? On the scanner driver, select "Halftone" or "Greyscale" before performing the scanning again.(*1) Clean the dirty locations. (*2) YES If the problem canot be resolved with this flowchart, refer to "6.4 Before contacting a service partner." After checking the items given in - Konica Minolta fi-7180 | fi-5900C Operations Guide - Page 159
value for the resolution setting on the scanner driver. Select "Binary black and white" on the scanner driver. (*1) Clean the dirty locations. (*2) YES If the problem canot be resolved with this flowchart, refer to "6.4 Before contacting a service partner." After checking the items given in section - Konica Minolta fi-7180 | fi-5900C Operations Guide - Page 160
. YES If the problem canot be resolved with this flowchart, refer to "6.4 Before contacting a service partner." After checking the items given in section 6.4, contact an authorized FUJITSU scanner service provider or your dealer. (*) Refer to "4 DAILY CARE" on page 99. 140 6.3 Troubleshooting - Konica Minolta fi-7180 | fi-5900C Operations Guide - Page 161
when scanning with a lower resolution? Set the resolution to a lower value and scan the document again. NO If the problem canot be resolved with this flowchart, refer to "6.4 Before contacting a service partner." After checking the items given in section 6.4, contact an authorized FUJITSU scanner - Konica Minolta fi-7180 | fi-5900C Operations Guide - Page 162
the weight of the batch of documents becomes less than 5kg. Clean the Pad and the Brake roller (*4) YES Continued on the next page 142 6.3 Troubleshooting - Konica Minolta fi-7180 | fi-5900C Operations Guide - Page 163
thickness to a thicker value (*6) YES If the problem canot be resolved with this flowchart, refer to "6.4 Before contacting a service partner." After checking the items given in section . (*6) Refer to "2.9 Setting the Paper Thickness" on page 29. SOLVING COMMON PROBLEMS 6 6.3 Troubleshooting 143 - Konica Minolta fi-7180 | fi-5900C Operations Guide - Page 164
transport path? YES Replace the worn out Pick and Separation roller. (*5) Remove all debris from the transport path. NO Continued on the next page 144 6.3 Troubleshooting - Konica Minolta fi-7180 | fi-5900C Operations Guide - Page 165
thickness to a thicker value (*6) YES If the problem canot be resolved with this flowchart, refer to "6.4 Before contacting a service partner." After checking the items given in section CONSUMABLES" on page 115. (*6) Refer to "2.9 Setting the Paper Thickness" on page 29. 6 6.3 Troubleshooting 145 - Konica Minolta fi-7180 | fi-5900C Operations Guide - Page 166
that satisfy the requirements. (*2) Use the Software Operation Panel to adjust the scan scale. (*3) If the problem canot be resolved with this flowchart, refer to "6.4 Before contacting a service partner." After checking the items given in section 6.4, contact an authorized FUJITSU scanner - Konica Minolta fi-7180 | fi-5900C Operations Guide - Page 167
with this flowchart, refer to "6.4 Before contacting a service partner." After checking the items given in section 6.4, contact an authorized FUJITSU scanner service provider or your dealer. (*1) Refer to "8 SCANNER SETTINGS" on page 165. SOLVING COMMON PROBLEMS 6 6.3 Troubleshooting 147 - Konica Minolta fi-7180 | fi-5900C Operations Guide - Page 168
items before contacting an authorized FUJITSU Scanner service provider or the dealer where you bought the scanner. ■ General descriptions Items to check Model Serial Number Manufacturing date Date of purchase Symptom Frequency of trouble Information example: fi-5900C Check the labels on the - Konica Minolta fi-7180 | fi-5900C Operations Guide - Page 169
) type Displayed error message Interface (example) SCSI interface 6 Interface controller (example) Adaptec SCSI Card 2940Au SOLVING COMMON PROBLEMS Document feeding trouble Items to check Document type Main purpose of use Last cleaning date Last consumable replacement date Operator panel - Konica Minolta fi-7180 | fi-5900C Operations Guide - Page 170
6.5 Labels on the Scanner This section describes how to check the labels on the scanner. The following shows where the two labels are located on the scanner. Label B Label A Label A (example): Indicates scanner information. Barcode Area Label B (example): Indicates various standards that the scanner - Konica Minolta fi-7180 | fi-5900C Operations Guide - Page 171
7 DOCUMENT SPECIFICATIONS This chapter describes the sizes and qualities of documents required for the satisfactory performance of the scanner. 7.1 Document Size 152 7.2 Document Quality 153 7.3 Maximum Document Loading Capacity 156 7.4 Hole-punching Prohibited Areas 157 7.5 Multifeed Detection - Konica Minolta fi-7180 | fi-5900C Operations Guide - Page 172
7.1 Document Size The following shows the supported document sizes. A Feeding Direction B A 304.8 mm (12 in) Maximum B 431.8 mm * (17 in) A 53 mm (2.087 in) Minimum B 74 mm (2.913) *When scanning in "long page", the maximum scannable length is 863 mm (34 in). 152 7.1 Document Size - Konica Minolta fi-7180 | fi-5900C Operations Guide - Page 173
7.2 Document Quality This section describes the types and thickness of documents this scanner supports. ■ Document type The recommended document types are as follows. •Wood free paper 7 •Wood containing paper When using documents of a paper type other than the above, - Konica Minolta fi-7180 | fi-5900C Operations Guide - Page 174
■ Precautions The following documents may not be scanned successfully. •Document of non-uniform thickness (e.g. envelopes) •Wrinkled or curled documents (Refer to HINT on the next page) •Folded or torn documents •Tracing paper •Coated paper •Carbon paper •Carbonless paper •Photosensitive paper • - Konica Minolta fi-7180 | fi-5900C Operations Guide - Page 175
Pad and the Pick roller. For details on cleaning the Pad and the Pick roller, refer to "4 DAILY CARE" on page 99 Replacing parts: The service life of the Pad and Pick roller may be shortened com- 7 pared to the case of scanning wood containing paper documents. • When scanning wood containing - Konica Minolta fi-7180 | fi-5900C Operations Guide - Page 176
7.3 Maximum Document Loading Capacity The maximum number of sheets that can be loaded on the ADF paper chute is determined by the size and weight of the documents. The following graph shows the maximum document loading capacity of ADF with respect to paper weight. Hopper height : Low 500 Hopper - Konica Minolta fi-7180 | fi-5900C Operations Guide - Page 177
7.4 Hole-punching Prohibited Areas Punched holes in the shaded areas may cause errors. For job separation sheet requirements, refer to "7.7 Job Separation Sheet" on page 161. 35 Reference Point 㧔Unit : mm㧕 Leading edge 7 Front Side Feeding Direction 15 DOCUMENT SPECIFICATIONS Center line - Konica Minolta fi-7180 | fi-5900C Operations Guide - Page 178
7.5 Multifeed Detection Conditions The following describes the conditions required for Multifeed detection: ■ Check overlapping •Paper weight: 31 - 209.3 g/m2 (8.3 to 56.1 lb) •Punched holes are not allowed within 35 mm (1.4 in) of the vertical lines of the center, right and left sides of the the - Konica Minolta fi-7180 | fi-5900C Operations Guide - Page 179
Feeding Direction Feeding Direction DOCUMENT SPECIFICATIONS 35 35 35 35 㧔Unit: mm㧕 7 60 60 Fig.1 Fig.2 When you want to detect overlapping, be sure that paper documents are not HINT clinging to each other. Those clinging documents (glued or with static cling) may cause a lower multifeed - Konica Minolta fi-7180 | fi-5900C Operations Guide - Page 180
7.6 Background Color Areas Paper white detection is performed in the shaded area as shown in the Figure below. The top 3mm on both sides of a document, should have no printing in this area. When using dropout color, the color can be in this area. If this cannot be followed, turn the white level - Konica Minolta fi-7180 | fi-5900C Operations Guide - Page 181
7.7 Job Separation Sheet 1. Shape The following shows the typical format of the job separation sheet. 15 (0.59") 7 Feeding direction 15 (0.59") DOCUMENT SPECIFICATIONS Center of document more than 210 (8.27") (Unit : mm) 2. Document Specifications Document width must be A4 width (210mm/8.27") - Konica Minolta fi-7180 | fi-5900C Operations Guide - Page 182
Sizes Refer to the table below when mixing documents of different sizes. ATTENTION • When scanning mixed size document, because the hopper side guides will not function, the scanned images are easily skewed. We recommend you to enable "Automatic Page Size Detection". • Multifeed Detection by - Konica Minolta fi-7180 | fi-5900C Operations Guide - Page 183
DOCUMENT SPECIFICATIONS Maximum Size A3 DL B4 LTR A4 B5 A5 B6 A6 B7 A7 B8 A8 Width(mm) 297 279 257 216 210 182 149 129 105 91 74. 64. 52. 335 A3 297 M DL 279 i n B4 257 i LTR 216 m u A4 210 m B5 182 s A5 149 i B6 129 z e A6 105 B7 91 Mixing Possible A7 74.3 B8 64.3 A8 52.5 - Konica Minolta fi-7180 | fi-5900C Operations Guide - Page 184
164 7.8 Scanning Mixed Documents - Konica Minolta fi-7180 | fi-5900C Operations Guide - Page 185
Auto Color Detection 189 8.14 Alarm Setting 190 8.15 Jam Detection Outside of Scannable Area When Transporting 191 8.16 Imprinter Selection 192 8.17 Timeout for Manual Feeding 193 165 - Konica Minolta fi-7180 | fi-5900C Operations Guide - Page 186
8.1 Scanner Settings The Software Operation Panel will be installed together with the scanner driver (TWAIN/ISIS). With this application, you can configure settings and functions for the fi-5900C. ■ Start up the Software Operation Panel Start up via PC 1. Confirm if the scanner is connected - Konica Minolta fi-7180 | fi-5900C Operations Guide - Page 187
Start up via Scanner 1. Confirm if the scanner is connected correctly to the PC, then power on the scanner. 2. Press the [Function] button on the Operator Panel. The Function Number Display will show . 8 When pressing the [Function] button, the Function Number Display will change in the - Konica Minolta fi-7180 | fi-5900C Operations Guide - Page 188
■ Settings Using the Software Operation Panel, you can configure the following settings for the scanner connected to the PC. [Device setting] Item Page counter (Consumables counter) Power saving setting Offset setting Scan scale Explanation Selectable parameter Default For evaluating the - Konica Minolta fi-7180 | fi-5900C Operations Guide - Page 189
[Device settings 2] Selecting each item displays detailed settings (parameters) in the lower part. 8 SCANNER SETTINGS Item Multifeed Page edge filler (ADF) Explanation Selectable parameter Default Select the method to detect Deactivated/Checking for overlap- Multifeed. (Check either of over- - Konica Minolta fi-7180 | fi-5900C Operations Guide - Page 190
Page edge filler (Automatic paper size detection) Fill the end sections of a specifiedmm-wide with white when the paper size is automatically detected. The end sections of a specifiedmm-wide are filled with white. Top/Left/Right/Bottom: 0 to 7.5mm (can be set in increments of 0.5mm) A Top/Bottom - Konica Minolta fi-7180 | fi-5900C Operations Guide - Page 191
the standby time period. 5, 10, 20, 30, 40, 50, 60, 70, 80, 90, ual feeding After the predetermined time 100, 110 (seconds) period has elapsed, manual feeding mode is canceled. 10 seconds 8 SCANNER SETTINGS 8.1 Scanner Settings 171 - Konica Minolta fi-7180 | fi-5900C Operations Guide - Page 192
8.2 Power saving setting When not using this scanner for a certain time, it will enter automatically the power saving mode. Configure the Power saving mode as follows: 1. Start up the Software Operation Panel. Refer to "8.1 Scanner Settings" on page 166. 2. Select the [Device Setting] tab. 3. Use - Konica Minolta fi-7180 | fi-5900C Operations Guide - Page 193
8.3 Offset/Scan scale When the position of the scanned image is not correct or the image is elongated, use the following procedure to adjust the Offset and the Scan scale for correction. ATTENTION The factory default setting are appropriate, so normally there is no need to make any adjustment. 8 - Konica Minolta fi-7180 | fi-5900C Operations Guide - Page 194
3. Adjust the Offset/Scan scale as necessary. Offset setting Target: Horizontal: Vertical: Select ADF front or ADF back as target. Adjusts the horizontal Offset. Setting range -2mm to +3mm, in steps of 0.5mm. Adjusts the vertical Offset. Setting range -2mm to +3mm, in steps of 0.5mm. Scan scale - Konica Minolta fi-7180 | fi-5900C Operations Guide - Page 195
8.4 Multifeed Detection Multifeed refers to the phenomenon, when two or more documents are fed overlapping at once into the scanner. This may cause the loss of important data. To prevent this, this scanner is equipped with a Multifeed detection function. When function is activated, a message will - Konica Minolta fi-7180 | fi-5900C Operations Guide - Page 196
area] function, you can also use [Checking overlapping]. • The setting can be done as well on the scanner driver configuration window. (In this case, the scanner driver selection will have priority) When [Check overlapping] is selected as the detection method, you can also specify the detection - Konica Minolta fi-7180 | fi-5900C Operations Guide - Page 197
3. Speficy the detection area. Specified area: Specify the area to be detected. Select left, middle, or right. Left Middle Right 35 35 35 8 Feeding direction SCANNER SETTINGS Document 60 60 Unit: mm Selected mode: You can specify the mode to detect or not to detect the specified area - Konica Minolta fi-7180 | fi-5900C Operations Guide - Page 198
Setting Example 1: Specified area = Right, Selected mode = Non-detection area, Start = 50mm, End = 200mm 35 35 35 50 200 Feeding direction Unit: mm 60 60 Setting Example 2: Specified area = Middle, Selected mode = Detection area, Start = 50mm, End = 200mm 35 35 35 50 200 Feeding - Konica Minolta fi-7180 | fi-5900C Operations Guide - Page 199
8.5 Page Edge Filler (ADF) Depending on the state of the documents, the shadow of the scanned document appears in the end portion of the output image and black thin lines may be generated. If this is the case, you can improve the output image by using the "Page Edge Filler" function. This function - Konica Minolta fi-7180 | fi-5900C Operations Guide - Page 200
Unless otherwise specified, the background color is white. You can also HINT change it to the "Black background" using the scanner driver. If you are using the TWAIN driver, do the following to change the back- ground color to black: Select the [Option] button, and then select [Black background - Konica Minolta fi-7180 | fi-5900C Operations Guide - Page 201
colors than red, green, and blue. If you want to drop out any other colors, use the scanner driver setting window. For details on how to configure settings through the scanner driver setting window, refer to "3.5 Excluding a Color from the image (drop out color)" on page 82 8.6 Dropout Color 181 - Konica Minolta fi-7180 | fi-5900C Operations Guide - Page 202
8.7 Pre-Pick To scan documents consecutively, you can previously pick the document to be scanned next. This operation is called Pre-Pick. By enabling Pre-Pick, the time interval between the scanning of two separate documents can be shortened. Configure the settings for the Pre-Pick as follows: 1. - Konica Minolta fi-7180 | fi-5900C Operations Guide - Page 203
8.8 Page Edge Filler (Automatic paper size detection) When the scanner is set to detect paper size automatically, depending on the state of the documents, the black frame may be generated on the output image. If this is the case, you can improve the output image by using the "Page Edge Filler ( - Konica Minolta fi-7180 | fi-5900C Operations Guide - Page 204
The "Automatic Paper Size Detection" setting can be configured on the HINT scanner driver setting window. For details on how to set the setting, refer to "3.8 Correcting skewed Docu- ments" on page 90 ATTENTION Note that if the Page - Konica Minolta fi-7180 | fi-5900C Operations Guide - Page 205
8.9 Thin Paper Mode If nonstandard thin paper cannot be fed and scanned smoothly, use this mode. In this mode, sheets of paper are fed at a slower speed so that thin paper can be fed and scanned properly. Follow the steps below to switch to the Thin Mode. 1. Start up the Software Operation Panel. - Konica Minolta fi-7180 | fi-5900C Operations Guide - Page 206
8.10 Paper Jam Detection You can set the degree of detection sensitivity for a jam at the feeder. Configure the settings for Paper Jam Detection as follows: 1. Start up the Software Operation Panel. Refer to "8.1 Scanner Settings" on page 166. 2. Select the "Paper jam detection" setting on the [ - Konica Minolta fi-7180 | fi-5900C Operations Guide - Page 207
8.11 AutoCrop Boundary When the scanner is set to detect a paper size automatically, the detected paper size may not be the integer number. You can round the number including fractions up or down. Configure the settings for the AutoCrop Boundary as follows: 1. Start up the Software Operation - Konica Minolta fi-7180 | fi-5900C Operations Guide - Page 208
Width" setting on the [Device Setting 2] tab. 3. Select either 16-bit or 8-bit. ATTENTION To use SCSI cards and/or SCSI cables that do not support Ultra Wide SCSI, select "8-bit". 188 8.12 SCSI Bus Width - Konica Minolta fi-7180 | fi-5900C Operations Guide - Page 209
the case that color documents are judged as black and white, select smaller values. The auto color detection setting can be configured on the scanner driver HINT setting window. For details on how to set the setting, refer to "3.10 Color/monochrome Auto Detection" on page 95. 8.13 Auto Color - Konica Minolta fi-7180 | fi-5900C Operations Guide - Page 210
8.14 Alarm Setting You can make the alarm to sound beeps when a jam or multifeed occurs, as well as disabling the alarm. Configure the settings for the Alarm setting as follows: 1. Start up the Software Operation Panel. Refer to "8.1 Scanner Settings" on page 166. 2. Select the "Alarm setting" on - Konica Minolta fi-7180 | fi-5900C Operations Guide - Page 211
8.15 Jam Detection Outside of Scannable Area When Transporting... If this function is turned On, such a case, in which the documents are fed outside of the scannable area due to over-skew, is judged as a jam. You can turn it On and Off. Configure the settings for the Jam detection outside of - Konica Minolta fi-7180 | fi-5900C Operations Guide - Page 212
to use. Normal (obey Host specification): Forcibly select Pre-imprinter: Forcibly select Post-imprinter: Complies with the scanner driver setting. Pre-imprinter is forcibly used to print unless directed by the scanner driver. Post-imprinter is forcibly used to print unless directed by the scanner - Konica Minolta fi-7180 | fi-5900C Operations Guide - Page 213
to scan for an extended time period, the scanner completes the scanning once and cancel the manual feeding mode. The time period is called "timeout". Configure the settings for the Timeout for Manual as follows: 1. Start up the Software Operation Panel. Refer to "8.1 Scanner Settings" on page 166 - Konica Minolta fi-7180 | fi-5900C Operations Guide - Page 214
194 8.17 Timeout for Manual Feeding - Konica Minolta fi-7180 | fi-5900C Operations Guide - Page 215
9 OPTIONS This chapter describes options for fi-5900C. 9.1 Options 196 9.2 fi-590PRF (Pre-imprinter 197 9.3 fi-590PRB (Post-imprinter 198 9.4 Other Options 199 195 - Konica Minolta fi-7180 | fi-5900C Operations Guide - Page 216
9.1 Options The following lists options available for the scanner. Name fi-590PRF PreImprinter Part No. PA3450-D700 fi-590PRB PostImprinter PA3450-D710 Description Prints an alphanumerical string on the document to be scanned. The printing is done on the front side of the - Konica Minolta fi-7180 | fi-5900C Operations Guide - Page 217
operations in such areas are not guaranteed. Printing Position Accuracy Consumables Vertical: ± 4mm Horizontal: ± 4mm Print Cartridge As for the operations and functions of fi-590PRF (Pre-imprinter), refer to the fi-590PRF Operator's Guide attached to fi-590PRF. 9.2 fi-590PRF (Pre-imprinter) 197 - Konica Minolta fi-7180 | fi-5900C Operations Guide - Page 218
path, inside of the scanner. It prints after the scanning. fi-590PRB (Post-imprinter) Specifications are described below. Item Descriptions Printing and functions of fi-590PRB (Post-imprinter), refer to the fi-590PRB Operator's Guide attached to fi-486PRRE. 198 9.3 fi-590PRB (Post-imprinter) - Konica Minolta fi-7180 | fi-5900C Operations Guide - Page 219
9.4 Other Options ■ Extended Memory Increasing memory is an effective way to improve the scanner's processing speed when scanning at high resolutions. (For example, this may prevent the scanner from pausing when scanning double-sided color A3 documents at resolutions higher than 400 dpi). - Konica Minolta fi-7180 | fi-5900C Operations Guide - Page 220
The memory listed below is recommended. Two modules of the same specification must be installed at the same time. The memory modules are not provided with the scanner. Memory type: 144-pin Unbuffered DODIMM Manufacturer Micron Technology Model MT8LSDT3264HY-133D2 Size 256MB ATTENTION The - Konica Minolta fi-7180 | fi-5900C Operations Guide - Page 221
10 SCANNER SPECIFICATIONS This chapter describes the Scanner Specifications. 10.1 Basic Product Specifications 202 10.2 Installation Specifications 204 10.3 Dimensions 205 201 - Konica Minolta fi-7180 | fi-5900C Operations Guide - Page 222
Basic Product Specifications 1 Scanner Type ADF (Automatic Document - Feeder) and Manual feed 2 Image sensor Color CCD x 2 Front/Back 3 Light source Incandescent Other functions JPEG compression - 14 Option Imprinter fi-590PRF/fi-590 PRB (*8) 202 10.1 Basic Product Specifications - Konica Minolta fi-7180 | fi-5900C Operations Guide - Page 223
-imprinter) will print prior to scanning on the front side of the document. The fi-590PRB (post-imprinter) will print after the scanning on the back side of the document. You can install both the fi-590PRF and fi-590PRB, but you cannot use them at the same time. 10 SCANNER SPECIFICATIONS 10 - Konica Minolta fi-7180 | fi-5900C Operations Guide - Page 224
10.2 Installation Specifications Item Dimensions (With hopper and stacker retracted) Space requirements Depth 540 mm, 21 in Specification Width Height 540 mm, 21 in 500 mm, 20 in 600 mm (23.62 in) 200 mm (7.874 in) Scanner 200 mm (7.874 in) 600 mm (23.62 in) Weight (kg) Input power - Konica Minolta fi-7180 | fi-5900C Operations Guide - Page 225
SCANNER SPECIFICATIONS 10.3 Dimensions 10 unit: mm 10.3 Dimensions 205 - Konica Minolta fi-7180 | fi-5900C Operations Guide - Page 226
206 10.3 Dimensions - Konica Minolta fi-7180 | fi-5900C Operations Guide - Page 227
154 Document jams 130 Document smoother 4 Document thickness 5 Dropout Color 181 E Ejector 2 F Feed roller 109 fi-590PRB 196, 198 fi-590PRF 196, 197 FUJITSU ISIS Scanner Driver ........48 FUJITSU TWAIN32 Scanner Driver41 Function Number display 5 H Hopper 2, 10, 17 Hopper extension 2, 19 - Konica Minolta fi-7180 | fi-5900C Operations Guide - Page 228
scanner 150 Lifting or lowering the hopper ......... 10 M Main power switch 3 Manual Feed Mode 34 Multifeed detection 175 O Offset 173 Operator panel 2 P Separator roller 4 Service provider 148 Setting Window for FUJITSU TWAIN32 Scanner Driver 44 Side guide 2 Side guides 18 Skipping blank - Konica Minolta fi-7180 | fi-5900C Operations Guide - Page 229
IN-3 - Konica Minolta fi-7180 | fi-5900C Operations Guide - Page 230
fi-5900C Image Scanner Operator's Guide P3PC-1432-02ENZ0 Date published: February, 2006 PFU LIMITED •Copying of the contents of this manual in whole or in part and copying of the scanner application is forbidden under the copyright law. •The contents of this manual are subject to change without
-
 1
1 -
 2
2 -
 3
3 -
 4
4 -
 5
5 -
 6
6 -
 7
7 -
8
-
9
-
10
-
11
-
12
-
13
-
14
-
15
-
16
-
17
-
18
-
19
-
20
-
21
-
22
-
23
-
24
-
25
-
26
-
27
-
28
-
29
-
30
-
31
-
32
-
33
-
34
-
35
-
36
-
37
-
38
-
39
-
40
-
41
-
42
-
43
-
44
-
45
-
46
-
47
-
48
-
49
-
50
-
51
-
52
-
53
-
54
-
55
-
56
-
57
-
58
-
59
-
60
-
61
-
62
-
63
-
64
-
65
-
66
-
67
-
68
-
69
-
70
-
71
-
72
-
73
-
74
-
75
-
76
-
77
-
78
-
79
-
80
-
81
-
82
-
83
-
84
-
85
-
86
-
87
-
88
-
89
-
90
-
91
-
92
-
93
-
94
-
95
-
96
-
97
-
98
-
99
-
100
-
101
-
102
-
103
-
104
-
105
-
106
-
107
-
108
-
109
-
110
-
111
-
112
-
113
-
114
-
115
-
116
-
117
-
118
-
119
-
120
-
121
-
122
-
123
-
124
-
125
-
126
-
127
-
128
-
129
-
130
-
131
-
132
-
133
-
134
-
135
-
136
-
137
-
138
-
139
-
140
-
141
-
142
-
143
-
144
-
145
-
146
-
147
-
148
-
149
-
150
-
151
-
152
-
153
-
154
-
155
-
156
-
157
-
158
-
159
-
160
-
161
-
162
-
163
-
164
-
165
-
166
-
167
-
168
-
169
-
170
-
171
-
172
-
173
-
174
-
175
-
176
-
177
-
178
-
179
-
180
-
181
-
182
-
183
-
184
-
185
-
186
-
187
-
188
-
189
-
190
-
191
-
192
-
193
-
194
-
195
-
196
-
197
-
198
-
199
-
200
-
201
-
202
-
203
-
204
-
205
-
206
-
207
-
208
-
209
-
210
-
211
-
212
-
213
-
214
-
215
-
216
-
217
-
218
-
219
-
220
-
221
-
222
-
223
-
224
-
225
-
226
-
227
-
228
-
229
-
230
 |
 |
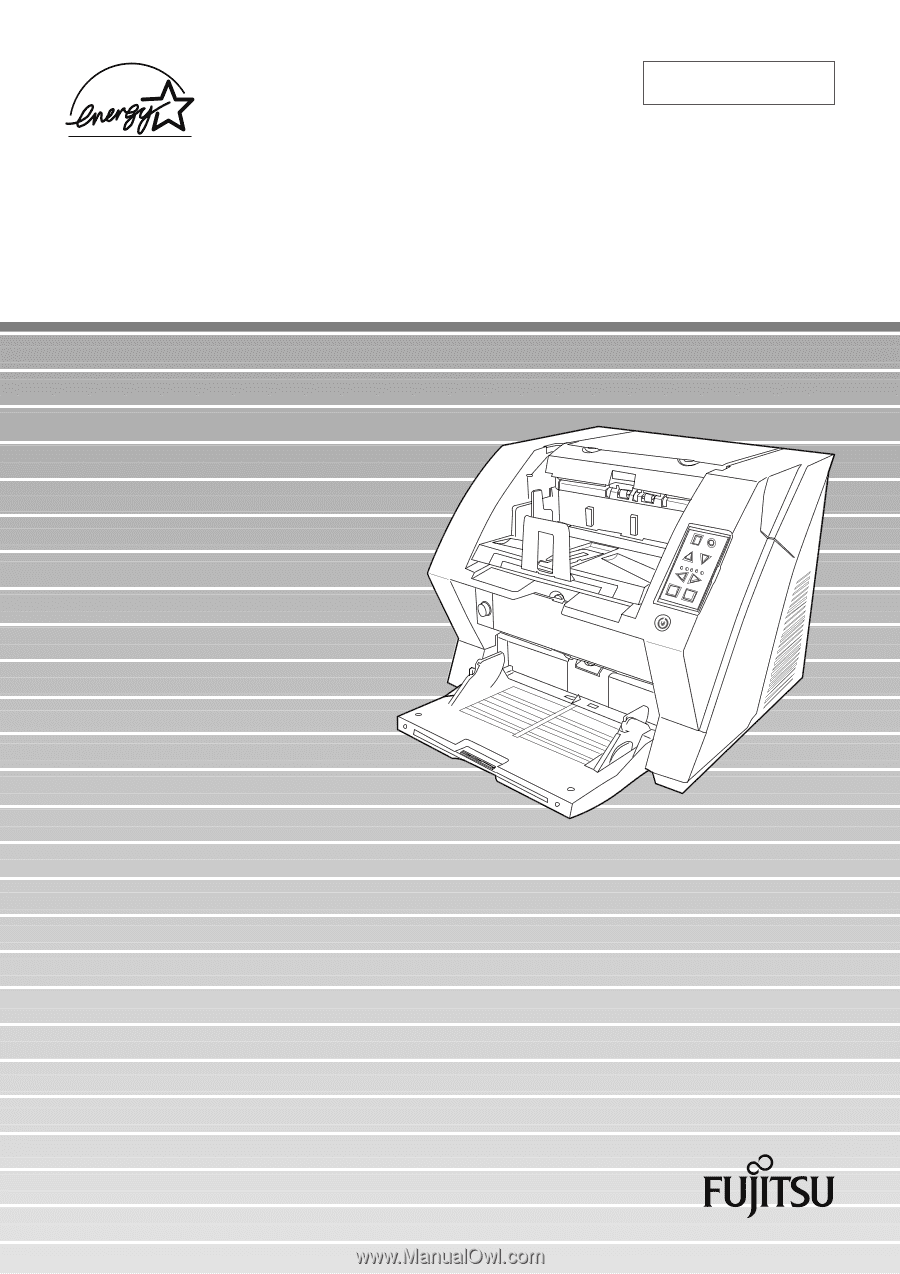
Operator's Guide
fi-5900C Image Scanner
P3PC-1432-02ENZ0
Send to
Scan
Power Thickness
Hopper Hei
ght
Function
Thick
Thin