Kyocera TASKalfa 3051ci Printing System (11),(12),(13),(14) Welcome Guide (Fie - Page 8
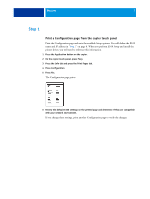
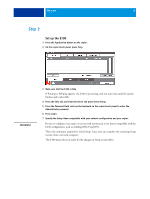
Step 2
 |
View all Kyocera TASKalfa 3051ci manuals
Add to My Manuals
Save this manual to your list of manuals |
Page 8 highlights
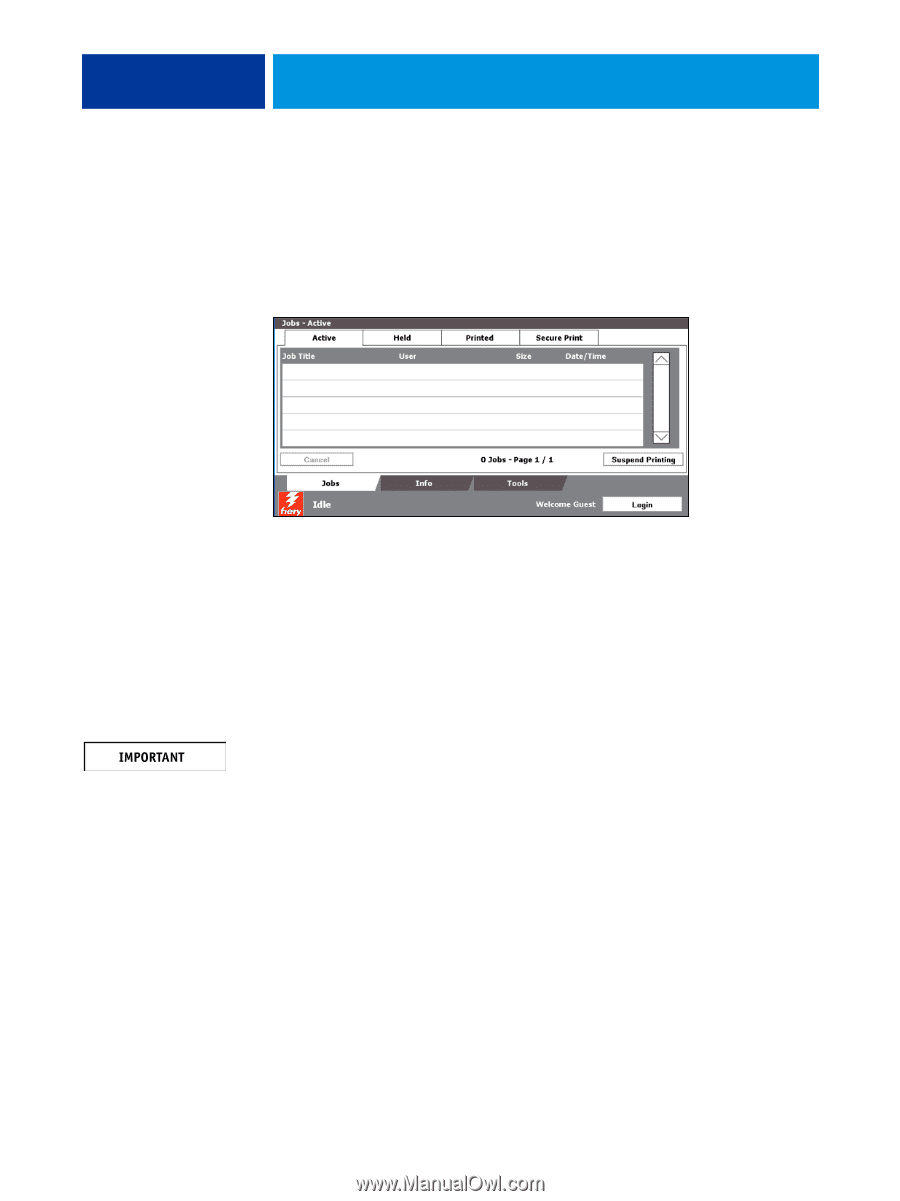
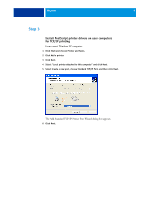
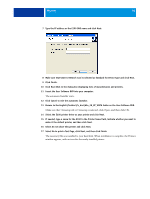
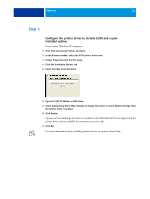
WELCOME 8 Step 2 Set up the E100 1 Press the Application button on the copier. 2 On the copier touch panel, press Fiery. 3 Make sure that the E100 is Idle. If Printing or RIPping appears, the E100 is processing, and you must wait until the system finishes and reaches Idle. 4 Press the Info tab, and from the Server tab press Server Setup. 5 Press the Password field, and use the keyboard on the copier touch panel to enter the Administrator password. 6 Press Login. 7 Specify the Setup items compatible with your network configuration and your copier. Be sure to configure your copier to use network resources in a way that is compatible with the E100 configuration, such as enabling DHCP and IPv6. This is the minimum required for initial Setup. Later, you can complete the remaining Setup menus, from a network computer. The E100 must reboot in order for the changes in Setup to take effect.
-
 1
1 -
2
-
 3
3 -
 4
4 -
 5
5 -
 6
6 -
 7
7 -
 8
8 -
 9
9 -
 10
10 -
 11
11 -
 12
12 -
 13
13 -
14
-
15
 |
 |