LG 50PW450 Service Manual - Page 9
> Not used any more, Use Auto D/L - 50
 |
View all LG 50PW450 manuals
Add to My Manuals
Save this manual to your list of manuals |
Page 9 highlights
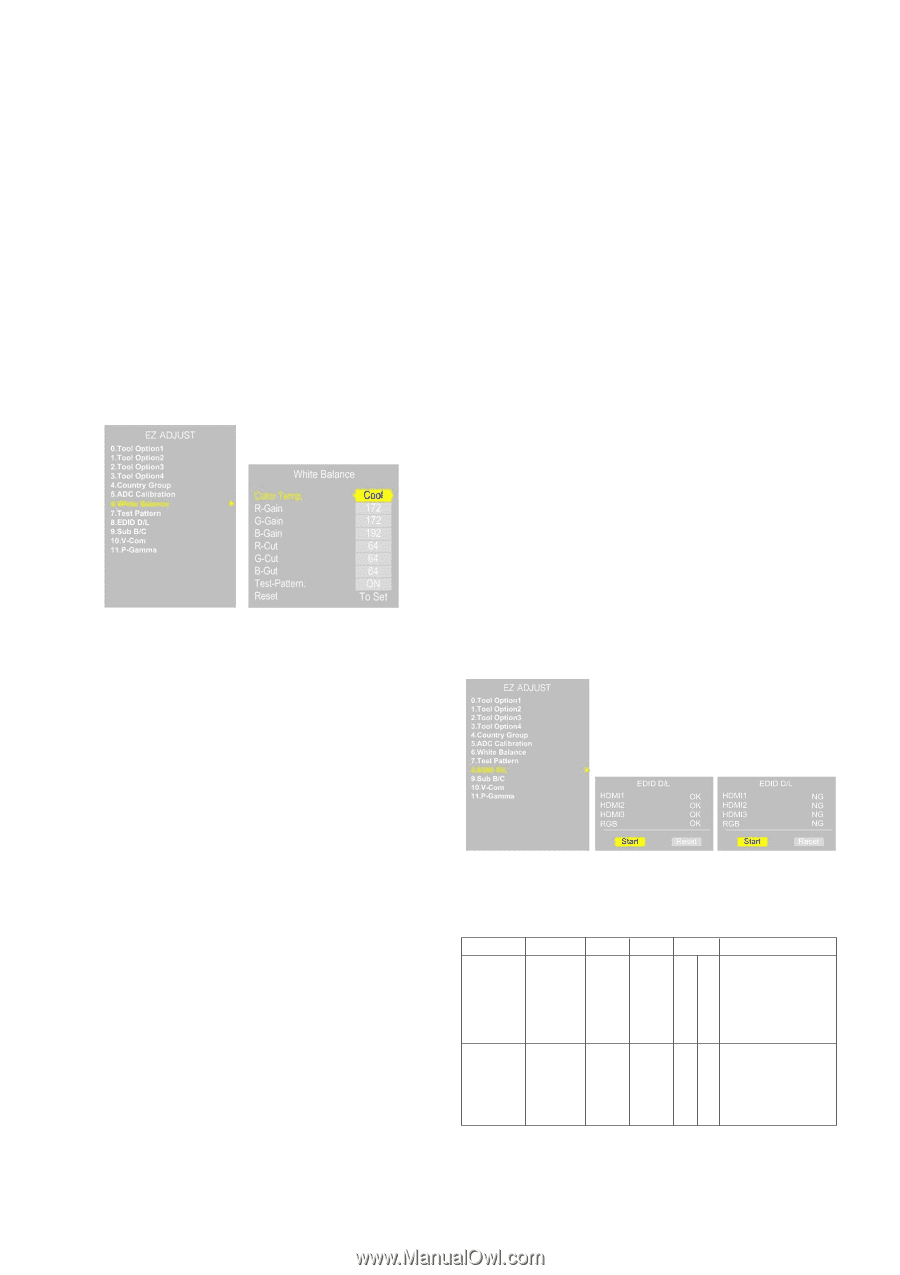
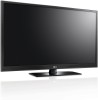
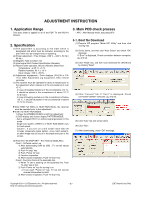
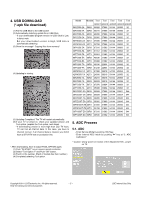
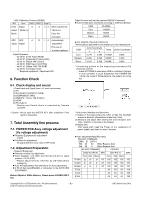
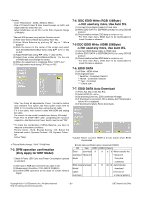
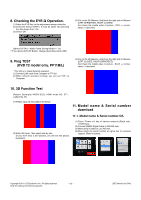
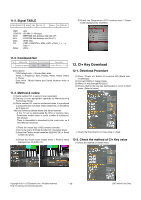
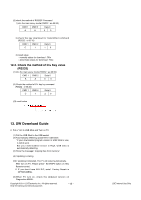
* Caution - Color Temperature : COOL, Medium, Warm. - One of R Gain/G Gain/ B Gain should be kept on 0xC0, and adjust other two lower than C0. (when R/G/B Gain are all C0, it is the FULL Dynamic Range of Module) * Manual W/B process using adjusts Remote control. (1) After enter Service Mode by pushing "ADJ" key, (2) Enter White Balance by pushing "G" key at ". White Balance" (3) Stick the sensor to the center of the screen and select each items(Red/Green/Blue Gain) using D/E (CH +/-) key on R/C. (4) Adjust R/G/B Gain using F/G (VOL +/-) key on R/C. (5) Adjust three modes all(Cool/Medium/Warm) : Fix the one of R/G/B Gain and Change the others. (6) When the adjustment is completed, Enter "COPY ALL". (7) Exit adjustment mode using EXIT key on R/C. 7-4. DDC EDID Write (RGB 128Byte ) -> Not used any more, Use Auto D/L (1) Connect D-sub Signal Cable to D-Sub Jack. (2) Write EDID DATA to EEPROM (24C02) by using DDC2B protocol. (3) Check whether written EDID data is correct or not. * For SVC main Ass'y, EDID have to be downloaded to Insert Process in advance. 7-5 DDC EDID Write (HDMI 256Byte) -> Not used any more, Use Auto D/L (1) Connect HDMI Signal Cable to HDMI Jack. (2) Write EDID DATA to EEPROM(24C02) by using DDC2B protocol. (3) Check whether written EDID data is correct or not. * For SVC main Ass'y, EDID have to be downloaded to Insert Process in advance. 7-6. EDID DATA (1) All Data : HEXA Value (2) Changeable Data : *: Serial No : Controlled / Data:01 **: Month : Controlled / Data:00 ***:Year : Controlled ****:Check sum * After You finish all adjustments, Press °∞In-start°± button and compare Tool option and Area option value with its BOM, if it is correctly same then unplug the AC cable. If it is not same, then correct it same with BOM and unplug AC cable. For correct it to the model's module from factory JIG model. * Push The "N STOP KEY" after completing the function inspection. And Mechanical Power Switch must be set "ON". 7-7. EDID DATA Auto Download (1) Press Adj. key on the Adj. R/C, (2) Select EDID D/L menu. (3) By pressing Enter key, EDID download will begin (4) If Download is successful, OK is display, but If Download is failure, NG is displayed. (5) If Download is failure, Re-try downloads. * To check the coordinates of White Balance, you have to measure at the below conditions. Picture mode : Vivid, Energy Saving : Off, Below the Advanced control, Dynamic Contrast : Off, Dynamic Colour : Off Colour Temp. -> Picture Mode change : Vivid ? Vivid(User) 7-3. DPM operation confirmation (Only Apply for MNT Model) * Check if Power LED Color and Power Consumption operate as standard. (1) Set Input to RGB and connect D-sub cable to set (2) Measurement Condition: (100~240V@ 50/60Hz) (3) Confirm DPM operation at the state of screen without Signal *Caution: Never connect HDMI & D-sub Cable when EDID downloaded. O Edid data and Model option download (RS232) NO Item CMD 1 CMD 2 Data 0 Enter download A A 0 0 When transfer the downloadrMode Ins rMode Ins Mode Carry the command. EDID data download A E 00 10 Automatically Model download option (The use of download a internal pattern) Copyright ©2011 LG Electronics Inc. All rights reserved. Only for training and service purposes -9- LGE Internal Use Only
-
 1
1 -
2
-
3
-
 4
4 -
 5
5 -
 6
6 -
 7
7 -
 8
8 -
 9
9 -
 10
10 -
 11
11 -
 12
12 -
 13
13 -
 14
14 -
15
-
16
-
17
-
18
-
19
-
20
-
21
-
22
-
23
-
24
-
25
-
26
-
27
-
28
-
29
-
30
-
31
-
32
-
33
-
34
-
35
-
36
-
37
-
38
-
39
-
40
-
41
-
42
-
43
-
44
-
45
-
46
-
47
-
48
-
49
-
50
-
51
-
52
-
53
-
54
-
55
-
56
-
57
-
58
-
59
-
60
-
61
-
62
-
63
-
64
-
65
-
66
-
67
-
68
-
69
-
70
-
71
-
72
-
73
 |
 |