LG DLG5988S Owners Manual
LG DLG5988S Manual
 |
View all LG DLG5988S manuals
Add to My Manuals
Save this manual to your list of manuals |
LG DLG5988S manual content summary:
- LG DLG5988S | Owners Manual - Page 1
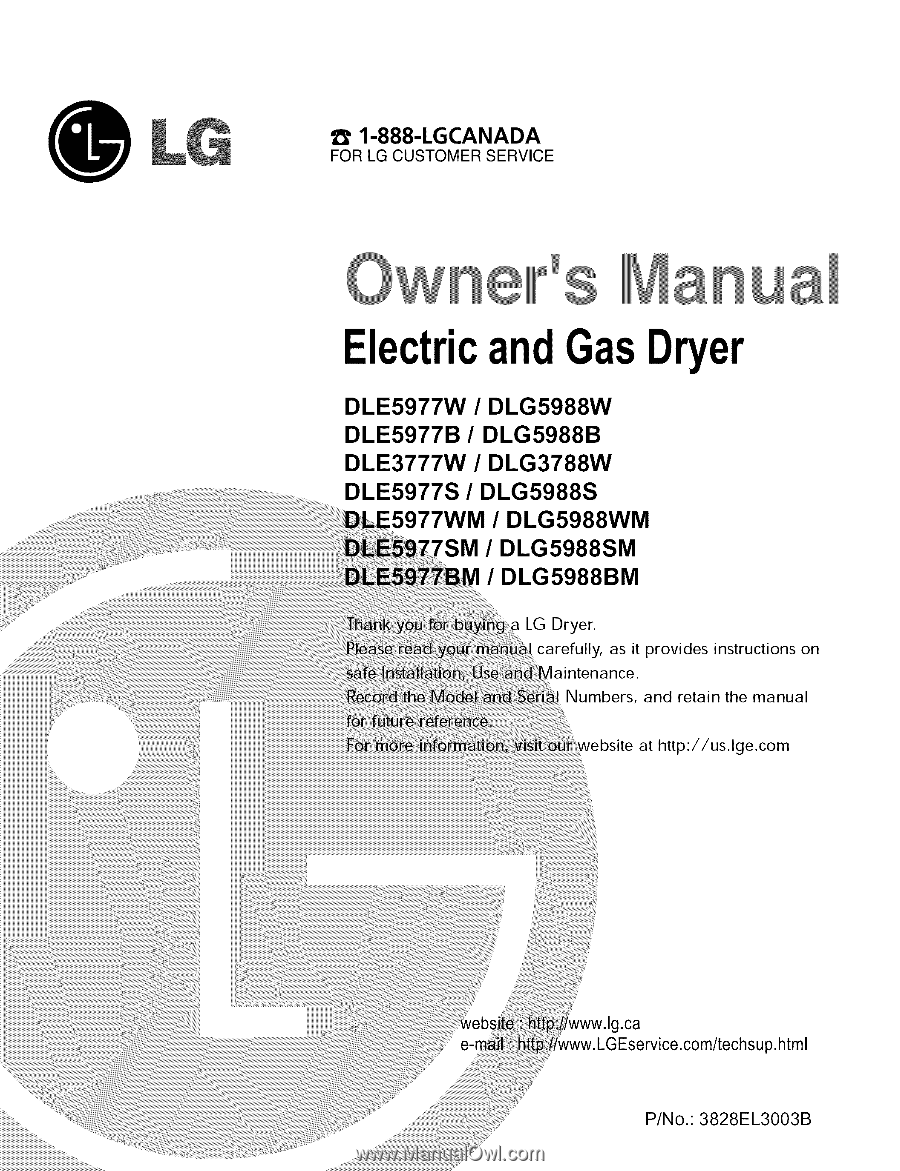
1-888-LGCANADA FOR LG CUSTOMER SERVICE ElectricandGasDryer DLE5977W / DLG5988W DLE5977B / DLG5988B DLE3777W / DLG3788W DLE5977S / DLG5988S t77WM / DLG5988WM / DLG5988SM / DLG5988BM LG Dryer. carefully, as it provides instructions on Numbers, and retain the manual at http:/ /us.lge.com p.html P/No.: - LG DLG5988S | Owners Manual - Page 2
INSTALLATION ...PARTS. ELECTRICAL REQUIREMENTS FOR ELECTRIC DRYER ...PART6. ELECTRICAL REQUIREMENTS FOR GAS DRYERS ...PART7. GAS REQUIREMENTS AND INSTRUCTIONS ...PART8. EXHAUST REQUIREMENTS AND MAINTENANCE ...PARTg. OPERATING YOUR DRYER ...PART10. TROUBLESHOOTING GUIDE ...LG DRYER LIMITED WARRANTY - LG DLG5988S | Owners Manual - Page 3
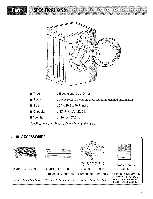
• Rating Electric and Gas Dryer Please refer to the rating label regarding detailed information. • Size 27 x 29.9 x 38.7(inch) • Capacity IEC 7.3cu.ft. (22.5 Ib) • Weight 126 Ibs (57.2 kg) Specifications are subject to change by manufacturer. ACCESSORIES Dryer rack (1 each) Stacking kit - LG DLG5988S | Owners Manual - Page 4
WARRANTY ASSISTANCE The Warranty for your Dryer is located at the end of this manual. Warranty Service is available by contacting your nearest LG Service Center. If this product is installed and operated per this manual, LG will repair or replace any parts defective in material or workmanship - LG DLG5988S | Owners Manual - Page 5
repair or replace any part of the appliance or attempt any servicing unless specifically recommended in the user-maintenance instructions. 9) Do not use heat to dry conductor can result in a risk of electric shock. Check with a qualified electrician or service person if you are in doubt as to - LG DLG5988S | Owners Manual - Page 6
, electric shock, property damage, personal injury or death when using this appliance, please follow all instructions and information, including those in this manual and instructions and information provided by your gas supplier, including the following: • Do not store or use any gasoline, dry - LG DLG5988S | Owners Manual - Page 7
with any installation or use. More detailed instructions concerning electrical connections, gas connections, and exhaust requirements are provided at other parts of this manual. Choose a location with a solid floor for your dryer. Place the dryer at least eighteen inches above the floor for - LG DLG5988S | Owners Manual - Page 8
also provide important information concerning the placement of and clearances for your dryer. Please review this entire manual before proceeding with any installation. The door on your dryer can be installed to open either to the left or the right. Follow these procedures to reverse the direction - LG DLG5988S | Owners Manual - Page 9
drying performance. In addition to the following warnings, please refer to manual section on Exhaust Requirements and Maintenance. IMPORTANT." To reduce the risk of fire, combustion, and gas accumulation, the dryer must be vented to the outdoors. Please follow the instructions is a SVC part) f \ 3-1. - LG DLG5988S | Owners Manual - Page 10
fluid. Refer to Part 7(page 20) 5. For LP (Liquefied Petroleum) gas connection, refer to this manual's section entitled Gas Requirements and Instructions. 10 Following are several warnings and instructions concerning making the electrical connection t_r electric dryers. More detailed information - LG DLG5988S | Owners Manual - Page 11
two minutes. Confirming Heat Source in Electric Dryers Close the door to the dryer drum/drying compartment and, after completing all steps in this manual for proper installation of this dryer, start the dryer on a heat setting, as described more fully in the operating instructions that accompany the - LG DLG5988S | Owners Manual - Page 12
, please contact a service and installation professional for assistance. The following instructions apply to any installation of the dryer in a manufactured or mobile home: 1) The gas dryer must be permanently attached to the floor. 2) The electrical connection for an electric dryer must be a 4-wire - LG DLG5988S | Owners Manual - Page 13
observe the instructions below. WARNING! Incorrect Installation can cause serious accidents. The weight of the dryer and the height of installation makes the stacking procedure too risky for one person. This procedure should be performed by 2 or more experienced service personnel, Stackingkit - LG DLG5988S | Owners Manual - Page 14
, installation hardware, and instructions from the shipping carton. Position dryer on top of the pedestal. NOTE : Because of the weight of the dryer two or more people may be needed. NOTE : If dryer was previously installed, uninstall it as follows: A. Uninstalling an electric dryer: 1) Unplug the - LG DLG5988S | Owners Manual - Page 15
regulations. Please contact a qualified electrician to check your home's wiring and fuses to ensure that your home has adequate electrical power to operate the dryer. 120V/240M 60 Hertz, 3-Wire Installation Instructions for Grounding of your Electric Dryer: a) Please note that the wiring diagram - LG DLG5988S | Owners Manual - Page 16
120 Volt, 60 Hertz, with 3-Prong Grounding Plug Following are additional instructions regarding electrical connections and requirements for gas dryers. Important Warning: To help prevent fire, electric shock, serious injury or death, the wiring and grounding must conform to the latest edition of - LG DLG5988S | Owners Manual - Page 17
non-corrosive leak detection fluid. WARNING! DO NOT attempt any disassembly of the dryer, any disassembly requires the attention and tools of an authorized and qualified service person or company, • Use a new AGA or CSA approved gas supply line. • Install a shut-off valve. • Securely tighten all - LG DLG5988S | Owners Manual - Page 18
crawl space, chimney, gas vent, or concealed space of a building. To reduce the risk of fire, DO NOT exhaust the dryer with plastic or m) 15 feet (4.5m) Exhaust Requirements and Instructions: 1. Venting materials are not provided with the dryer and you should obtain the necessary venting materials - LG DLG5988S | Owners Manual - Page 19
wires prior to disconnection when servicing the dryer, because wiring errors can cause serious injury to you and your dryer. Cleaning the Lint Screen 1. Clean the lint filter either before drying each load or after drying each load. Always make sure the lint filter is clean before starting a new - LG DLG5988S | Owners Manual - Page 20
the risk of fire, electric shock, or injury to person, read this entire manual, including the lmportanl Safely lnstrudions, before operating this dryer. DLE5977W/DLG5988W/DLE5977B/DLG5988B/DLE5977S/DLG5988S/DLE5977WM/DLG5988WM/ DLE5977SM/DLG5988SM/DLE5977BM/DLG5988BM CYCLESELECTOR Time change - LG DLG5988S | Owners Manual - Page 21
LESS TIME until the desired drying time is set. MORE TIME LESSTIME Time change button is available only with Manual Dry, Time Dry and Rack Dry programs. EstimatedTime • The Display shows the estimated time remaining. In addition to this, if the dryer has some problem, it displays error messages - LG DLG5988S | Owners Manual - Page 22
1.0pen the door. 3 Hold the dryer rack with both hands. 2. Put the dryer rack into the drum 3. Make sure Dryer RACK is evenly spaced right onto the drum inside and door rim. DonJt use Rack for normal tumble drying. Rack Dry is shipped in place in your dryer so remove rack for normal laundry - LG DLG5988S | Owners Manual - Page 23
Time on your own. You can select the desired operation time manually by pressing Time Dry button which ranges from 20 to 60 minutes. O 60{MIN} O 30 Manual Dry Cycles Load Type SPEED DRY SMALL LOADS FRESHEN UP Remove Wrinkles AIR DRY Templ Default Time* (Minutes) High 25 Medium 20 High Air - LG DLG5988S | Owners Manual - Page 24
laund U into dryer and shut dool: See Loading. • Turn the Dlob to select the drying cycle you want. The preset setting for Sensor DU Cycles or Manual Cycles will these instruction can llelp reduce your utility bill, prolong the life of your clothes, mad decrease the likelihood of uneven drying mad - LG DLG5988S | Owners Manual - Page 25
glass door to keep inside view clear through the glass. 1.Open the door and pull the filter straight up 2.Clean the filter using one of following ways in cases. Run the fingers across the filter , _) Vacuum the lint filter @ Wash the lint screen in warm, soapy water. Dry thoroughly and replace. 2% - LG DLG5988S | Owners Manual - Page 26
Check your home's or laundry room's fuse box/circuit breaker box and replace the fuse or reset the circuit breaker. (IMPORTANT: electric dryers generally use two fuses or breakers.) 2.Problem:My Dryer Doesn't Heat , Is the fuse blown, or is the Circuit breaker tripped ? • Isthe assu 1 or service - LG DLG5988S | Owners Manual - Page 27
':" lry using a fabric softener. 6.Problem:The drying time is not consistent • Are you usiug consistent heat settings tuld consistent load sizes'? The dryiug time for a load will vary depending on the heat setting, the type of heat I used (electric, natural or LP gas). the size of the load. the - LG DLG5988S | Owners Manual - Page 28
a slight amount of moisture. Remove your laundry from the dryer after the drying cycle ends trod either hang or fold the items. 9.Problem:My clothes are shrinking •Are you following the care instructions for your garment? • PLM problem 28 To avoid shrinkage, please caretully follow the care trod - LG DLG5988S | Owners Manual - Page 29
: CalI1-888-542-2623(1-888-LG-CANADA)ancdhoose the appropriate prompt, Please have product type (Dryer), model number, serial number, and ZIPcode ready, The warranted 2-year of labor covers the cost of In-Home Service on all parts including the Drum Tub and Motor, THISWARRANTYIS IN LIEUOF ANY - LG DLG5988S | Owners Manual - Page 30
iiiiiiiiiiiiiiiiiiiiiiiiiiiiiiiiiJi_J" 1-888-LGCANADA POUR SERVICE A LA CLIENTE_LE DE LG G S cheuse gazet lectrique DLE5977W / DLG5988W DLE5977B / DLG5988B DLE3777W / DLG3788W :)LE5977S / DLG5988S P77WM / DLG5988WM SM / DLG5988SM / DLG5988BM e secheuse LG. Lire attentivement ce Rstructions pour une - LG DLG5988S | Owners Manual - Page 31
EXIGENCES I_LECTRIQUES DE LA SI_CHEUSE A GAZ ...PARTIE 7. EXIGENCES EN GAZ ET INSTRUCTIONS ...PARTIE 8. EXIGENCES D'ECHAPPEMENT ET ENTRETIEN ...PARTIE 9. FONCTIONNEMENT DE LA SECHEUSE ...PARTIE 10. GUIDE DE DEPANNAGE ...GARANTIE LIMITI_E DE LA SECHEUSE LG ...2 3 4-6 7-12 13-14 15 16 17 18-19 20-25 - LG DLG5988S | Owners Manual - Page 32
(57.2 kg) Les donnees techniques sont sujettes & des changements par le fabricant ACCESSOIRES 1 support de secheuse Voir page 24 sur la fafon d' utilise r. Necessaire b. empiler o achete s6parement distance A acheter separ6ment (DLE5977WM, DLG5988WM, DLE5977SM, DLG5988SM, DLE5977BM, DLG5988BM) 3 - LG DLG5988S | Owners Manual - Page 33
La garantie de la secheuse est & la fin de ce guide. Le service sous garantie est disponible en communiquant avec le centre de service LG. Si ce produit est installe et utilise selon les instructions de ce guide, LG reparera ou remplacera toute piece presentant un defaut de fabrication ou - LG DLG5988S | Owners Manual - Page 34
. 8. Ne pas r@arer ni remplacer des pRces de l'appareil ou tenter d'effectuer le service h moins de recommandations sp_cifiques donn_es dans les instructions d'entretien de l'utilisateur. CONSERVER CES INSTRUCTIONS INSTRUCTIONS DE MISE A, LA TERRE Cet appareil doit _tre mis h la terre. Dans le - LG DLG5988S | Owners Manual - Page 35
, tall@honer au service des incendies. _, AVERTISSEMENT Pour rdduire le risque d'incendie, d'explosion, de choc dlectrique, de dommages 5 la propridtd, de blessures ou de mort au moment d'utiliser cet appareil, suivre toutes les informations et les instructions, incluant celles de ce guide et celles - LG DLG5988S | Owners Manual - Page 36
Ce d6gagement minimum requis est donn6 dans l'illustration ci-dessous, Conserver ces instructions pour l'installation dans une garde-robe ou un endroit en retrait, • Consid_rer un d_gagement additionnel pour l'installation et le service. • Moulures de mur, de porte, de plancher peuvent n@essiter des - LG DLG5988S | Owners Manual - Page 37
ne pas sdcher addquatement et les capteurs de cycle peuvent ne pas fonctionner de fagon appropride. Remarque : D'autres sections dans ce guide donnent des informations importantes concernant l'emplacement et les ddgagements. Revoir ces sections avant de procdder _t l'installation. La porte peut 8tre - LG DLG5988S | Owners Manual - Page 38
le risque d'incendie, de combustion et d'accumulation de gaz, la sdcheuse dolt 6tre ventilde vers l'extdrieur. Suivre les instructions suivantes (et autres donndes dans le guide) attentivement. • Ne pas utiliser de conduit en plastique ou en aluminium. • Utiliser des conduits en mdtal flexible ou - LG DLG5988S | Owners Manual - Page 39
Au besoin, un technicien qualifi6 doit fake la conversion de I,embout et indiquer ou apposer une 6tiquette instructions concernant les connexions 41ectriques suivent. Plus de d4tails sont donn4s h la section exigences 41ectriques. I1 est important de bien lire cette section et de conserver ce guide - LG DLG5988S | Owners Manual - Page 40
secheuse a gaz Fermer la porte et apr_s avoir complEtE toutes les Etapes dans ce guide pour une installation adequate, mettre l'appareil en marche sur un rEglage de chaleur tel qu'il est dEcrit dans les instructions de fonctionnement fournies avec la sEcheuse. Aprbs la mise en marche de la sEcheuse - LG DLG5988S | Owners Manual - Page 41
32-80 ou aux normes CAN/ACNOROZ240MH et les codes et r_glements locaux. En cas de doute, communiquer avec une agence de service ou un professionnel. Les instructions suivantes s'applique h toute installation de la sdcheuse dans une maison mobile. 1. La sdcheuse doit Etre fixde de facon permanente au - LG DLG5988S | Owners Manual - Page 42
& suivre doit _tre effectuee par au moins deux personnes de service experiment6es. Fixer de fa£on s6curitaire la fixation lat6rale du dispositif stable, tel qu'il est d6crit dans les instructions du guide du propri6taire. Rlaet6tirraelrele dupadpisieprosiptirfotedc'teemurpilasguer. la fixation - LG DLG5988S | Owners Manual - Page 43
du sechoir, plus de deux personnes so_,_n6cessaires. NOTE : Au cas oQ le sechoir a et6 install6 prealablement, le desinstaller selon les instructions suivantes: A. D_sinstaller le s_choir _lectrique: 1) D6brancher le fil electrique. 2) Laisser assez d'espace entre le sechoir et le mur pour permettre - LG DLG5988S | Owners Manual - Page 44
pour l'installation sur place des sdcheuses qui sont branchd sur un service dlectrique de different voltage que celui indiqud sur la plaque signaldtique, calibre du fil doivent 8tre conforme aux codes locaux et aux instructions des pages suivantes. f) La mdthode de cfibler l'appareil est - LG DLG5988S | Owners Manual - Page 45
terre a 3 broches, 120 volts, 60 Hertz Les instructions suivantes s'appliquent aux connexions dlectriques et les exigences pour tier de la sdcheuse, l_tiqueter tousles ills avant de ddbrancher au moment du service de l'appareil. Des erreurs de cfiblages peuvent causer des blessures sdrieuses ou - LG DLG5988S | Owners Manual - Page 46
Les instructions suivantes s'appliquent aux exigences pour l'alimentation en gaz et le service pour les sdcheuses gaz. _ Avertissement important : L'alimentation en gaz et le service pour la sdcheuse _t gaz doivent 8tre conformes _ tousles codes et rEglements locaux. En l'absence de ces derniers, l' - LG DLG5988S | Owners Manual - Page 47
REMARQUE : Deduire 6 pi (1,8 m) pour chaque coude additionnel. II n'est pas recommande d'utiliser plus de 4 coudes 90 ° Exigences d'echappement et instructions 1. Les matdriaux de ventilation ne sont pas fournis avec l'appareil et doivent Etre obtenus localement. Par exemple, l'extrdmitd extdrieure - LG DLG5988S | Owners Manual - Page 48
Voir n ° 2. 12. Le diagramme de cfiblage est h l'intErieur du panneau de contr61e, l_tiqueter tousles fils avant de dEbrancher au moment du service de l'appareil. Des erreurs de cfiblages peuvent causer des blessures sErieuses ou endommager la sEcheuse Nettoyage de la crepine a charpie l. Nettoyer - LG DLG5988S | Owners Manual - Page 49
/DLGS988WM/ DLE5977SM/DLG5988SM/DLE5977BM/DLG5988 SELECTEURDE BM Touche changement DUREE POSITION Verrouillageenfant Nettoyagefiltre S_chagepar Anti froissement capteur CYCLE dur6e RESIDUELLE VOYANT S6chageminut6 PERM PRESS . NOR_ COTTONflOWE' LS HEAVY DUTY *MANUAL DRY SPEEDDRY FRESHENUP - LG DLG5988S | Owners Manual - Page 50
S61ectionde cycle • En tournant le bouton, sdlectionner le cycle ddsird en fonction du type de lessive et des conditions. 1. Cycle de s6chage par capteur Les cycles de s@hage par capteur pem_ettent de faire correspondre le cycle _tla charge. Chaque cycle s@he certains tissus 'ala temp&ature - LG DLG5988S | Owners Manual - Page 51
de contr61e pendant le sdchage. Lorsque activd, toutes les touches sont verrouilldes et le voyant s'allume. Pour verrouiller Presser et maintenir RACK DRY (sdchage support) pendant 3 secondes. Une tonalitd est entendue et CL figure _t l'affichage. Pour ddverrouiller, presser et maintenir RACK - LG DLG5988S | Owners Manual - Page 52
3. Entretien froissement Cette option aide h prdvenir le froissement de la lessive. En choisissant cette option, la sdcheuse fait culbuter pdriodiquement les v&ements jusqu'_ trois heures une fois le cycle compl&& L'on peut utiliser cette option si l'on ne peut retirer les v&ements immddiatement - LG DLG5988S | Owners Manual - Page 53
le poids. • l_viter de surcharger la s@heuse. En observant ces instructions, cela peut aider h rdduim la factum d'alimentation, h prolonger la vie le froissement et l'humidit& 3. Utilisation du s_chaqe par capteur • Sdlectionner DRY LEVEL (niveau de sdchage) pour rEgler le taux de sdchage de la - LG DLG5988S | Owners Manual - Page 54
et la durde change en tranches de 1 minute. Cette fonction peut _tre utilis6e avec les cycles de s6chage manuel, s6chage minut6 et s6chage support. • Presser TEMP CONTROL jusqu'_ ce que le voyant de la tempdrature ddsirde figure. • (t_TAPE OPTIONNELLE). Si ddsird, sdlectionner OPTIONS. Pour plus de - LG DLG5988S | Owners Manual - Page 55
habituellement 2 fusibles ou coupe-circuit • L'alimentation en gaz ou le service est-il obstru6 ou arrOt6 ? S'assurer que la soupape de gaz de • taches tie graisse sur les vP.tements ' A-t-on suivi les instructions de ...... l'assouplissant ? • Sbche-t-on des v5tements propres et sales en - LG DLG5988S | Owners Manual - Page 56
# Probl_me • charlaie sur les v_tements • Le filtre _lcharpie est-il plein ? Voir la mbrique concemtmt le nettoyage du filtre _lcharpie et s'assurer qu'il est propre avant et aprbs chaque charge,, • A-t-on bien tri_ la charge ? • Les vOtements ont-ils un excbs d'_lectricit_ statique ? Afin de - LG DLG5988S | Owners Manual - Page 57
ou le coupecircuit d_clench_ ? A+on surchargd la sdcheuse ? A-t-on sous charg& la sdcheuse ? S'assurer de relire les rubriques approprides dans ce guide concerntmt les conduits d'_chappement, s assurer qu i! n y a pas d'0bstruction, que les registres l_nctio_mement bien, etc. Vdrifier la boi'te de - LG DLG5988S | Owners Manual - Page 58
facture cornme preuve de la date d'achat Un exemplaire de la facture dolt 6tre pr6sent6 au moment service sous garantie est fourni, ot_ un T61Gphoner au 1-888-542-2623 (1-888-LG-CANADA): (lun, au yen, 8 h (_ 17 h Est; de 9 h (_ 18 h Central), Presser I'option du menu appropri6e et avoir le
-
 1
1 -
 2
2 -
 3
3 -
 4
4 -
 5
5 -
 6
6 -
 7
7 -
8
-
9
-
10
-
11
-
12
-
13
-
14
-
15
-
16
-
17
-
18
-
19
-
20
-
21
-
22
-
23
-
24
-
25
-
26
-
27
-
28
-
29
-
30
-
31
-
32
-
33
-
34
-
35
-
36
-
37
-
38
-
39
-
40
-
41
-
42
-
43
-
44
-
45
-
46
-
47
-
48
-
49
-
50
-
51
-
52
-
53
-
54
-
55
-
56
-
57
-
58
 |
 |
1-888-LGCANADA
FOR LG CUSTOMER
SERVICE
ElectricandGasDryer
DLE5977W
/
DLG5988W
DLE5977B
/
DLG5988B
DLE3777W
/
DLG3788W
DLE5977S
/
DLG5988S
t77WM
/
DLG5988WM
/
DLG5988SM
/
DLG5988BM
LG Dryer.
carefully,
as it provides
instructions
on
Numbers,
and
retain
the
manual
at http:/
/us.lge.com
p.html
P/No.:
3828EL3003B