LG LP1200DXR Owner's Manual - Page 18
Installation In Casement Style Windows
 |
View all LG LP1200DXR manuals
Add to My Manuals
Save this manual to your list of manuals |
Page 18 highlights
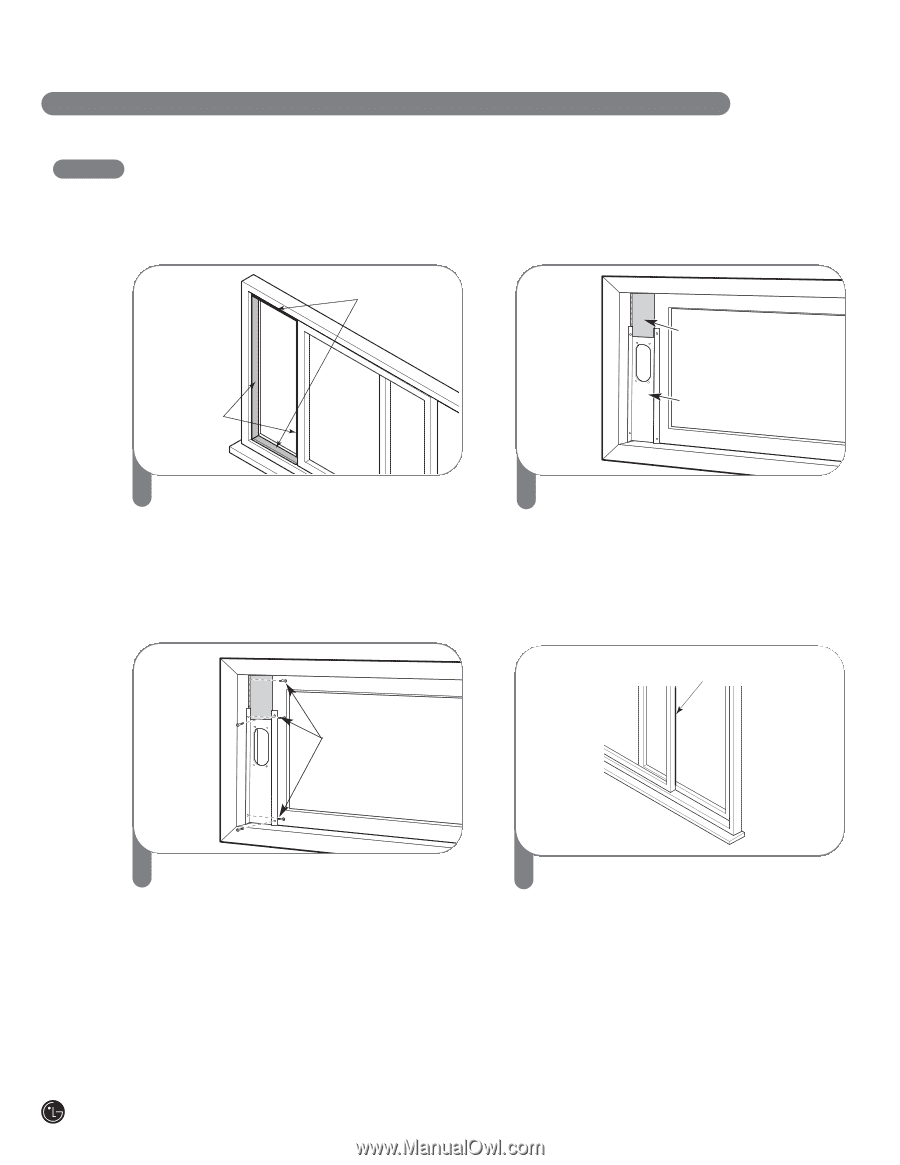
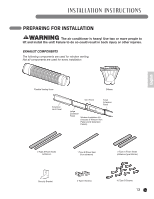
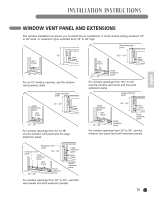
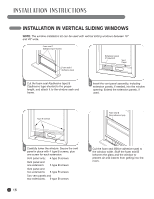
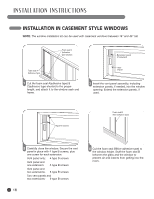
INSTALLATION INSTRUCTIONS INSTALLATION IN CASEMENT STYLE WINDOWS NOTE: The window installation kit can be used with casement windows between 18ʺ and 48ʺ tall. Foam seal C (Adhesive type-shorter) Foam seal A (Adhesive type) 1 Cut the foam seal A(adhesive type) & C(adhesive type-shorter) to the proper length, and attach it to the window sash and frame. Sellado con espuma A Type B sc(triepwo sadhesivo) Extension panel (if required) Vent Panel 2 Insert the vent panel assembly, including extension panels, if needed, into the window opening. Extend the extension panels, if used. Sellado con espuma C (tipo adhesivo- más corto) Foam seal B (Non-adhesive type) 3 Carefully close the window. Secure the vent panel in place with 4 type B screws, plus one screw for each extension: Vent panel only: 4 type B screws Vent panel and one extension: 5 type B screws Vent panel and two extensions: 6 type B screws Two vent panels and two extensions: 9 type B screws 18 4 Cut the foam seal B(Non-adhesive Jtoyipntes )ento the window height. Stuff the foam sMeoausl sBe C between the glass and the window(ptlous court de prevent air and insects from gettingtypinetaodhtéhseif) room. Sellado con esp (tipo adhesivo) Joints en Mousse A (Type adhésif)
-
 1
1 -
2
-
3
-
4
-
5
-
6
-
7
-
8
-
9
-
10
-
11
-
12
-
 13
13 -
 14
14 -
 15
15 -
 16
16 -
 17
17 -
 18
18 -
 19
19 -
 20
20 -
 21
21 -
 22
22 -
 23
23 -
24
-
25
-
26
 |
 |