Lenovo H430 Lenovo H4 Series Hardware Maintenance Manual V2.0 - Page 61
Replacing the external speaker, Completing the installation
 |
View all Lenovo H430 manuals
Add to My Manuals
Save this manual to your list of manuals |
Page 61 highlights
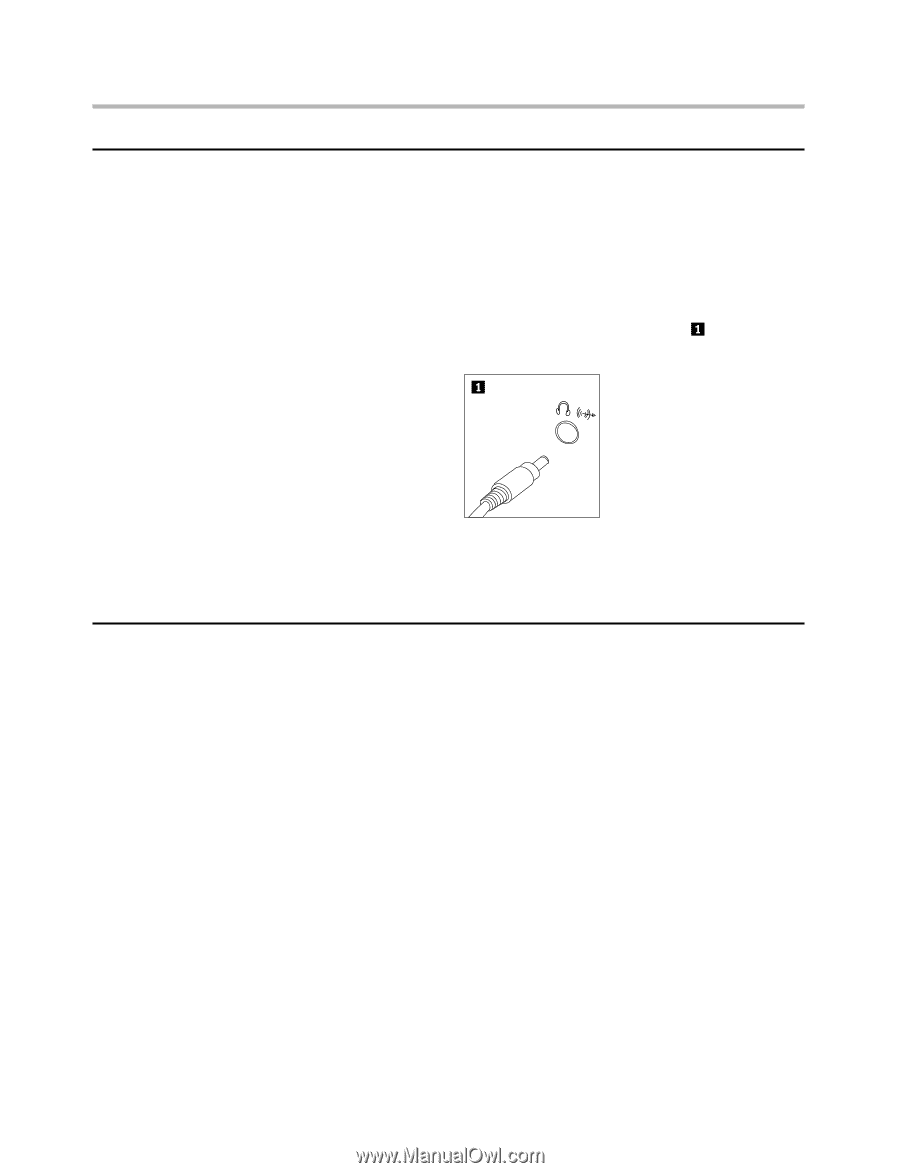
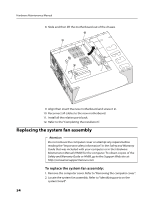
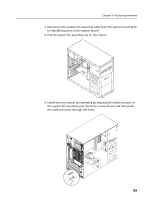
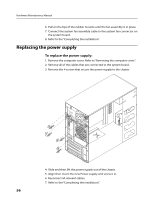
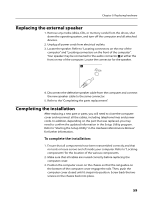
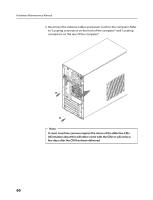
Chapter 9. Replacing hardware Replacing the external speaker 1. Remove any media (disks, CDs, or memory cards) from the drives, shut down the operating system, and turn off the computer and all attached devices. 2. Unplug all power cords from electrical outlets. 3. Locate the speaker. Refer to "Locating connectors on the rear of the computer" and "Locating connectors on the front of the computer". Your speaker may be connected to the audio connector at either the front or rear of the computer. Locate the connector for the speaker. 4. Disconnect the defective speaker cable from the computer and connect the new speaker cable to the same connector. 5. Refer to the "Completing the parts replacement". Completing the installation After replacing a new part or parts, you will need to close the computer cover and reconnect all the cables, including telephone lines and power cords. In addition, depending on the part that was replaced, you may need to confirm the updated information in the Setup Utility program. Refer to "Starting the Setup Utility" in the Hardware Maintenance Manual for further information.. To complete the installation: 1. Ensure that all components have been reassembled correctly and that no tools or loose screws are left inside your computer. Refer to "Locating components" for the location of the various components. 2. Make sure that all cables are routed correctly before replacing the computer cover. 3. Position the computer cover on the chassis so that the rail guides on the bottom of the computer cover engage the rails. Then, push the computer cover closed until it snaps into position. Screw back the two screws on the chassis back into place. 59
-
 1
1 -
2
-
3
-
4
-
5
-
6
-
7
-
8
-
9
-
10
-
11
-
12
-
13
-
14
-
15
-
16
-
17
-
18
-
19
-
20
-
21
-
22
-
23
-
24
-
25
-
26
-
27
-
28
-
29
-
30
-
31
-
32
-
33
-
34
-
35
-
36
-
37
-
38
-
39
-
40
-
41
-
42
-
43
-
44
-
45
-
46
-
47
-
48
-
49
-
50
-
51
-
52
-
53
-
54
-
55
-
 56
56 -
 57
57 -
 58
58 -
 59
59 -
 60
60 -
 61
61 -
 62
62 -
 63
63 -
 64
64 -
 65
65 -
 66
66
 |
 |