Lenovo ThinkCentre A52 Hardware Maintenance Manual - Page 49
General, Checkout - beep codes
 |
View all Lenovo ThinkCentre A52 manuals
Add to My Manuals
Save this manual to your list of manuals |
Page 49 highlights
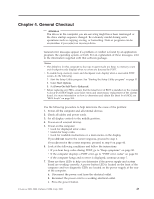
Chapter 4. General Checkout Attention The drives in the computer you are servicing might have been rearranged or the drive startup sequence changed. Be extremely careful during write operations such as copying, saving, or formatting. Data or programs can be overwritten if you select an incorrect drive. General error messages appear if a problem or conflict is found by an application program, the operating system, or both. For an explanation of these messages, refer to the information supplied with that software package. Notes: v The default is for this computer to boot up in quiet mode (no beep, no memory count and checkpoint code display) when no errors are detected by POST. v To enable beep, memory count, and checkpoint code display when a successful POST occurs, do the following: 1. Start the Setup Utility program. See "Starting the Setup Utility program" on page 53. 2. Select Start Options. 3. Set Power-On Self-Test to Enhanced. v Before replacing any FRUs, ensure that the latest level of BIOS is installed on the system. A down-level BIOS might cause false errors and unnecessary replacement of the system board. For more information on how to determine and obtain the latest level BIOS, see "BIOS levels" on page 268. Use the following procedure to help determine the cause of the problem: 1. Power-off the computer and all external devices. 2. Check all cables and power cords. 3. Set all display controls to the middle position. 4. Power-on all external devices. 5. Power-on the computer. v Look for displayed error codes v Listen for beep codes v Look for readable instructions or a main menu on the display. If you did not receive the correct response, proceed to step 6. If you do receive the correct response, proceed to step 8 on page 44. 6. Look at the following conditions and follow the instructions: v If you hear beep codes during POST, go to "Beep symptoms" on page 80. v If the computer displays a POST error, go to "POST error codes" on page 83. v If the computer hangs and no error is displayed, continue at step 7. 7. There are three LEDs to help you determine if the power supply and system board are working correctly. A power button LED is located on the front of the computer and two diagnostic LEDs are located on the power supply at the rear of the computer. a. Disconnect the power cord from the electrical outlet. b. Reconnect the power cord to a working electrical outlet. c. Press the power button. © Lenovo 2005, 2008. Portions © IBM Corp. 2005. 43
-
 1
1 -
2
-
3
-
4
-
5
-
6
-
7
-
8
-
9
-
10
-
11
-
12
-
13
-
14
-
15
-
16
-
17
-
18
-
19
-
20
-
21
-
22
-
23
-
24
-
25
-
26
-
27
-
28
-
29
-
30
-
31
-
32
-
33
-
34
-
35
-
36
-
37
-
38
-
39
-
40
-
41
-
42
-
43
-
 44
44 -
 45
45 -
 46
46 -
 47
47 -
 48
48 -
 49
49 -
 50
50 -
 51
51 -
 52
52 -
 53
53 -
 54
54 -
55
-
56
-
57
-
58
-
59
-
60
-
61
-
62
-
63
-
64
-
65
-
66
-
67
-
68
-
69
-
70
-
71
-
72
-
73
-
74
-
75
-
76
-
77
-
78
-
79
-
80
-
81
-
82
-
83
-
84
-
85
-
86
-
87
-
88
-
89
-
90
-
91
-
92
-
93
-
94
-
95
-
96
-
97
-
98
-
99
-
100
-
101
-
102
-
103
-
104
-
105
-
106
-
107
-
108
-
109
-
110
-
111
-
112
-
113
-
114
-
115
-
116
-
117
-
118
-
119
-
120
-
121
-
122
-
123
-
124
-
125
-
126
-
127
-
128
-
129
-
130
-
131
-
132
-
133
-
134
-
135
-
136
-
137
-
138
-
139
-
140
-
141
-
142
-
143
-
144
-
145
-
146
-
147
-
148
-
149
-
150
-
151
-
152
-
153
-
154
-
155
-
156
-
157
-
158
-
159
-
160
-
161
-
162
-
163
-
164
-
165
-
166
-
167
-
168
-
169
-
170
-
171
-
172
-
173
-
174
-
175
-
176
-
177
-
178
-
179
-
180
-
181
-
182
-
183
-
184
-
185
-
186
-
187
-
188
-
189
-
190
-
191
-
192
-
193
-
194
-
195
-
196
-
197
-
198
-
199
-
200
-
201
-
202
-
203
-
204
-
205
-
206
-
207
-
208
-
209
-
210
-
211
-
212
-
213
-
214
-
215
-
216
-
217
-
218
-
219
-
220
-
221
-
222
-
223
-
224
-
225
-
226
-
227
-
228
-
229
-
230
-
231
-
232
-
233
-
234
-
235
-
236
-
237
-
238
-
239
-
240
-
241
-
242
-
243
-
244
-
245
-
246
-
247
-
248
-
249
-
250
-
251
-
252
-
253
-
254
-
255
-
256
-
257
-
258
-
259
-
260
-
261
-
262
-
263
-
264
-
265
-
266
-
267
-
268
-
269
-
270
-
271
-
272
-
273
-
274
-
275
-
276
-
277
-
278
-
279
-
280
-
281
-
282
 |
 |