Lenovo ThinkPad T420 (English) BIOS Setup using Windows Management Instrumenta - Page 21
Typical, usage
 |
View all Lenovo ThinkPad T420 manuals
Add to My Manuals
Save this manual to your list of manuals |
Page 21 highlights
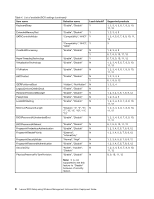
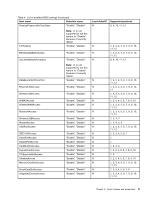
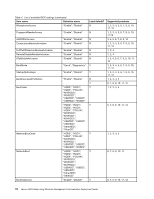
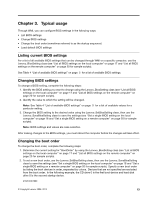
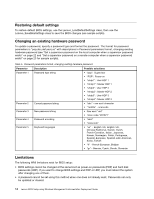
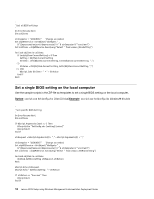
Chapter 3. Typical usage Through WMI, you can configure BIOS settings in the following ways: • List BIOS settings • Change BIOS settings • Change the boot order (sometimes referred to as the startup sequence) • Load default BIOS settings Listing current BIOS settings For a list of all available BIOS settings that can be changed through WMI on a specific computer, use the Lenovo_BiosSetting class (see "List all BIOS settings on the local computer" on page 17 and "List all BIOS settings on the remote computer" on page 20 for sample scripts). See Table 4 "List of available BIOS settings" on page 5 for a list of available BIOS settings. Changing BIOS settings To change a BIOS setting, complete the following steps: 1. Identify the BIOS setting you want to change using the Lenovo_BiosSetting class (see "List all BIOS settings on the local computer" on page 17 and "List all BIOS settings on the remote computer" on page 20 for sample scripts). 2. Identify the value to which the setting will be changed. Note: See Table 4 "List of available BIOS settings" on page 5 for a list of available values for a particular setting. 3. Change the BIOS setting to the desired value using the Lenovo_SetBiosSetting class, then use the Lenovo_SaveBiosSetting class to save the settings (see "Set a single BIOS setting on the local computer" on page 18 and "Set a single BIOS setting on a remote computer" on page 20 for sample scripts). Note: BIOS settings and values are case sensitive. After making changes to the BIOS settings, you must reboot the computer before the changes will take effect. Changing the boot order To change the boot order, complete the following steps: 1. Determine the current setting for "BootOrder" by using the Lenovo_BiosSetting class (see "List all BIOS settings on the local computer" on page 17 and "List all BIOS settings on the remote computer" on page 20 for sample scripts). 2. To set a new boot order, use the Lenovo_SetBiosSetting class, then use the Lenovo_SaveBiosSetting class to save the settings (see "Set a single BIOS setting on the local computer" on page 18 and "Set a single BIOS setting on a remote computer" on page 20 for sample scripts). Specify a new boot order by listing the boot devices in order, separated by colons. Devices that are not specified are excluded from the boot order. In the following example, the CD drive 0 is the first boot device and hard disk drive 0 is the second startup device. ATAPICD0:HDD0 © Copyright Lenovo 2008, 2012 13
-
 1
1 -
2
-
3
-
4
-
5
-
6
-
7
-
8
-
9
-
10
-
11
-
12
-
13
-
14
-
15
-
 16
16 -
 17
17 -
 18
18 -
 19
19 -
 20
20 -
 21
21 -
 22
22 -
 23
23 -
 24
24 -
 25
25 -
 26
26 -
27
-
28
-
29
-
30
-
31
-
32
-
33
-
34
-
35
-
36
-
37
-
38
-
39
-
40
 |
 |