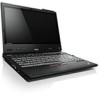
Lenovo ThinkPad X220i Hardware Maintenance Manual
Lenovo ThinkPad X220i Manual
 |
View all Lenovo ThinkPad X220i manuals
Add to My Manuals
Save this manual to your list of manuals |
Lenovo ThinkPad X220i manual content summary:
- Lenovo ThinkPad X220i | Hardware Maintenance Manual - Page 1
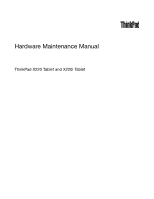
Hardware Maintenance Manual ThinkPad X220 Tablet and X220i Tablet - Lenovo ThinkPad X220i | Hardware Maintenance Manual - Page 2
this information and the product it supports, be sure to read the general information under "Notices" on page 140. Fifth Edition (March 2012) © Copyright Lenovo 2012. LIMITED AND RESTRICTED RIGHTS NOTICE: If data or software is delivered pursuant a General Services Administration "GSA" contract, use - Lenovo ThinkPad X220i | Hardware Maintenance Manual - Page 3
. 59 Chapter 8. Removing and replacing a FRU 61 Before servicing ThinkPad X220 Tablet and X220i Tablet models 62 1010 Digitizer pen 63 1020 Battery pack 63 1030 Hard disk drive (HDD) and solid state drive (SSD 64 1040 DIMM 66 1050 Hinge caps 68 1060 Keyboard 68 1070 Palm rest 71 1080 Backup - Lenovo ThinkPad X220i | Hardware Maintenance Manual - Page 4
mode 107 Bottom view 107 Top view (ThinkPad X220 UltraBase 108 Bottom view (ThinkPad X220 UltraBase). . . . . 108 Chapter 10. Parts list 109 Overall 110 LCD FRUs 126 Keyboard 130 Miscellaneous parts 131 ac power adapter 132 Power cords 133 Recovery discs 134 Windows XP Professional DVDs - Lenovo ThinkPad X220i | Hardware Maintenance Manual - Page 5
this manual This manual contains service and reference information for the following ThinkPad® products. ThinkPad X220 Tablet and Machine types (MT) 4294, 4296, 4297, 4298, 4299, 4300, and 4301 X220i Tablet Use this manual along with the advanced diagnostic tests to troubleshoot problems. Important - Lenovo ThinkPad X220i | Hardware Maintenance Manual - Page 6
iv Hardware Maintenance Manual - Lenovo ThinkPad X220i | Hardware Maintenance Manual - Page 7
service a ThinkPad Notebook. • "General safety" on page 1 • "Electrical safety" on page 2 • "Safety inspection guide object equally between your feet. 3. Use a slow lifting force. Never move suddenly or twist when for you. • Do not perform any action that causes hazards to the customer, Lenovo 2012 1 - Lenovo ThinkPad X220i | Hardware Maintenance Manual - Page 8
or near equipment that has hazardous voltages. • Disconnect all power before: - Performing a mechanical inspection - Working near power supplies - Removing or installing main units • Before you start to work on the machine, unplug the power cord. If you cannot unplug it, ask the customer to - Lenovo ThinkPad X220i | Hardware Maintenance Manual - Page 9
at the beginning of every service task. Begin the checks with the power off, and the power cord disconnected. Checklist: 1. Check exterior covers for damage (loose, broken, or sharp edges). 2. Power off the computer. Disconnect the power cord. 3. Check the power cord for: a. A third-wire ground - Lenovo ThinkPad X220i | Hardware Maintenance Manual - Page 10
specific service requirement. Note: The use of a grounding system to guard against ESD damage is desirable but not necessary. - Attach the ESD ground clip to any frame ground, ground braid, or green-wire ground. - When working on a double-insulated or battery-operated system the computer is powered - Lenovo ThinkPad X220i | Hardware Maintenance Manual - Page 11
as required by local ordinances or regulations. Use only the battery in the appropriate parts listing when replacing the battery pack. Use of an incorrect battery can result in ignition or explosion of the battery. DANGER The lithium battery can cause a fire, an explosion, or a severe burn. Do not - Lenovo ThinkPad X220i | Hardware Maintenance Manual - Page 12
DANGER Unless hot swap is allowed for the FRU being replaced, do as follows before removing it: power off the computer, unplug all power cords from electrical outlets, remove the battery pack, and disconnect any interconnecting cables. 6 Hardware Maintenance Manual - Lenovo ThinkPad X220i | Hardware Maintenance Manual - Page 13
PERIGO Antes de ligar o computador após a substituição da FRU, certifique-se de que todos os parafusos, molas e outras peças pequenas estejam no lugar e não estejam soltos dentro do computador. Verifique isso sacudindo o computador e procurando ouvir sons de peças soltas. Peças metálicas ou lascas - Lenovo ThinkPad X220i | Hardware Maintenance Manual - Page 14
-vous qu'aucun bruit suspect ne se produit. Des pièces métalliques ou des copeaux de métal pourraient causer un court-circuit. DANGER 8 Hardware Maintenance Manual - Lenovo ThinkPad X220i | Hardware Maintenance Manual - Page 15
liste de pièces détachées adéquate. Une batterie ou une pile inappropriée risque de prendre feu ou d'exploser. DANGER La batterie contient du nickel. Ne la démontez pas, ne liste de pièces détachées adéquate. En effet, une batterie inappropriée risque de prendre feu ou d'exploser. DANGER La pile de - Lenovo ThinkPad X220i | Hardware Maintenance Manual - Page 16
batterie et déconnectez tous les câbles d'interconnexion. VORSICHT Bevor nach einem FRU-Austausch der Computer use vergessen wurden. Der Computer muß geschüttelt werden. Die Batterie kann schwere beachten. Beim Ersetzen der Batterie nur Batterien des Typs Beim Ersetzen der Batterie nur Batterien des - Lenovo ThinkPad X220i | Hardware Maintenance Manual - Page 17
Entsorgung die örtlichen Bestimmungen für Sondermüll beachten. Der LCD-Bildschirm besteht aus Glas und kann zerbrechen, wenn er unsachgemäß behandelt wird oder der Computer auf den Boden fällt. Wenn der Bildschirm beschädigt ist und die darin befindliche Flüssigkeit in Kontakt mit Haut und Augen ger - Lenovo ThinkPad X220i | Hardware Maintenance Manual - Page 18
12 Hardware Maintenance Manual - Lenovo ThinkPad X220i | Hardware Maintenance Manual - Page 19
Chapter 1. Safety information 13 - Lenovo ThinkPad X220i | Hardware Maintenance Manual - Page 20
se encuentren en la lista de piezas. La utilización de una batería no apropiada puede provocar la ignición o explosión de la misma. 14 Hardware Maintenance Manual - Lenovo ThinkPad X220i | Hardware Maintenance Manual - Page 21
Las baterías contienen pequeñas cantidades de níquel. No las desmonte, ni recargue, ni las eche al fuego o al agua ni las cortocircuite. Deséchelas tal como dispone la normativa local. Utilice sólo baterías que se encuentren en la lista de piezas al sustituir la batería. La utilización de una bater - Lenovo ThinkPad X220i | Hardware Maintenance Manual - Page 22
statements in this section are provided in the following languages: • English • Arabic • Brazilian Portuguese • French • German • Hebrew • Japanese • Korean • Spanish • Traditional Chinese 16 Hardware Maintenance Manual - Lenovo ThinkPad X220i | Hardware Maintenance Manual - Page 23
Chapter 1. Safety information 17 - Lenovo ThinkPad X220i | Hardware Maintenance Manual - Page 24
18 Hardware Maintenance Manual - Lenovo ThinkPad X220i | Hardware Maintenance Manual - Page 25
Chapter 1. Safety information 19 - Lenovo ThinkPad X220i | Hardware Maintenance Manual - Page 26
20 Hardware Maintenance Manual - Lenovo ThinkPad X220i | Hardware Maintenance Manual - Page 27
Chapter 1. Safety information 21 - Lenovo ThinkPad X220i | Hardware Maintenance Manual - Page 28
22 Hardware Maintenance Manual - Lenovo ThinkPad X220i | Hardware Maintenance Manual - Page 29
this manual. After a system board is replaced, ensure that the latest UEFI BIOS is loaded to the system board before completing the service action. To download software fixes, drivers, and UEFI BIOS, do as follows: 1. Go to http://www.lenovo.com/support. 2. Enter the product number of the computer - Lenovo ThinkPad X220i | Hardware Maintenance Manual - Page 30
drive or hard disk drive, the mSATA drive will be seen as hard disk 0 in the system, and assigned drive C:. The solid state drive or hard disk drive will be seen as hard disk 1, and assigned drive D:. The mSATA drive is installed in the wireless WAN card slot of the computer. The Lenovo preloaded - Lenovo ThinkPad X220i | Hardware Maintenance Manual - Page 31
1829-F1U). • PEW can be accessed at the following Web site: http://www.lenovo.com/support/site.wss/document.do?lndocid=LOOK-WARNTY Select Warranty lookup. Input the MT and the (Examples - hard disk drive, system board, microprocessor, LCD, and memory) Chapter 2. Important service information 25 - Lenovo ThinkPad X220i | Hardware Maintenance Manual - Page 32
Product & Parts Detail and then follow the instructions on the screen to reach the Product and Parts Details page. 2. Click the Parts Detail tab to view the list of service parts. Using the HMM For Key Commodities (Examples - hard disk drive, system board, microprocessor, LCD, and memory) Use the - Lenovo ThinkPad X220i | Hardware Maintenance Manual - Page 33
the Lenovo diagnostics programs" on page 33 • "Power system checkout" on page 35 The descriptions in this chapter apply to any ThinkPad model that supports the PC-Doctor® for DOS diagnostics program. Some descriptions might not apply to your particular computer. Before you go to the checkout guide - Lenovo ThinkPad X220i | Hardware Maintenance Manual - Page 34
as a guide in identifying and correcting problems with the ThinkPad Notebook. 1. Identify the failing symptoms in as much detail as possible. 2. Verify the symptoms. Try to re-create the failure by running the diagnostic test or by repeating the operation. System supporting the Lenovo ThinkVantage - Lenovo ThinkPad X220i | Hardware Maintenance Manual - Page 35
://www.lenovo.com/support PC-Doctor cannot be used to test a device that is in the docking station, even if the computer supports the docking station. To test a USB device, connect it to the USB connector of the computer. Testing the computer In this product, you need an external optical drive to - Lenovo ThinkPad X220i | Hardware Maintenance Manual - Page 36
• Diskette • System Load • Optical Drive Test • Intel WLAN Radio Test Notes: • In the Keyboard test in Interactive Tests, the Fn key should be held down for at least 2 seconds; otherwise, it cannot be sensed. • Video Adapter test supports only the LCD display on the ThinkPad Notebook. If you - Lenovo ThinkPad X220i | Hardware Maintenance Manual - Page 37
Form • Battery Rundown • View Test Log • Print Log • Save Log • Full Erase Hard Drive • Quick Erase Hard Drive Lenovo ThinkVantage Toolbox Lenovo ThinkVantage® Toolbox is a diagnostic program that works through the Windows operating system. It enables you to view symptoms of computer problems and - Lenovo ThinkPad X220i | Hardware Maintenance Manual - Page 38
resolve problems related to the computer. Select one of the categories listed below to display symptoms and solutions: • Check System Health • System and Device Tests • Lenovo Troubleshooting Center • System Reports • Updates and Support PC-Doctor for Rescue and Recovery In some models of ThinkPad - Lenovo ThinkPad X220i | Hardware Maintenance Manual - Page 39
then follow the instructions on the screen. For additional information about this program, see the help information system. Quick test programs Lenovo Hard Drive Quick Test and Lenovo Memory Quick Test are two quick test programs that enable you to troubleshoot and resolve computer internal storage - Lenovo ThinkPad X220i | Hardware Maintenance Manual - Page 40
tests to be performed. 7. Follow the instructions on the screen to start the test. When a problem is detected, information messages will be displayed. Refer to the messages to troubleshoot the problem. UEFI diagnostic program A UEFI diagnostic program is preinstalled on the computer. It enables you - Lenovo ThinkPad X220i | Hardware Maintenance Manual - Page 41
36 • "Checking the backup battery" on page 37 Checking the ac power adapter You are here because the computer fails only when the ac power adapter is used. • If the power problem occurs only when the docking station or the port replicator is used, replace the docking station or the port replicator - Lenovo ThinkPad X220i | Hardware Maintenance Manual - Page 42
adapter may different from the one you are servicing. 3. If the voltage is not correct, replace the ac power adapter. 4. If the voltage is acceptable, do the following: • Replace the system board. • If the problem persists and your system supports the PC doctor for DOS, go to "FRU tests" on page - Lenovo ThinkPad X220i | Hardware Maintenance Manual - Page 43
pack. If the resistance is correct, replace the system board. Checking the backup battery Do the following: 1. Power off the computer, and unplug the ac power adapter from it. 2. Turn the computer upside down. 3. Remove the battery pack (see "1020 Battery pack" on page 63). 4. Remove the backup - Lenovo ThinkPad X220i | Hardware Maintenance Manual - Page 44
38 Hardware Maintenance Manual - Lenovo ThinkPad X220i | Hardware Maintenance Manual - Page 45
. Follow the instructions on the screen to complete the Windows setup. Restoring the factory contents by using Recovery Disc Set When the hard disk drive (HDD) or solid state drive (SSD) is replaced because of a failure, no product recovery program is on the new drive. In this case, you must - Lenovo ThinkPad X220i | Hardware Maintenance Manual - Page 46
then turn on the computer. When the logo screen is displayed or if you hear repeating beeps, release the F1 key. The ThinkPad Setup program opens. b. Use the arrow keys to select Startup ➙ Boot. c. Select the CD/DVD drive as the 1st Boot Device. 2. Insert the Operating System Recovery Disc into the - Lenovo ThinkPad X220i | Hardware Maintenance Manual - Page 47
to save and exit the ThinkPad Setup program. Note: After restoring a drive to the factory default settings, you might need to reinstall some device drivers. Passwords As many as three passwords may be needed for any ThinkPad Notebook: the power-on password (POP), the hard-disk password (HDP), and - Lenovo ThinkPad X220i | Hardware Maintenance Manual - Page 48
any services to reset the user HDPs or to recover data from the hard disk drive. The hard disk drive can be replaced for a scheduled fee. To remove a user HDP that has been forgotten, when the SVP and the master HDP are known, do the following: 1. Turn on the computer. 2. When the ThinkPad logo - Lenovo ThinkPad X220i | Hardware Maintenance Manual - Page 49
any key. Sleep (Standby) mode When the computer enters sleep (standby) mode, the following events occur in addition to what occurs in screen blank mode: • The LCD is powered off. • The hard disk drive or the solid state drive is powered off. • The CPU stops. To enter sleep (standby) mode, press - Lenovo ThinkPad X220i | Hardware Maintenance Manual - Page 50
does not do any operation with the keyboard, the TrackPoint, the hard disk drive, the parallel connector, or the diskette drive within that time. • If the timer conditions are satisfied in suspend mode. When the power is turned on, the computer returns from hibernation mode and resumes operation - Lenovo ThinkPad X220i | Hardware Maintenance Manual - Page 51
Invalid RFID configuration information area - The EEPROM checksum is not correct. 0190 Critical low-battery error 1. Charge the battery pack. 2. Battery pack. 0191 System Security - Invalid Remote Change requested. 1. Run the ThinkPad Setup program, and then save current setting by pressing F10 - Lenovo ThinkPad X220i | Hardware Maintenance Manual - Page 52
Hard disk drive. 4. System board. Run interactive tests of the keyboard and the auxiliary input device. Load Setup Defaults in the ThinkPad Setup program. System board. 1. DIMM. 2. System board. 1. DIMM. 2. System board. 1. Charge the backup battery for more than 8 hours by connecting the ac power - Lenovo ThinkPad X220i | Hardware Maintenance Manual - Page 53
connecting the ac power adapter. 2. Replace the backup battery and run the ThinkPad Setup program to reset the time and date. 3. System board. 0271 Date and time error - Neither the date nor the time is set in the computer. Run the ThinkPad Setup program to reset the time and date. 0280 Previous - Lenovo ThinkPad X220i | Hardware Maintenance Manual - Page 54
docking station or port replicator if it is attached to the ThinkPad Notebook. 2. Place the ThinkPad Notebook on a horizontal surface. Do not apply any physical shock to the computer. 3. Run Diagnostics ➙ ThinkPad Devices ➙ HDD Active Protection Test. 2010 Warning: Your internal hard disk drive - Lenovo ThinkPad X220i | Hardware Maintenance Manual - Page 55
hard disk drive. 3. System board. 1. Reseat the hard disk drive. 2. Main hard disk drive. 3. System board. 1. Reseat the hard disk drive. 2. Ultrabay hard disk drive. 3. System board. FRU or action, in sequence 1. Load "Setup Defaults" in the ThinkPad Setup program. 2. Backup battery. 3. System - Lenovo ThinkPad X220i | Hardware Maintenance Manual - Page 56
45. Two short beeps and a blank screen. 1. System board. 2. DIMM. Two or more beeps, or a continuous beep. Operating system starts successfully. If a mini-PCI Ethernet card is installed, confirm that Alert On LAN 2 in the ThinkPad Setup program is disabled. Three short beeps, pause, three more - Lenovo ThinkPad X220i | Hardware Maintenance Manual - Page 57
are supported by the computer. Verify that the power supply being used at the time of the failure is operating correctly. (See "Power system checkout" on page 35.) 1. Turn off the computer. 2. Visually check each FRU for damage. Replace any damaged FRU. Chapter 4. Related service information - Lenovo ThinkPad X220i | Hardware Maintenance Manual - Page 58
Non-ThinkPad devices b. Devices attached to the docking station or the port replicator c. Printer, mouse, and other external devices d. Battery pack e. Hard disk drive f. External diskette drive or optical drive g. DIMM h. PC Cards 4. Turn on the computer. 5. Determine whether the problem has been - Lenovo ThinkPad X220i | Hardware Maintenance Manual - Page 59
Chapter 5. Status indicators This chapter presents the system status indicators that show the status of the computer. 65 © Copyright Lenovo 2012 53 - Lenovo ThinkPad X220i | Hardware Maintenance Manual - Page 60
read from or written to the hard disk drive, the diskette drive, or the drive in the Serial Ultrabay Slim device. When this indicator is on, do not put the computer into sleep (standby) mode or turn off the computer. Note: Do not move the system while the green drive-in-use light is on. Sudden - Lenovo ThinkPad X220i | Hardware Maintenance Manual - Page 61
must be installed on the computer beforehand: • ThinkPad Power Management driver • OnScreen Display Utility • Wireless device drivers Change the camera and audio settings. Apply a presentation scheme directly, with no need to start Presentation Director. To disable this function and use the Fn - Lenovo ThinkPad X220i | Hardware Maintenance Manual - Page 62
not support the EasyEject Utility function. Reserved. Reserved. Put the computer into hibernation mode. To return to normal operation, press the power button for less than four seconds. Note: To use Fn+F12 for hibernation, you must have the ThinkPad PM device driver installed on the computer. The - Lenovo ThinkPad X220i | Hardware Maintenance Manual - Page 63
See your Lenovo Limited Warranty documentation for full details. This chapter presents notices related to removing and replacing parts. Read this chapter carefully before replacing any FRU. Screw notices Loose screws can cause a reliability problem. In the ThinkPad notebook computer, this problem is - Lenovo ThinkPad X220i | Hardware Maintenance Manual - Page 64
drivers are calibrated correctly following country specifications. LENOVO ThinkPad Hardware Maintenance Diskette Version 1.76 or later and restart the computer. 2. From the main menu, select 1. Set System Identification. 3. Select 1. Add S/N data from EEPROM. Follow the instructions on the screen - Lenovo ThinkPad X220i | Hardware Maintenance Manual - Page 65
and follow the instruction. 4. To read box build date, select 5. Read box build date from EEPROM, and follow the instruction on the screen. After an ECA has been applied to the machine, the EEPROM must be updated to reflect the ECA's application. Use the LENOVO ThinkPad Hardware Maintenance Diskette - Lenovo ThinkPad X220i | Hardware Maintenance Manual - Page 66
60 Hardware Maintenance Manual - Lenovo ThinkPad X220i | Hardware Maintenance Manual - Page 67
Lenovo installs an Optional-service CRU according to the warranty service for your product. Where you are installing the CRU, Lenovo will ship the CRU to you. CRU information and replacement instructions off the computer, unplug all power cords from electrical outlets, remove the battery pack, and - Lenovo ThinkPad X220i | Hardware Maintenance Manual - Page 68
models of the ThinkPad X220 Tablet and X220i Tablet you are servicing might have the SIM card that the customer has been installed. If the computer you are servicing has the SIM card, remove it before you start the servicing. To remove the SIM card, you need to remove the battery pack first. (See - Lenovo ThinkPad X220i | Hardware Maintenance Manual - Page 69
pack is physically damaged or a customer is reporting a possible safety issue. If Lenovo ThinkVantage Toolbox is not installed in the computer, the customer should download this program before a non-physically damaged battery pack is replaced. Note that the replacement of a physically damaged - Lenovo ThinkPad X220i | Hardware Maintenance Manual - Page 70
slot. Make sure that the left battery release lever is in the locked position. 1030 Hard disk drive (HDD) and solid state drive (SSD) • "1020 Battery pack" on page 63 Attention: • Do not drop the hard disk drive or apply any physical shock to it. The hard disk drive is sensitive to physical shock - Lenovo ThinkPad X220i | Hardware Maintenance Manual - Page 71
1 3 2 Step 1 Screw (quantity) Color Hard disk drive screw, M3 × 3 mm, wafer-head, nylon-coated (1) Black Torque 0.181 Nm (1.85 kgfcm) 4 Chapter 8. Removing and replacing a FRU 65 - Lenovo ThinkPad X220i | Hardware Maintenance Manual - Page 72
: 5 6 6 6 When installing: Rubber rails on the hard disk drive or spacers on the solid state drive must be attached to the replacement drive. Otherwise the drive cannot be installed properly. 1040 DIMM For access, remove this FRU: • "1020 Battery pack" on page 63 66 Hardware Maintenance Manual - Lenovo ThinkPad X220i | Hardware Maintenance Manual - Page 73
DIMM Remove the DIMM slot cover as shown in the following figure. Note: Loosen the screws 1 . 2 1 1 Note: If only one DIMM is used on the computer you are servicing, the card must be installed in SLOT-0 a , but not in SLOT-1 b . b a When installing: Chapter 8. Removing and replacing a FRU 67 - Lenovo ThinkPad X220i | Hardware Maintenance Manual - Page 74
place. Make sure that it is firmly installed in the slot and does not move easily. 1050 Hinge caps For access, remove this FRU: • "1020 Battery pack" on page 63 Removal steps of hinge caps 1 Open the LCD unit, and then remove the hinge cap. 3 2 1060 - Lenovo ThinkPad X220i | Hardware Maintenance Manual - Page 75
a little bit forward, in the direction shown by arrow 2 , to detach the front edge of the keyboard from the frame. Then, lift up the keyboard in the direction shown by arrow 3 . Lift the keyboard a little in the direction shown by arrow 5 , and then detach the connector 4 . Chapter 8. Removing and - Lenovo ThinkPad X220i | Hardware Maintenance Manual - Page 76
firmly. 2. Make sure that the keyboard edge is under the frame as shown in the following figure. Then press the keys to latch the keyboard firmly in place. 3. Gently press the keys with your palms and slightly slide the keyboard toward you until it snaps into position. 70 Hardware Maintenance Manual - Lenovo ThinkPad X220i | Hardware Maintenance Manual - Page 77
by tightening the screws from the bottom side of the computer. 1070 Palm rest For access, remove these FRUs in order: • "1020 Battery pack" on page 63 • "1060 Keyboard" on page 68 Removal steps of palm rest Step 1 Icon Screw (quantity) M2 × 6 mm, wafer-head, nylon-coated (5) Color Black Torque - Lenovo ThinkPad X220i | Hardware Maintenance Manual - Page 78
as follows: 1. Attach the touch pad connector firmly to the system board. 2. Press the left and right top edges of the palm rest to fit it into place. 3. Push the front side of the palm rest until it clicks into place. 4. Close the LCD cover and turn the computer over. And then fasten - Lenovo ThinkPad X220i | Hardware Maintenance Manual - Page 79
1080 Backup battery DANGER Use only the battery specified in the parts list for your computer. Any other battery could ignite or explode. For access, remove these FRUs in order: • "1020 Battery pack" on page 63 • "1060 Keyboard" on page 68 • "1070 Palm rest" on page 71 Chapter 8. Removing and - Lenovo ThinkPad X220i | Hardware Maintenance Manual - Page 80
Removal steps of backup battery 74 Hardware Maintenance Manual - Lenovo ThinkPad X220i | Hardware Maintenance Manual - Page 81
connector is attached firmly. 1090 PCI Express Mini Card for wireless LAN/WiMAX For access, remove these FRUs in order: • "1020 Battery pack" on page 63 • "1060 Keyboard" on page 68 • "1070 Palm rest" on page 71 Removal steps of PCI Express Mini Card for wireless LAN/WiMAX In step 1 , unplug the - Lenovo ThinkPad X220i | Hardware Maintenance Manual - Page 82
, plug the gray cable into the jack labeled MAIN or M on the card, and the black cable into the jack labeled AUX or A. If the computer you are servicing has three cables, put the white cable in the cable protection tube. 76 Hardware Maintenance - Lenovo ThinkPad X220i | Hardware Maintenance Manual - Page 83
the jack labeled TR2 on the card. 1100 PCI Express Mini Card for wireless WAN For access, remove these FRUs in order: • "1020 Battery pack" on page 63 • "1060 Keyboard" on page 68 • "1070 Palm rest" on page 71 Removal steps of PCI Express Mini Card for wireless WAN In step 1 , unplug - Lenovo ThinkPad X220i | Hardware Maintenance Manual - Page 84
If the computer you are servicing is the wireless WAN-ready model, put the antenna cables in the cable protection tube and place them as shown in the following figure. 1110 Bluetooth daughter card For access, remove these FRUs in order: • "1020 Battery pack" on page 63 • "1060 Keyboard - Lenovo ThinkPad X220i | Hardware Maintenance Manual - Page 85
nylon-coated (1) When installing: Make sure that the connector 2 is attached firmly. 1120 Keyboard bezel For access, remove these FRUs in order: • "1010 Digitizer pen" on page 63 • "1020 Battery pack" on page 63 • "1060 Keyboard" on page 68 • "1070 Palm rest" on page 71 Color Silver Torque 0.181 - Lenovo ThinkPad X220i | Hardware Maintenance Manual - Page 86
Removal steps of keyboard bezel 1 2 2 1 1 Step 1 2 Screw (quantity) M2 × 6 mm, wafer-head, nylon-coated (3) M2 × 3.5 mm, wafer-head, nylon-coated (2) , nylon-coated (4) Rotate the LCD unit as shown in the following figure. 80 Hardware Maintenance Manual Color Black Torque 0.181 Nm (1.85 kgfcm) - Lenovo ThinkPad X220i | Hardware Maintenance Manual - Page 87
by arrow 6 . Attention: When you service the keyboard bezel, avoid any kind of rough handling. 55 6 5 5 6 When installing: Make sure that all the claws are attached firmly. 1130 LCD assembly For access, remove these FRUs in order: • "1010 Digitizer pen" on page 63 • "1020 Battery pack" on page 63 - Lenovo ThinkPad X220i | Hardware Maintenance Manual - Page 88
"1100 PCI Express Mini Card for wireless WAN" on page 77 • "1120 Keyboard bezel" on page 79 Removal steps of LCD assembly Step 1 Screw (quantity) step 3 , strip off the tapes securing the antenna cables, and release the cables from the cable guides of the frame. 82 Hardware Maintenance Manual - Lenovo ThinkPad X220i | Hardware Maintenance Manual - Page 89
3 4 5 6 7 When installing: • Make sure that you attach the connectors firmly. Chapter 8. Removing and replacing a FRU 83 - Lenovo ThinkPad X220i | Hardware Maintenance Manual - Page 90
by the cable guides, or a wire to be broken. 1140 DC-in connector, base cover, fan, digitizer pen case, and pen switch assembly For access, remove these FRUs in order: • "1010 Digitizer pen" on page 63 • "1020 Battery pack" on page 63 • "1050 Hinge caps" on page 68 • "1060 Keyboard" on page 68 - Lenovo ThinkPad X220i | Hardware Maintenance Manual - Page 91
2 3 Step 1 2 Screw (quantity) M1.6 x 3 + 4.2A mm, shoulder socket-head, nylon-coated (1) M2 x 3.5 mm, wafer-head, nylon-coated (1) Color Black Silver 4 Torque 0.181 Nm (1.85 kgfcm) 0.181 Nm (1.85 kgfcm) 4 4 4 Chapter 8. Removing and replacing a FRU 85 - Lenovo ThinkPad X220i | Hardware Maintenance Manual - Page 92
, nylon-coated (4) Color Silver Torque 0.181 Nm (1.85 kgfcm) 5 7 6 When installing: Make sure that the wireless switch is adjusted as shown by callout a . Turn the system board over, and then disconnect the DC-in connector, the fan connector, and the pen switch connector from the - Lenovo ThinkPad X220i | Hardware Maintenance Manual - Page 93
installing: • Before you attach the fan assembly to the computer, apply thermal grease, at an amount of 0.2 grams, on the part marked a as in the following figure. Either too much or too less application of grease can cause a thermal problem due to imperfect contact with a component. You need to - Lenovo ThinkPad X220i | Hardware Maintenance Manual - Page 94
label attached to the customer, or provide a letter to the customer stating what the label was originally on the system and what the label part number, serial number, and product key were. When you replace the base cover, FCC-ID label for contactless smart card model 88 Hardware Maintenance Manual - Lenovo ThinkPad X220i | Hardware Maintenance Manual - Page 95
as much as 6,000 G's of shock. • Be careful not to drop the system board on a bench top that has a hard surface, such as metal, wood, or composite. • If a system board is dropped, test it using PC-Doctor for DOS if the system supports PC-Doctor for DOS, to make sure that the HDD Active Protection - Lenovo ThinkPad X220i | Hardware Maintenance Manual - Page 96
If the system supports PC-Doctor for DOS, after replacing the system board, run PC-Doctor for DOS to make sure that HDD Active Protection System still functions. The procedure is as follows: 1. Place the computer on a horizontal surface. 2. Run Diagnostics ➙ ThinkPad Devices ➙ HDD Active Protection - Lenovo ThinkPad X220i | Hardware Maintenance Manual - Page 97
over, and then remove the ExpressCard slot assembly from the system board. 2 3 1160 Speaker assembly For access, remove these FRUs in order: • "1010 Digitizer pen" on page 63 • "1020 Battery pack" on page 63 • "1050 Hinge caps" on page 68 • "1060 Keyboard" on page 68 • "1070 Palm rest" on page 71 - Lenovo ThinkPad X220i | Hardware Maintenance Manual - Page 98
For access, remove these FRUs in order: • "1020 Battery pack" on page 63 • "1060 Keyboard" on page 68 • "1070 Palm rest" on page 71 Attention: • Do not drop the hard disk drive or apply any physical shock to it. The hard disk drive is sensitive to physical shock. Improper handling can cause damage - Lenovo ThinkPad X220i | Hardware Maintenance Manual - Page 99
Removal steps of mSATA solid state drive 1 Step 1 Screw (quantity) M2 × 3 mm, flat-head, nylon-coated (1) Color Black Torque 0.181 Nm (1.85 kgfcm) 2010 LCD front bezel For access, remove this FRU: • "1020 Battery pack" on page 63 2 Chapter 8. Removing and replacing a FRU 93 - Lenovo ThinkPad X220i | Hardware Maintenance Manual - Page 100
Removal steps of LCD front bezel Step 1 Screw cap Screw (quantity) M2.5 × 8 mm, wafer-head, nylon-coated (3) Color Black 2 3 Torque 0.392 Nm (4 kgfcm) 2 4 When installing: Attach the fingerprint reader connector firmly. 94 Hardware Maintenance Manual - Lenovo ThinkPad X220i | Hardware Maintenance Manual - Page 101
2020 Micro-Processor card For access, remove these FRUs in order: • "1020 Battery pack" on page 63 • "2010 LCD front bezel" on page 93 Removal steps of Micro-Processor card Step 1 Screw (quantity) M2 × 3.5 mm, wafer-head, nylon- - Lenovo ThinkPad X220i | Hardware Maintenance Manual - Page 102
• "1010 Digitizer pen" on page 63 • "1020 Battery pack" on page 63 • "1050 Hinge caps" on page 68 • "1060 Keyboard" on page 68 • "1070 Palm rest" on page 75 • "1100 PCI Express Mini Card for wireless WAN" on page 77 • "1120 Keyboard bezel" on page 79 • "1130 LCD assembly" on page 81 • "2010 LCD front - Lenovo ThinkPad X220i | Hardware Maintenance Manual - Page 103
them to be damaged by the cable guides, or a wire to be broken. 2 3 2 3 2040 LCD panel and LCD cable For access, remove these FRUs in order: • "1010 Digitizer pen" on page 63 • "1020 Battery pack" on page 63 • "1050 Hinge caps" on page 68 • "1060 Keyboard" on page 68 • "1070 Palm rest" on - Lenovo ThinkPad X220i | Hardware Maintenance Manual - Page 104
-coated (3) Color Black Silver In step 3 , detach the claws. Then remove the LCD panel. 3 3 3 3 3 3 3 3 3 3 Torque 0.392 Nm (4 kgfcm) 0.181 Nm (1.85 kgfcm) 98 Hardware Maintenance Manual - Lenovo ThinkPad X220i | Hardware Maintenance Manual - Page 105
When installing: • Make sure that all the claws are attached firmly. • When attaching the LCD panel to the cover, gently press the left and right edges covered with metal. Do not press the surface of the panel or apply any excessive force to the panel. Turn the LCD panel over, and then remove the - Lenovo ThinkPad X220i | Hardware Maintenance Manual - Page 106
they are not pinched. No cables are pinched under the hinge. 2050 Integrated camera For access, remove these FRUs in order: • "1010 Digitizer pen" on page 63 • "1020 Battery pack" on page 63 • "1050 Hinge caps" on page 68 • "1060 Keyboard" on page 68 • "1070 Palm rest" on page 71 • "1090 PCI Express - Lenovo ThinkPad X220i | Hardware Maintenance Manual - Page 107
camera 1 2 Step 1 Screw (quantity) M2 × 3.5 mm, wafer-head, nylon-coated (1) Color Silver 2060 LCD rear cover and wireless antenna cables For access, remove these FRUs in order: • "1010 Digitizer pen" on page 63 • "1020 Battery pack" on page 63 • "1050 Hinge caps" on page 68 • "1060 Keyboard - Lenovo ThinkPad X220i | Hardware Maintenance Manual - Page 108
Removal steps of LCD rear cover and wireless antenna cables 1 Step 1 Screw (quantity) M2 × 3.5 mm, wafer-head, nylon-coated (1) Color Silver Torque 0.181 Nm (1.85 kgfcm) 2 In step 3 , release the antenna cables from the cable guides of the rear cover. 102 Hardware Maintenance Manual - Lenovo ThinkPad X220i | Hardware Maintenance Manual - Page 109
route the antenna cables, make sure that they are not subjected to any tension. Tension could cause the cables to be damaged by the cable guides, or a wire to be broken. Chapter 8. Removing and replacing a FRU 103 - Lenovo ThinkPad X220i | Hardware Maintenance Manual - Page 110
104 Hardware Maintenance Manual - Lenovo ThinkPad X220i | Hardware Maintenance Manual - Page 111
chapter presents the locations of ThinkPad X220 Tablet and X220i Tablet features and hardware components. Front view 1 Integrated camera 2 Built-in microphone 3 Security keyhole 4 Tablet digitizer pen 5 Hard disk drive (HDD) or solid state drive (SSD) 6 Combo audio jack 7 Ethernet - Lenovo ThinkPad X220i | Hardware Maintenance Manual - Page 112
of each indicator, see Chapter 5 "Status indicators" on page 53. 2 ExpressCard slot 3 Wireless radio switch 4 USB connector 5 DisplayPort connector 6 External monitor connector 7 USB connector 8 ac power connector 1 8 106 Hardware Maintenance Manual 2 3 4 5 6 7 - Lenovo ThinkPad X220i | Hardware Maintenance Manual - Page 113
Rear view (tablet mode) 1 Tablet buttons 2 Fingerprint reader 3 Status indicators Note: For the description of each indicator, see Chapter 5 "Status indicators" on page 53. 1 2 3 Bottom view 1 Battery pack latch 2 Battery pack 3 Docking connector 4 DIMM slots 5 Built-in speakers - Lenovo ThinkPad X220i | Hardware Maintenance Manual - Page 114
Top view (ThinkPad X220 UltraBase) 1 Docking connector 2 ac power connector 3 Ethernet connector 4 DisplayPort view (ThinkPad X220 UltraBase) 1 UltraBase eject request button 2 Docking indicator 3 UltraBase eject lever 4 Holes for speakers 4 108 Hardware Maintenance Manual 1 - Lenovo ThinkPad X220i | Hardware Maintenance Manual - Page 115
ac power adapter, power cord, battery, and hard disk drive. Other Self-service CRUs depending on product design may include the memory module, wireless card, keyboard, and palm rest with finger print reader and touchpad. - Optional-service CRUs: These CRUs are isolated parts within the computer that - Lenovo ThinkPad X220i | Hardware Maintenance Manual - Page 116
• FRUs marked with OP are available as options. Overall 1 26 25 24 23 2 22 3 4 21 5 20 6 7 19 8 9 18 10 17 11 12 13 14 16 15 110 Hardware Maintenance Manual - Lenovo ThinkPad X220i | Hardware Maintenance Manual - Page 117
, 5Ax, 5Bx, 5Cx • 4300-CTO • 4301-CTO 5 System board assembly with Intel® Core™ i5-2520M processor, AMT, TPM, AES • 4294-CTO, 23x, 24x, 2Nx • 4296-CTO, 22x, 2Ax, 2Bx, 2Kx, 2Lx, 2Mx, 2Wx, 2Xx, 32x, 33x, 36x, 3Bx, 3Cx, 3Jx, 3Tx, 3Vx, 3Xx • 4297-CTO, 23x, 24x • 4298-CTO, 27x, 28x, 2Ax, 2Dx, 2Gx, 2Hx - Lenovo ThinkPad X220i | Hardware Maintenance Manual - Page 118
assembly with Intel Core i5-2520M processor, non-AMT, non-TPM, non-AES • 4294-CTO, 2Kx, 2Rx • 4296-CTO, 26x, 27x • 4297-CTO • 4298-CTO, 45x, 46x, 4Jx, 4Xx • 4299-CTO, 3Bx • 4300-CTO • 4301-CTO 5 System board assembly with Intel Core i7-2620M processor, AMT, TPM, AES • 4294-CTO • 4296-CTO, 2Dx, 2Ex - Lenovo ThinkPad X220i | Hardware Maintenance Manual - Page 119
-CTO • 4301-CTO 5 System board assembly with Intel Core i5-2520M AMT, non-TPM, non-AES • 4294-CTO • 4296-CTO • 4297-CTO • 4298-CTO, 4Ax, 49x • 4299-CTO • 4300-CTO • 4301-CTO 5 System board assembly with Intel Core i5-2520M, non-AMT, non-TPM, AES • 4294-CTO • 4296-CTO • 4297-CTO • 4298-CTO • 4299-CTO - Lenovo ThinkPad X220i | Hardware Maintenance Manual - Page 120
(continued) No. FRU 5 System board assembly with Intel Core i5-2520M, non-AMT, non-TPM, non-AES • 4294-CTO, 29x, 28x • 4296-CTO, 3Ax, 28x • 4297-CTO • 4298-CTO • 4299-CTO • 4300-CTO • 4301-CTO 5 System board assembly with Intel Core i7-2620M, AMT, TPM, AES • 4294-CTO • 4296-CTO, 2Dx, 2Ex, 2Nx - Lenovo ThinkPad X220i | Hardware Maintenance Manual - Page 121
• 4300-CTO • 4301-CTO 5 System board assembly with Intel Core i5-2520M, non-AMT, non-TPM, non-AES • 4294-CTO, 29x, 28x • 4296-CTO, 3Ax, 28x • 4297-CTO • 4298-CTO • 4299-CTO • 4300-CTO • 4301-CTO 5 System board assembly with Intel Core i7-2620M, AMT, TPM, AES • 4294-CTO • 4296-CTO, 2Dx, 2Ex, 2Nx, 2Px - Lenovo ThinkPad X220i | Hardware Maintenance Manual - Page 122
continued) No. FRU 5 System board assembly with Intel Core i7-2620M, non-AMT, TPM, AES • 4294-CTO • 4296-CTO • 4297-CTO • 4298-CTO • 4299-CTO • 4300-CTO • 4301-CTO 5 System board assembly with Intel Core i7-2620M, AMT, non-TPM, non-AES • 4294-CTO, 2Ax • 4296-CTO, 3Dx • 4297-CTO • 4298-CTO • 4299-CTO - Lenovo ThinkPad X220i | Hardware Maintenance Manual - Page 123
- Overall (continued) No. FRU 5 System board assembly with Intel Core i7-2640M, AMT, non-TPM • 4294-CTO • 4296-CTO • 4297-CTO • 4298-CTO • 4299-CTO • 4300-CTO • 4301-CTO 5 System board assembly with Intel Core i7-2640M, non-AMT, TPM • 4294-CTO • 4296-CTO • 4297-CTO • 4298-CTO, 4Px, 4Nx • 4299-CTO - Lenovo ThinkPad X220i | Hardware Maintenance Manual - Page 124
- Overall (continued) No. FRU 5 System board assembly with Intel Core i3-2370M, non-AMT, non-TPM • 4294-CTO • 4296-CTO • 4297-CTO • 4298-CTO • 4299-CTO • 4300-CTO • 4301-CTO 6 Integrated Mobile Broadband (Gobi 3000 3G with GPS) • 4294-CTO • 4296-CTO, 2Xx • 4297-CTO • 4298-CTO, 2Jx • 4299-CTO • 4300 - Lenovo ThinkPad X220i | Hardware Maintenance Manual - Page 125
CTO • 4300-CTO • 4301-CTO 7 ThinkPad b/g/n Wireless (1x1 BGN) • 4294-CTO, 29x, 28x, 2Px, 2Qx • 4296-CTO, 3Px, 3Qx • 4297-CTO • 4298-CTO • 4299-CTO • 4300-CTO • 4301-CTO 7 ThinkPad b/g/n Wireless (1x1 BGN) • 4294-CTO, 29x, 28x, 2Px, 2Qx • 4296-CTO, 3Px, 3Qx • 4297-CTO • 4298-CTO • 4299-CTO • 4300-CTO - Lenovo ThinkPad X220i | Hardware Maintenance Manual - Page 126
WiMAX 6250, Russian SKU • 4294-CTO • 4296-CTO • 4297-CTO • 4298-CTO • 4299-CTO • 4300-CTO • 4301-CTO 60Y3209 ** 8 Battery pack, 3 cell 42T4877 * • 4294-CTO, 2Ex, 2Fx, 2Kx, 2Px, 2Qx, 2Rx • 4296-CTO, 22x, 23x, 26x, , 58x, 59x, 5Ax, 5Bx, 5Cx • 4300-CTO • 4301-CTO 120 Hardware Maintenance Manual - Lenovo ThinkPad X220i | Hardware Maintenance Manual - Page 127
, 59x, 5Ax, 5Bx, 5Cx • 4300-CTO • 4301-CTO 8 Battery pack, 6 cell 42T4903 * • 4294-CTO, 23x, 24x, 26x, 27x, 28x, 29x, 2Ax, 2Bx, 2Cx, 2Dx 4301-CTO 9 Hard disk drive rubber rails 04W1716 * 10 SATA hard disk drive, 250GB, 5,400 rpm • 4294-CTO • 4296-CTO, 3Tx • 4297-CTO, 24x • 4298-CTO, 3Ex, 3Zx - Lenovo ThinkPad X220i | Hardware Maintenance Manual - Page 128
• 4301-CTO 10 SATA hard disk drive, 250 GB, 7,200 rpm • 4294-CTO • 4296-CTO • 4297-CTO • 4298-CTO • 4299-CTO • 4300-CTO • 4301-CTO 10 SATA hard disk drive, 250 GB, 7,200 rpm • 4294-CTO • 4296-CTO • 4297-CTO • 4298-CTO • 4299-CTO • 4300-CTO • 4301-CTO 122 Hardware Maintenance Manual FRU no. 42T1155 - Lenovo ThinkPad X220i | Hardware Maintenance Manual - Page 129
CTO • 4301-CTO 10 SATA hard disk drive, 320 GB, 7,200 rpm 42T1171 * • 4294-CTO, 2Bx, 2Ex, 2Gx, 2Jx, 2Nx, 2Sx, 2Tx, 2Ux • 4296-CTO, 23x, 2Ax, 2Bx • 4301-CTO 12 SATA solid state drive, 128 GB 45N8007 * • 4294-CTO, 2Dx, 2Mx • 4296-CTO, 27x, 28x, 35x • 4297-CTO • 4298-CTO, 4Tx, 4Rx, 4Lx, 4Cx, - Lenovo ThinkPad X220i | Hardware Maintenance Manual - Page 130
, 55x • 4300-CTO • 4301-CTO 13 Hard disk drive cover assembly 14 ThinkPad X220 UltraBase 14 ThinkPad X220 UltraBase 15 DVD-ROM drive • 4294-CTO • 4296-CTO • 4297-CTO • 4298-CTO • 4299-CTO • 4300-CTO • 4301-CTO 15 DVD-ROM drive • 4294-CTO • 4296-CTO • 4297-CTO • 4298-CTO • 4299-CTO • 4300-CTO • 4301 - Lenovo ThinkPad X220i | Hardware Maintenance Manual - Page 131
list - Overall (continued) No. FRU FRU no. CRU ID 15 DVD/CD-RW combo drive 45N7457 * • 4294-CTO, 23x, 24x, 2Hx, 2Lx, 2Mx • 4296-CTO, 27x, 28x, 2Ax, 2Jx, 2Lx, 2Nx, 33x, 35x, 3Bx, 3Hx, 3Ux, 3Vx • 4297-CTO, 22x • 4298-CTO, 2Ax, 2Sx, 33x, 34x, 35x, 36x, 3Nx, 3Sx, 3Tx, 44x, 4Jx, 4Kx - Lenovo ThinkPad X220i | Hardware Maintenance Manual - Page 132
2Bx • 4296-CTO, 2Ex, 35x • 4297-CTO • 4298-CTO, 2Gx, 2Hx, 2Jx, 3Hx, 3Kx, 43x, 4Dx, 54x • 4299-CTO • 4300-CTO • 4301-CTO 45N8259 ** - ac power adapter (see "ac power adapter " on page 132.) LCD FRUs 12.5-in. HD LED backlight LCD (Table 10 "Parts list - 12.5-in. HD LED backlight LCD for multi-touch - Lenovo ThinkPad X220i | Hardware Maintenance Manual - Page 133
LCD or outdoor LCD No. FRU 1 LCD panel, 12.5-in. WXGA, LED backlight for multi-touch panel • 4294-CTO, 23x, 24x, 29x, 2Fx, 2Gx, 2Hx, 2Jx, 2Kx, 2Lx, 2Mx, 2Nx, 2Px, 2Qx, 2Rx, 2Sx, 2Tx • 4296-CTO, 22x, 23x, 24x, 25x, 26x, 27x, 28x, 29x, 2Ax, 2Bx, 2Cx, 2Dx, 2Jx, 2Kx, 2Lx, 2Mx, 2Px - Lenovo ThinkPad X220i | Hardware Maintenance Manual - Page 134
multi-touch panel LCD or outdoor LCD (continued) No. FRU FRU no. CRU ID • 4298 4294-CTO, 23x, 24x, 29x, 2Fx, 2Gx, 2Hx, 2Jx, 2Kx, 2Lx, 2Mx, 2Nx, 2Px, 2Qx, 2Rx, 2Sx, 2Tx • 4296 • 4298-CTO, N • 4294-CTO, • 4296-CTO, 23x • 4298-CTO, 4294-CTO, 2Nx, 2Rx • 4296-CTO, 3Kx, 3Px • 4297-CTO, 24x • 4298 - Lenovo ThinkPad X220i | Hardware Maintenance Manual - Page 135
multi-touch panel LCD or outdoor LCD (continued) No. FRU FRU no. CRU ID 3 Integrated camera 04W1364 N • 4294-CTO, 23x, 24x, 26x, 27x, 28x, 29x, 2Ax, 2Bx, 2Cx, 2Dx, 2Ex, 2Fx, 2Gx, 2Hx, 2Jx, 2Kx, 2Lx, 2Mx, 2Nx, 2Px, 2Qx, 2Rx, 2Sx, 2Tx, 2Ux • 4296 CTO, 22x, 23x, 24x • 4298-CTO, 26x, 27x, 28x, - Lenovo ThinkPad X220i | Hardware Maintenance Manual - Page 136
fingerprint reader • 4294-CTO, 2Nx, 2Rx • 4296-CTO, 3Kx, 3Px • 4297-CTO, 24x • 4298-CTO, 2Bx, 3Ex, 2Qx, 3Lx, 3Mx, 4Cx, 4Gx, 4Zx, 53x, 54x • 4299-CTO, 3Ax, 3Bx • 4300-CTO • 4301-CTO 04W1666 N 12 Icon plate for X220 Tablet 04W2044 N - N Keyboard Table 11. Parts list - Keyboard Language Arabic - Lenovo ThinkPad X220i | Hardware Maintenance Manual - Page 137
Table 11. Parts list - Keyboard (continued) Language German Greek (U.S. English and Greek layout) Hungarian Icelandic Israel (Hebrew) Italian Japanese Kazakhstan Korean Latin American Spanish Norwegian Polish Portuguese Russian Slovak Slovenian - Lenovo ThinkPad X220i | Hardware Maintenance Manual - Page 138
• LCD side screw mylar, (8) • Microphone support mylar, (1) • Microphone support mylar, (1) • Name plate, (1) • Battery latch right • Battery latch left • Battery knob right • Battery knob left • Battery latch spring System miscellaneous parts kit: • EMI touch pad conductive clothes LDB-1 • Touch - Lenovo ThinkPad X220i | Hardware Maintenance Manual - Page 139
Power cords A ThinkPad power cord for a specific country or region is usually available only in that country or region: Table 14. Parts list - 2-pin power cords , xxC Denmark • Models: CTO, xxG European countries • Models: CTO, xxG India • Models: CTO, xxQ Israel • Models: CTO, xxG Italy • Models: - Lenovo ThinkPad X220i | Hardware Maintenance Manual - Page 140
from the factory, but has either a Windows 7 or Windows Vista COA affixed to the system, that model is eligible only for recovery DVDs that match the operating system specified on the COA. • 4294-CTO • 4296-CTO • 4297-CTO • 4298-CTO • 4299-CTO Table 17. Parts list - Windows XP Tablet (32 bit - Lenovo ThinkPad X220i | Hardware Maintenance Manual - Page 141
Business or Windows Vista Ultimate preinstalled from the factory, but has a Windows 7 COA affixed to the system, that model is eligible only for recovery DVDs that match the operating system specified on the COA. • 4294-CTO • 4296-CTO • 4297-CTO • 4298-CTO • 4299-CTO • 4300-CTO • 4301-CTO Table - Lenovo ThinkPad X220i | Hardware Maintenance Manual - Page 142
is preinstalled as the operating system in the following models: • 4294-CTO, 23x, 24x, 26x, 27x, 28x, 29x, 2Ax, 2Bx, 2Cx, 2Dx, 2Gx, 2Hx, 2Jx, 2Lx, 2Mx, 2Nx, 2Sx, 2Tx, 2Ux • 4296 3Rx, 3Tx, 3Vx, 3Wx, 3Xx, 3Yx • 4297-CTO, 22x, • 4298-CTO, 26x, 27x, 28x, 29x, 2Ax, 2Cx, 2Dx, 2Ex, Manual - Lenovo ThinkPad X220i | Hardware Maintenance Manual - Page 143
Simplified Chinese Slovakian Spanish Traditional Chinese Traditional Chinese (Hong Kong S.A.R.) Turkish US English US English (Disabled) Windows 7 Ultimate (32 bit) DVDs • 4294-CTO • 4296-CTO • 4297-CTO • 4298-CTO • 4299-CTO • 4300-CTO • 4301-CTO Table 22. Parts list - Windows 7 Ultimate (32 bit - Lenovo ThinkPad X220i | Hardware Maintenance Manual - Page 144
P/N 04T3602 CRU ID * Windows 7 Home Basic (32 bit) DVDs • 4294-CTO • 4296-CTO • 4297-CTO • 4298-CTO • 4299-CTO • 4300-CTO • 4301-CTO Table 24. Parts list ) is preinstalled as the operating system in the following models: • 4294-CTO, 2Ex, 2Fx, 2Kx, 2Px, 2Qx, 2Rx 138 Hardware Maintenance Manual - Lenovo ThinkPad X220i | Hardware Maintenance Manual - Page 145
Windows Home Premium (32 bit) recovery DVDs Language English Indian English Simplified Chinese Windows 7 Home Premium (64 bit) DVDs • 4294-CTO • 4296-CTO, 2Hx, 2Sx, 32x, 3Sx, 3Ux • 4297-CTO, 24x • 4298-CTO, 2Bx, 54x, 56x • 4299-CTO, 2Gx, 2Lx, 2Rx • 4300-CTO • 4301-CTO Table 27. Parts list - Windows - Lenovo ThinkPad X220i | Hardware Maintenance Manual - Page 146
USB cable USB floppy diskette drive for maintenance diskette USB floppy diskette drive tool kit Test card for integrated Smart Card ThinkPad Hardware Maintenance Diskette Version 1.73 or later Note: Download the file from the following Web site: http://www.lenovo.com/spm P/N 95F3598 1650840 93F2838 - Lenovo ThinkPad X220i | Hardware Maintenance Manual - Page 147
devices, refer to the corresponding information in the User Guide. Trademarks The following terms are trademarks of Lenovo in the United States, other countries or both: Active Protection System Lenovo Rescue and Recovery ThinkPad ThinkVantage TrackPoint UltraBase Ultrabay UltraNav Chapter 10. Parts - Lenovo ThinkPad X220i | Hardware Maintenance Manual - Page 148
The following are trademarks of Intel Corporation or its subsidiaries in the United States, other countries, or both: Intel Intel Celeron Intel Core 2 Duo Intel Core 2 Solo Other company, product, or service names may be the trademarks or service marks of others. 142 Hardware Maintenance Manual - Lenovo ThinkPad X220i | Hardware Maintenance Manual - Page 149
- Lenovo ThinkPad X220i | Hardware Maintenance Manual - Page 150
Part Number: 0A60175_04 Printed in China (1P) P/N: 0A60175_04 *0A60175_04*
-
 1
1 -
 2
2 -
 3
3 -
 4
4 -
 5
5 -
 6
6 -
 7
7 -
8
-
9
-
10
-
11
-
12
-
13
-
14
-
15
-
16
-
17
-
18
-
19
-
20
-
21
-
22
-
23
-
24
-
25
-
26
-
27
-
28
-
29
-
30
-
31
-
32
-
33
-
34
-
35
-
36
-
37
-
38
-
39
-
40
-
41
-
42
-
43
-
44
-
45
-
46
-
47
-
48
-
49
-
50
-
51
-
52
-
53
-
54
-
55
-
56
-
57
-
58
-
59
-
60
-
61
-
62
-
63
-
64
-
65
-
66
-
67
-
68
-
69
-
70
-
71
-
72
-
73
-
74
-
75
-
76
-
77
-
78
-
79
-
80
-
81
-
82
-
83
-
84
-
85
-
86
-
87
-
88
-
89
-
90
-
91
-
92
-
93
-
94
-
95
-
96
-
97
-
98
-
99
-
100
-
101
-
102
-
103
-
104
-
105
-
106
-
107
-
108
-
109
-
110
-
111
-
112
-
113
-
114
-
115
-
116
-
117
-
118
-
119
-
120
-
121
-
122
-
123
-
124
-
125
-
126
-
127
-
128
-
129
-
130
-
131
-
132
-
133
-
134
-
135
-
136
-
137
-
138
-
139
-
140
-
141
-
142
-
143
-
144
-
145
-
146
-
147
-
148
-
149
-
150
 |
 |

Hardware Maintenance Manual
ThinkPad X220 Tablet and X220i Tablet