Lenovo ThinkServer Storage SA120 (English) User Guide and Hardware Maintenance
Lenovo ThinkServer Storage SA120 Manual
 |
View all Lenovo ThinkServer Storage SA120 manuals
Add to My Manuals
Save this manual to your list of manuals |
Lenovo ThinkServer Storage SA120 manual content summary:
- Lenovo ThinkServer Storage SA120 | (English) User Guide and Hardware Maintenance - Page 1
ThinkServer Storage SA120 User Guide and Hardware Maintenance Manual Machine Types: 70F0 and 70F1 - Lenovo ThinkServer Storage SA120 | (English) User Guide and Hardware Maintenance - Page 2
on page iii • Appendix A "Notices" on page 75 Second Edition (May 2014) © Copyright Lenovo 2014. LIMITED AND RESTRICTED RIGHTS NOTICE: If data or software is delivered pursuant a General Services Administration "GSA" contract, use, reproduction, or disclosure is subject to restrictions set forth in - Lenovo ThinkServer Storage SA120 | (English) User Guide and Hardware Maintenance - Page 3
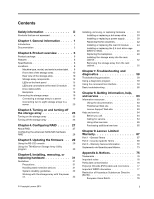
view of the storage array 10 Rear view of the storage array 10 Storage array components 12 LEDs troubleshooting 60 Chapter 8. Getting information, help, and service 63 Information resources 63 Using the documentation 63 ThinkServer Web site 63 Lenovo Support Web site 63 Help and service - Lenovo ThinkServer Storage SA120 | (English) User Guide and Hardware Maintenance - Page 4
German Ordinance for Work gloss statement. . . 78 Export classification notice 78 Electronic emission notices 78 Federal Communications Commission (FCC) Statement 78 Eurasian compliance mark 80 Index 81 ii ThinkServer Storage SA120 User Guide and Hardware Maintenance Manual - Lenovo ThinkServer Storage SA120 | (English) User Guide and Hardware Maintenance - Page 5
käyttöä. Avant d'utiliser le produit, veillez à bien lire et comprendre les instructions de sécurité multilingues figurant sur le DVD de documentation fourni avec le produit. veiligheidsinstructies op de documentatie-dvd van het product hebt gelezen en begrijpt. © Copyright Lenovo 2014 iii - Lenovo ThinkServer Storage SA120 | (English) User Guide and Hardware Maintenance - Page 6
statements in this document before you perform the procedures. Read and understand any additional safety information that is included with the storage array or optional device before you install, remove, or replace the device. iv ThinkServer Storage SA120 User Guide and Hardware Maintenance Manual - Lenovo ThinkServer Storage SA120 | (English) User Guide and Hardware Maintenance - Page 7
telecommunications systems, networks, and modems before you open the device covers, unless instructed otherwise in the installation and configuration procedures. • Connect and disconnect cables as Dispose of the battery as required by local ordinances or regulations. © Copyright Lenovo 2014 v - Lenovo ThinkServer Storage SA120 | (English) User Guide and Hardware Maintenance - Page 8
the laser product could result in exposure to hazardous laser radiation. There are no serviceable parts inside the device. • Use of controls or adjustments or performance of procedures are disconnected from the power source. vi ThinkServer Storage SA120 User Guide and Hardware Maintenance Manual - Lenovo ThinkServer Storage SA120 | (English) User Guide and Hardware Maintenance - Page 9
support the problem with one of these parts, contact a service technician. Statement 9 CAUTION: Disconnect the hot-swap fan cables before removing the fan from the device to protect against personal injury. Statement 10 CAUTION: The following label indicates a sharp-edge hazard. © Copyright Lenovo - Lenovo ThinkServer Storage SA120 | (English) User Guide and Hardware Maintenance - Page 10
power. To remove all electrical current from the device, ensure that all connections to dc power are disconnected at the dc power input terminals. viii ThinkServer Storage SA120 User Guide and Hardware Maintenance Manual - Lenovo ThinkServer Storage SA120 | (English) User Guide and Hardware Maintenance - Page 11
reduce the risk of electric shock or energy hazards: • This equipment must be installed by trained service personnel in a restricted-access location, as defined by your local electrical code and the latest edition moving parts. Keep fingers and other body parts away. © Copyright Lenovo 2014 ix - Lenovo ThinkServer Storage SA120 | (English) User Guide and Hardware Maintenance - Page 12
battery. Replace the battery only with the Lenovo-approved part. Recycle or discard the battery as instructed by local regulations. Products that are not bulk storage units and network products) • Industrial low-voltage switchgear x ThinkServer Storage SA120 User Guide and Hardware Maintenance Manual - Lenovo ThinkServer Storage SA120 | (English) User Guide and Hardware Maintenance - Page 13
" on page 2 Introduction This user guide for your Lenovo® ThinkServer® product contains information about the product features, specifications, component locations, configuration instructions, hardware replacement procedures, and basic troubleshooting and diagnostics. Your product comes with - Lenovo ThinkServer Storage SA120 | (English) User Guide and Hardware Maintenance - Page 14
comes with your storage array. This document also provides instructions on how to find the most up-to-date information on the Lenovo Support Web site. Documentation DVD The documentation DVD, which comes with your storage array, contains various documents for your storage array in Portable Document - Lenovo ThinkServer Storage SA120 | (English) User Guide and Hardware Maintenance - Page 15
documents are on the documentation DVD that comes with your storage array: • Lenovo License Agreement This document includes the terms and conditions of the Lenovo License Agreement. • User Guide and Hardware Maintenance Manual This document provides detailed information to help you get familiar - Lenovo ThinkServer Storage SA120 | (English) User Guide and Hardware Maintenance - Page 16
4 ThinkServer Storage SA120 User Guide and Hardware Maintenance Manual - Lenovo ThinkServer Storage SA120 | (English) User Guide and Hardware Maintenance - Page 17
package, features, specifications, software programs, and component locations. This chapter contains the following items: • "Product package" on page 6 • "Features" on page 6 • "Locations" on page 8 © Copyright Lenovo 2014 5 - Lenovo ThinkServer Storage SA120 | (English) User Guide and Hardware Maintenance - Page 18
package 1 Material box 2 Rail kit 3 Storage array Features This topic provides information about the storage array features for various models. Depending on your specific model, some features might vary or not be available. 6 ThinkServer Storage SA120 User Guide and Hardware Maintenance Manual - Lenovo ThinkServer Storage SA120 | (English) User Guide and Hardware Maintenance - Page 19
one or two 550-watt hot-swap power supplies. System fans Your storage array comes with two fan assemblies. Internal drives Internal drives are devices that your storage array uses to read and store data. Your storage array supports the following types of internal drives: • In the front: up to twelve - Lenovo ThinkServer Storage SA120 | (English) User Guide and Hardware Maintenance - Page 20
serial number label The machine type, model, and serial number identify your storage array. When you contact Lenovo for help, the information helps support technicians to identify your storage array and provide faster service. 8 ThinkServer Storage SA120 User Guide and Hardware Maintenance Manual - Lenovo ThinkServer Storage SA120 | (English) User Guide and Hardware Maintenance - Page 21
The following illustration is a sample of the machine type, model, and serial number label on the storage array. Note: Depending on the model type, your storage array might look slightly different from the following illustration. Figure 2. Machine type, model, and serial number label Chapter 2. - Lenovo ThinkServer Storage SA120 | (English) User Guide and Hardware Maintenance - Page 22
-swap SATA solid-state drives, see "Rear view of the storage array" on page 10. Rear view of the storage array This topic provides information to help you locate the connectors and components on the rear of your storage array. 10 ThinkServer Storage SA120 User Guide and Hardware Maintenance Manual - Lenovo ThinkServer Storage SA120 | (English) User Guide and Hardware Maintenance - Page 23
help you avoid significant interruption to the operation of the storage array when a power supply fails. You can purchase a power supply option from Lenovo and install the power supply to provide power redundancy without turning off the storage array. The power-supply-status LED A as shown in the - Lenovo ThinkServer Storage SA120 | (English) User Guide and Hardware Maintenance - Page 24
and cooling of the storage array are protected by having all drive bays covered or occupied. The number of the installed drives in your storage array varies by model. The vacant drive bays are occupied by dummy drive trays. 12 ThinkServer Storage SA120 User Guide and Hardware Maintenance Manual - Lenovo ThinkServer Storage SA120 | (English) User Guide and Hardware Maintenance - Page 25
The following illustration shows the components of your storage array. Figure 7. Components of your storage array 1 Power supply 1 3 2.5-inch drive cage (SATA-to-SAS) (in some models) 5 2.5-inch drive (in some models) 7 Rear I/O module 1 9 2.5-inch drive (in some models) 11 Fan - Lenovo ThinkServer Storage SA120 | (English) User Guide and Hardware Maintenance - Page 26
FRU part numbers and supported storage array models, go to: http:/www.lenovo.com/serviceparts-lookup Notes: • Before servicing a Lenovo product, ensure that SAS cables Yes Optional-service CRU No No No No No No No No No No 14 ThinkServer Storage SA120 User Guide and Hardware Maintenance Manual - Lenovo ThinkServer Storage SA120 | (English) User Guide and Hardware Maintenance - Page 27
LEDs on the front panel The following illustration shows the LEDs on the front panel of the storage array. Note: Depending on the model, your storage array might look slightly different from the following illustration. Figure 8. LEDs on the front panel 1 Power-status LED 3 Temperature-status LED 2 - Lenovo ThinkServer Storage SA120 | (English) User Guide and Hardware Maintenance - Page 28
determine if there are any system errors. Status On Off Color Amber None Description • The storage array is overheated. • A fan is running at low speed or has been removed. • -status LED 4 Debug connector 6 SAS-in connector 16 ThinkServer Storage SA120 User Guide and Hardware Maintenance Manual - Lenovo ThinkServer Storage SA120 | (English) User Guide and Hardware Maintenance - Page 29
has potential errors. The rear I/O module is working normally. 4 Debug connector Use the debug connector to update the firmware of the storage array and diagnose problems. See Chapter 5 "Updating the firmware" on page 29 and "Using the command line interface" on page 59. 5 SAS-out connector Use - Lenovo ThinkServer Storage SA120 | (English) User Guide and Hardware Maintenance - Page 30
12. Slots on the front of the backplane 1 Slot 0 for a 3.5-inch drive 3 Slot 2 for a 3.5-inch drive 2 Slot 1 for a 3.5-inch drive 4 Slot 3 for a 3.5-inch drive 18 ThinkServer Storage SA120 User Guide and Hardware Maintenance Manual - Lenovo ThinkServer Storage SA120 | (English) User Guide and Hardware Maintenance - Page 31
the Host Bus Adapter in the server. For more information about the RAID card or the Host Bus Adapter, refer to the user guide of your server. 3. For a storage array with two rear I/O modules, you can repeat step 1 and step 2 to connect another mini-SAS signal cable to the server and the secondary - Lenovo ThinkServer Storage SA120 | (English) User Guide and Hardware Maintenance - Page 32
I/O module 2). Note: Connecting the storage arrays to each other through two rear I/O modules provides redundancy, which helps avoid significant interruption to the connection of the storage arrays when a rear I/O module fails. 20 ThinkServer Storage SA120 User Guide and Hardware Maintenance Manual - Lenovo ThinkServer Storage SA120 | (English) User Guide and Hardware Maintenance - Page 33
Figure 15. Connecting one storage array to another 3. Repeat step 2 to connect more storage arrays as you need. Each mini-SAS connector on the RAID card or on the Host Bus Adapter installed in the target server can support up to four storage arrays. Chapter 2. Product overview 21 - Lenovo ThinkServer Storage SA120 | (English) User Guide and Hardware Maintenance - Page 34
S S A A S S S S A A S S S S A A S S S S A A S S S S A A S S S S A A S S S S A A S S S S A A S S Figure 16. Connecting two to eight storage arrays to a server (one rear I/O module) 22 ThinkServer Storage SA120 User Guide and Hardware Maintenance Manual - Lenovo ThinkServer Storage SA120 | (English) User Guide and Hardware Maintenance - Page 35
Figure 17. Connecting two to four storage arrays to a server (two rear I/O modules) Chapter 2. Product overview 23 - Lenovo ThinkServer Storage SA120 | (English) User Guide and Hardware Maintenance - Page 36
24 ThinkServer Storage SA120 User Guide and Hardware Maintenance Manual - Lenovo ThinkServer Storage SA120 | (English) User Guide and Hardware Maintenance - Page 37
storage array, do the following: 1. Turn off the server that the storage array is connected to. 2. Disconnect the storage array from the ac power source. Note: You do not have to turn off the storage array when restarting the server that the storage array is connected to. © Copyright Lenovo 2014 - Lenovo ThinkServer Storage SA120 | (English) User Guide and Hardware Maintenance - Page 38
26 ThinkServer Storage SA120 User Guide and Hardware Maintenance Manual - Lenovo ThinkServer Storage SA120 | (English) User Guide and Hardware Maintenance - Page 39
storage array the storage array. This Array of Independent Disks, is a technology that provides increased storage array. This array distributes data across multiple hard disk drives, but the array appears to the host server as one single storage unit. Creating and using RAID arrays array support - Lenovo ThinkServer Storage SA120 | (English) User Guide and Hardware Maintenance - Page 40
partial space in an array, the next virtual drive in the array has Guide on the documentation DVD that comes with your storage array. This document also is available on the Lenovo Web site at: http://www.lenovo.com/UserManuals 28 ThinkServer Storage SA120 User Guide and Hardware Maintenance Manual - Lenovo ThinkServer Storage SA120 | (English) User Guide and Hardware Maintenance - Page 41
instructions on how to update the firmware of the storage array. You can update the firmware through one of the following methods: • Using the out-of-band RS232 console • Using the ThinkServer Storage Array click Connect. The storage array is connected to the computer. 6. Enter lenovo in the main - Lenovo ThinkServer Storage SA120 | (English) User Guide and Hardware Maintenance - Page 42
that your storage arrays are connected to. Then, use ThinkServer Storage Array Utility to update the firmware of your storage arrays. For detailed information about using the program, refer to the user guide of the program. 30 ThinkServer Storage SA120 User Guide and Hardware Maintenance Manual - Lenovo ThinkServer Storage SA120 | (English) User Guide and Hardware Maintenance - Page 43
Chapter 6. Installing, removing, or replacing hardware This chapter provides instructions on how to install, remove, or replace hardware for your storage array. For a list of ThinkServer options, go to: http://www.lenovo.com/thinkserver Guidelines This topic provides some guidelines that you should - Lenovo ThinkServer Storage SA120 | (English) User Guide and Hardware Maintenance - Page 44
specific service storage array components. • Ensure that you replace a failing fan assembly to avoid overheating problems. • When replacing a hot-swap drive, install the new hot-swap drive within two minutes of removal. 32 ThinkServer Storage SA120 User Guide and Hardware Maintenance Manual - Lenovo ThinkServer Storage SA120 | (English) User Guide and Hardware Maintenance - Page 45
provides instructions on how to install or replace a hot-swap drive. This topic applies only to storage array models that have drives installed. See "Features" on page 6 for more information about the supported drives. For a list of ThinkServer drive options, go to: http://www.lenovo.com/thinkserver - Lenovo ThinkServer Storage SA120 | (English) User Guide and Hardware Maintenance - Page 46
all the related instructions or ensure that you can view the PDF version on another computer for reference. Notes: • Depending on the model, your storage array might look slightly button 1 to open the handle of the drive. 34 ThinkServer Storage SA120 User Guide and Hardware Maintenance Manual - Lenovo ThinkServer Storage SA120 | (English) User Guide and Hardware Maintenance - Page 47
Figure 18. Opening the handle of a 3.5-inch drive or dummy drive tray Figure 19. Opening the handle of a 2.5-inch drive or dummy drive tray 2. Pull the handle and carefully slide the drive or the dummy drive tray out of the front of the chassis. Chapter 6. Installing, removing, or replacing hardware - Lenovo ThinkServer Storage SA120 | (English) User Guide and Hardware Maintenance - Page 48
2.5-inch drive or dummy drive tray 3. Touch the static-protective package that contains the new drive to any unpainted surface on the outside of the storage array. Then, take the new drive out of the package. 36 ThinkServer Storage SA120 User Guide and Hardware Maintenance Manual - Lenovo ThinkServer Storage SA120 | (English) User Guide and Hardware Maintenance - Page 49
Note: Do not touch the circuit board on the drive. 4. Do one of the following: • If you are replacing a drive, remove the four screws to remove the failing drive from the drive tray. Figure 22. Removing the drive from the drive tray • If you are installing a drive, go to the next step. 5. Align the - Lenovo ThinkServer Storage SA120 | (English) User Guide and Hardware Maintenance - Page 50
the storage array for the newly installed drive to be recognized. See "Drive-status LEDs" on page 17. If the drive is faulty, you need to reinstall or replace it until it is operating correctly. 8. Do one of the following: 38 ThinkServer Storage SA120 User Guide and Hardware Maintenance Manual - Lenovo ThinkServer Storage SA120 | (English) User Guide and Hardware Maintenance - Page 51
on page iii and "Guidelines" on page 31. This topic provides instructions on how to install or replace a power supply. This topic applies only to storage array models that come with one or two power supplies. When the storage array is populated with two power supplies, it can withstand a power loss - Lenovo ThinkServer Storage SA120 | (English) User Guide and Hardware Maintenance - Page 52
instructions in addition to the instructions storage array" on page 10. b. Press the release tab 1 in the direction as shown and carefully pull the handle 2 at the same time to slide the failing power supply out of the chassis. 40 ThinkServer Storage SA120 User Guide and Hardware Maintenance Manual - Lenovo ThinkServer Storage SA120 | (English) User Guide and Hardware Maintenance - Page 53
27. Removing a power supply 2. Touch the static-protective package that contains the new power supply to any unpainted surface on the outside of the storage array. Then, remove the new power supply from the package. 3. Note the orientation of the new power supply and then slide it into the chassis - Lenovo ThinkServer Storage SA120 | (English) User Guide and Hardware Maintenance - Page 54
are connected to the storage array. 2. Locate the failing fan assembly. See "Storage array components" on page 12. 3. Loosen the screws 1 and pull the two screws outward to remove the failing fan assembly out of the chassis. 42 ThinkServer Storage SA120 User Guide and Hardware Maintenance Manual - Lenovo ThinkServer Storage SA120 | (English) User Guide and Hardware Maintenance - Page 55
the new fan assembly to any unpainted surface on the outside of the storage array. Then, remove the new fan assembly from the package. 5. Note the a fan assembly 6. If you are instructed to return the old fan assembly, follow all packaging instructions and use any packaging materials that are - Lenovo ThinkServer Storage SA120 | (English) User Guide and Hardware Maintenance - Page 56
storage array or attempt any repair before reading and understanding "Safety information" on page iii and "Guidelines" on page 31. This topic provides instructions storage array. Then, remove the new I/O module from the package. 44 ThinkServer Storage SA120 User Guide and Hardware Maintenance Manual - Lenovo ThinkServer Storage SA120 | (English) User Guide and Hardware Maintenance - Page 57
new I/O module. Then, check the status LED on the I/O module. See "Rear view of the storage array" on page 10. 6. If you are instructed to return the failing I/O module, follow all packaging instructions and use any packaging materials that are supplied to you for shipping. Installing or replacing - Lenovo ThinkServer Storage SA120 | (English) User Guide and Hardware Maintenance - Page 58
a. Locate the bay for the drive cage in the rear of your storage array. Then, remove the fan assembly that is installed near the bay. See "Replacing pull the shield out of the chassis. Figure 34. Removing the protective shield 46 ThinkServer Storage SA120 User Guide and Hardware Maintenance Manual - Lenovo ThinkServer Storage SA120 | (English) User Guide and Hardware Maintenance - Page 59
35. Removing the drive cage 3. Touch the static-protective package that contains the new drive cage to any unpainted surface on the outside of the storage array. Then, remove the new drive cage from the package. 4. Note the orientation of the new drive cage and slide it into the chassis until it - Lenovo ThinkServer Storage SA120 | (English) User Guide and Hardware Maintenance - Page 60
If the storage array is installed in a rack cabinet, remove the storage array from the rack cabinet and place it on a flat, clean, and static-protective surface. See "Removing the storage array from the rack cabinet" on page 55. 48 ThinkServer Storage SA120 User Guide and Hardware Maintenance Manual - Lenovo ThinkServer Storage SA120 | (English) User Guide and Hardware Maintenance - Page 61
cover one by one and record the location of each specific screw after you remove it. Then, slide the cover to the rear of the storage array to remove the cover. Note: The screws that secure the cover differ in length. Ensure that you record the location of each screw so that - Lenovo ThinkServer Storage SA120 | (English) User Guide and Hardware Maintenance - Page 62
the static-protective package that contains the new backplane to any unpainted surface on the outside of the storage array. Then, take the new backplane out of the package. Note: Carefully handle the backplane by its edges. 50 ThinkServer Storage SA120 User Guide and Hardware Maintenance Manual - Lenovo ThinkServer Storage SA120 | (English) User Guide and Hardware Maintenance - Page 63
7. Position the new backplane so that the screw holes in the new backplane are aligned with the corresponding holes in the chassis. Then, install the screws to secure the new backplane to the chassis. Note: Use a screw driver with a long handle to install the screws 1 to the bottom of the chassis. - Lenovo ThinkServer Storage SA120 | (English) User Guide and Hardware Maintenance - Page 64
storage array is rated above 16 kg (35.27 lb). Refer to the following statement for safe practices when lifting. ≥ 18 kg (39.7 lb) < 32 kg (70.5 lb) ≥ 32 kg (70.5 lb) < 55 kg (121.2 lb) ≥ 55 kg (121.2 lb) < 100 kg (220.5 lb) 52 ThinkServer Storage SA120 User Guide and Hardware Maintenance Manual - Lenovo ThinkServer Storage SA120 | (English) User Guide and Hardware Maintenance - Page 65
CAUTION: Use safe practices when lifting. To install the storage array into the rack cabinet, do the following: 1. Position the two side rails so that they are parallel with each other. Then, install the screws to - Lenovo ThinkServer Storage SA120 | (English) User Guide and Hardware Maintenance - Page 66
that the rear side of the storage array is secured in position by the rear support brackets. Then, install the screws to secure the storage array to the side rails. Figure 42. Installing the storage array to the side rails 54 ThinkServer Storage SA120 User Guide and Hardware Maintenance Manual - Lenovo ThinkServer Storage SA120 | (English) User Guide and Hardware Maintenance - Page 67
. ≥ 18 kg (39.7 lb) < 32 kg (70.5 lb) ≥ 32 kg (70.5 lb) < 55 kg (121.2 lb) CAUTION: Use safe practices when lifting. To remove the storage array from the rack cabinet, do the following: ≥ 55 kg (121.2 lb) < 100 kg (220.5 lb) Chapter 6. Installing, removing, or replacing hardware 55 - Lenovo ThinkServer Storage SA120 | (English) User Guide and Hardware Maintenance - Page 68
1. Remove the ear caps from the storage array. Figure 44. Removing the ear caps from the storage array 56 ThinkServer Storage SA120 User Guide and Hardware Maintenance Manual - Lenovo ThinkServer Storage SA120 | (English) User Guide and Hardware Maintenance - Page 69
2. Remove the screws that secure the storage array to the side rails. Then, remove the storage array from the side rails. Figure 45. Removing the storage array from the side rails Chapter 6. Installing, removing, or replacing hardware 57 - Lenovo ThinkServer Storage SA120 | (English) User Guide and Hardware Maintenance - Page 70
58 ThinkServer Storage SA120 User Guide and Hardware Maintenance Manual - Lenovo ThinkServer Storage SA120 | (English) User Guide and Hardware Maintenance - Page 71
Chapter 8 "Getting information, help, and service" on page 63 for additional troubleshooting resources. Troubleshooting procedure Use the following information as a general procedure for diagnosing and troubleshooting problems you experience with your storage array: 1. Verify that the power cords - Lenovo ThinkServer Storage SA120 | (English) User Guide and Hardware Maintenance - Page 72
is within the required range of the storage array. 2. If the power-status LED is not lit in green, check that: • The power cord is working correctly. • The power supply is working normally. Replace the power supply if necessary. 60 ThinkServer Storage SA120 User Guide and Hardware Maintenance Manual - Lenovo ThinkServer Storage SA120 | (English) User Guide and Hardware Maintenance - Page 73
arrays are connected to one another correctly. 4. Check the SAS-connector-status LEDs. Replace the SAS signal cables if necessary. 5. If none of these actions solve the problem, seek technical assistance. See Chapter 8 "Getting information, help, and service" on page 63. Chapter 7. Troubleshooting - Lenovo ThinkServer Storage SA120 | (English) User Guide and Hardware Maintenance - Page 74
62 ThinkServer Storage SA120 User Guide and Hardware Maintenance Manual - Lenovo ThinkServer Storage SA120 | (English) User Guide and Hardware Maintenance - Page 75
in your storage array User Guide and Hardware Maintenance Manual for instructions on how to diagnose problems and do basic troubleshooting. The troubleshooting and diagnostics information might tell you that you need additional or updated device drivers or other software. Lenovo maintains pages - Lenovo ThinkServer Storage SA120 | (English) User Guide and Hardware Maintenance - Page 76
and maintenance of application programs For the warranty type and duration for your product, refer to Chapter 9 "Lenovo Limited Warranty" on page 67. You must retain your proof of purchase to obtain warranty service. 64 ThinkServer Storage SA120 User Guide and Hardware Maintenance Manual - Lenovo ThinkServer Storage SA120 | (English) User Guide and Hardware Maintenance - Page 77
/support/phone. If the telephone number for your country or region is not listed, contact your Lenovo reseller or Lenovo marketing representative. Using other services If you travel with a Lenovo notebook computer or relocate your computer to a country where your desktop, notebook, or storage array - Lenovo ThinkServer Storage SA120 | (English) User Guide and Hardware Maintenance - Page 78
66 ThinkServer Storage SA120 User Guide and Hardware Maintenance Manual - Lenovo ThinkServer Storage SA120 | (English) User Guide and Hardware Maintenance - Page 79
during the warranty period, you may obtain warranty service by contacting Lenovo or a Lenovo approved Service Provider. A list of approved Service Providers and their telephone numbers is available at: www.lenovo.com/support/phone. Warranty service may not be available in all locations and may - Lenovo ThinkServer Storage SA120 | (English) User Guide and Hardware Maintenance - Page 80
or "CRU." If so, the Service Provider will ship the CRU to you for you to install. If your problem cannot be resolved over the telephone; Lenovo's privacy policy is available at www.lenovo.com/. What this Warranty Does not Cover 68 ThinkServer Storage SA120 User Guide and Hardware Maintenance Manual - Lenovo ThinkServer Storage SA120 | (English) User Guide and Hardware Maintenance - Page 81
materials; • damage caused by a non-authorized service provider; • failure of, or damage caused by, any third party products, including those that Lenovo may provide or integrate into the Lenovo product at your request; • any technical or other support, such as assistance with "how-to" questions - Lenovo ThinkServer Storage SA120 | (English) User Guide and Hardware Maintenance - Page 82
period, Lenovo will SERVICE PROVIDERS BE LIABLE FOR ANY OF THE FOLLOWING EVEN IF INFORMED OF THEIR POSSIBILITY AND REGARDLESS OF WHETHER THE CLAIM IS BASED IN CONTRACT, WARRANTY, NEGLIGENCE, STRICT LIABILITY OR OTHER THEORY 70 ThinkServer Storage SA120 User Guide and Hardware Maintenance Manual - Lenovo ThinkServer Storage SA120 | (English) User Guide and Hardware Maintenance - Page 83
not amount to a major failure. New Zealand The following is added to the same section in Part 1: Use of Personal Information: Lenovo will not be able to perform our service under this warranty if you refuse to provide your information or do not wish us to transfer your information to our agent - Lenovo ThinkServer Storage SA120 | (English) User Guide and Hardware Maintenance - Page 84
a suitable working area to allow disassembly and reassembly of the product. Some repairs may need to be completed at a service center. If so, the Service Provider will send the product to the service center at its expense. 72 ThinkServer Storage SA120 User Guide and Hardware Maintenance Manual - Lenovo ThinkServer Storage SA120 | (English) User Guide and Hardware Maintenance - Page 85
Provider may dispose of the product as it sees fit, with no liability to you. 7. Product Exchange Service Under Product Exchange Service, Lenovo will ship a replacement product to your location. You are responsible for its installation and verification of its operation. The replacement product - Lenovo ThinkServer Storage SA120 | (English) User Guide and Hardware Maintenance - Page 86
por: Lenovo México S. de R.L. de C.V. Paseo de Tamarindos No.400-A Piso 27 Arcos Torre Poniente Bosques de Las Lomas C.P. 05120 Mexico, D.F. Modelo del producto Fecha en que el consumidor recibió el producto Marca Lenovo 74 ThinkServer Storage SA120 User Guide and Hardware Maintenance Manual - Lenovo ThinkServer Storage SA120 | (English) User Guide and Hardware Maintenance - Page 87
and verify the operation of any other product, program, or service. Lenovo may have patents or pending patent applications covering subject matter described document are not intended for use in implantation or other life support applications where malfunction may result in injury or death to - Lenovo ThinkServer Storage SA120 | (English) User Guide and Hardware Maintenance - Page 88
the server, Lenovo may condition provision of repair or replacement of servers or parts on implementation of appropriate remedial measures to mitigate such environmental contamination. Implementation of such remedial measures is a customer responsibility. 76 ThinkServer Storage SA120 User Guide and - Lenovo ThinkServer Storage SA120 | (English) User Guide and Hardware Maintenance - Page 89
to cause cancer, and birth defects or other reproductive harm. Wash hands after handling. Important WEEE information The WEEE marking on Lenovo products applies to countries with WEEE and e-waste regulations (for example, European Directive 2002/96/EC, India E-Waste Management & Handling Rules - Lenovo ThinkServer Storage SA120 | (English) User Guide and Hardware Maintenance - Page 90
not installed and used in accordance with the instruction manual, may cause harmful interference to radio communications used in order to meet FCC emission limits. Lenovo is not responsible for any radio or television interference ThinkServer Storage SA120 User Guide and Hardware Maintenance Manual - Lenovo ThinkServer Storage SA120 | (English) User Guide and Hardware Maintenance - Page 91
of EU Council Directive 2004/108/EC on the approximation of the laws of the Member States relating to electromagnetic compatibility. Lenovo cannot accept responsibility for any failure to satisfy the protection requirements resulting from a non-recommended modification of the product, including the - Lenovo ThinkServer Storage SA120 | (English) User Guide and Hardware Maintenance - Page 92
führen. Verantwortlich für die Konformitätserklärung nach Paragraf 5 des EMVG ist die Lenovo (Deutschland) GmbH, Gropiusplatz 10, D-70563 Stuttgart. Informationen in Hinsicht EMVG Paragraf zu betreiben. Eurasian compliance mark 80 ThinkServer Storage SA120 User Guide and Hardware Maintenance Manual - Lenovo ThinkServer Storage SA120 | (English) User Guide and Hardware Maintenance - Page 93
updating 29 firmware update Xmodem 29 front panel LED 15 front view of the storage array locations 10 G gaseous contamination 76 German gloss statement 78 getting help 63 getting information 63 getting service 63 guidelines 31 H hardware installing 31 removing 31 replacing 31 help, getting 63 hot - Lenovo ThinkServer Storage SA120 | (English) User Guide and Hardware Maintenance - Page 94
25 TÜV gloss statement 78 U updating firmware 29 using documentation 63 ThinkServer Storage Array Utility program 30 W working with the storage array with the power on guidelines 33 X Xmodem firmware update 29 S SAS connector 82 ThinkServer Storage SA120 User Guide and Hardware Maintenance Manual - Lenovo ThinkServer Storage SA120 | (English) User Guide and Hardware Maintenance - Page 95
- Lenovo ThinkServer Storage SA120 | (English) User Guide and Hardware Maintenance - Page 96
-
 1
1 -
 2
2 -
 3
3 -
 4
4 -
 5
5 -
 6
6 -
 7
7 -
8
-
9
-
10
-
11
-
12
-
13
-
14
-
15
-
16
-
17
-
18
-
19
-
20
-
21
-
22
-
23
-
24
-
25
-
26
-
27
-
28
-
29
-
30
-
31
-
32
-
33
-
34
-
35
-
36
-
37
-
38
-
39
-
40
-
41
-
42
-
43
-
44
-
45
-
46
-
47
-
48
-
49
-
50
-
51
-
52
-
53
-
54
-
55
-
56
-
57
-
58
-
59
-
60
-
61
-
62
-
63
-
64
-
65
-
66
-
67
-
68
-
69
-
70
-
71
-
72
-
73
-
74
-
75
-
76
-
77
-
78
-
79
-
80
-
81
-
82
-
83
-
84
-
85
-
86
-
87
-
88
-
89
-
90
-
91
-
92
-
93
-
94
-
95
-
96
 |
 |
ThinkServerStorageSA120
UserGuideandHardwareMaintenance
Manual
Machine Types:
70F0and70F1