Lenovo Y310 Y310 User's Guide - Page 56
Attention
 |
View all Lenovo Y310 manuals
Add to My Manuals
Save this manual to your list of manuals |
Page 56 highlights
Lenovo 3000Y310 UG.book Page 48 Friday, September 14, 2007 4:24 PM Replacing Memory 8. Push the SO-DIMM down until it snaps into place. 2 1 9. Make sure that the memory module is firmly fixed in the slot and does not move easily. 10. Reinstall the cover of the memory slot by inserting the tabs into the slots first a, and closing the cover b. Then tighten the five screws c. 3 2 3 3 13 3 1 1 Attention: When you have added the SO-DIMM, do not use your computer until you have closed the memory slot cover. Never use the computer with the cover open. 11. Reinstall the battery. 12. Turn the computer over again, and reconnect the ac adapter and cables to the computer. 48 Lenovo 3000 Y310 User Guide
-
 1
1 -
2
-
3
-
4
-
5
-
6
-
7
-
8
-
9
-
10
-
11
-
12
-
13
-
14
-
15
-
16
-
17
-
18
-
19
-
20
-
21
-
22
-
23
-
24
-
25
-
26
-
27
-
28
-
29
-
30
-
31
-
32
-
33
-
34
-
35
-
36
-
37
-
38
-
39
-
40
-
41
-
42
-
43
-
44
-
45
-
46
-
47
-
48
-
49
-
50
-
 51
51 -
 52
52 -
 53
53 -
 54
54 -
 55
55 -
 56
56 -
 57
57 -
 58
58 -
 59
59 -
 60
60 -
 61
61 -
62
-
63
-
64
-
65
-
66
-
67
-
68
-
69
-
70
-
71
-
72
-
73
-
74
-
75
-
76
-
77
-
78
-
79
-
80
-
81
-
82
-
83
-
84
-
85
-
86
 |
 |
Replacing Memory
48
Lenovo 3000 Y310 User Guide
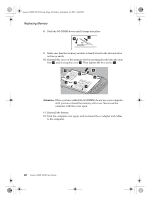
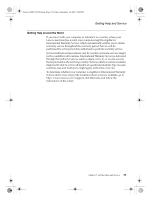
8.
Push the SO-DIMM down until it snaps into place.
9.
Make sure that the memory module is firmly fixed in the slot and does
not move easily.
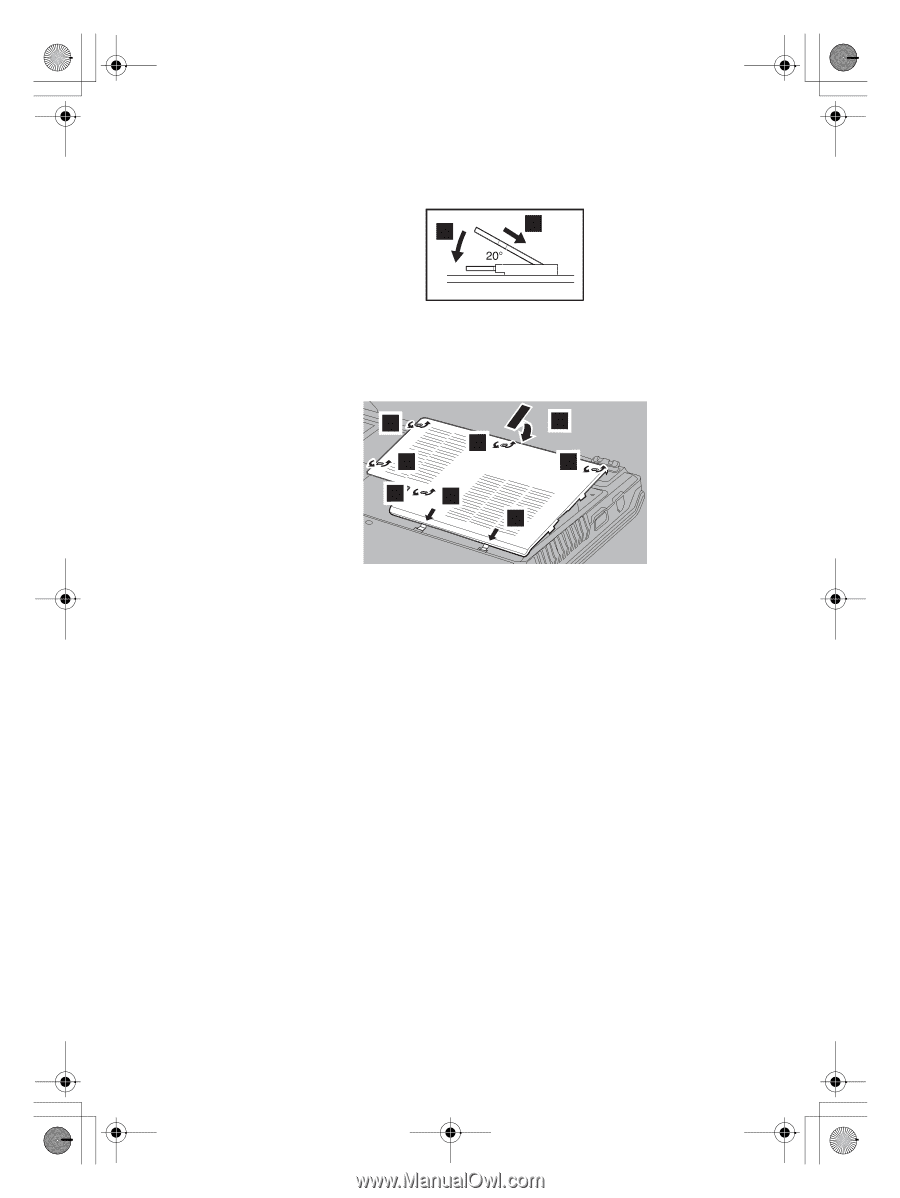
10.
Reinstall the cover of the memory slot by inserting the tabs into the slots
first
a
, and closing the cover
b
. Then tighten the five screws
c
.
Attention:
When you have added the SO-DIMM, do not use your computer
until you have closed the memory slot cover. Never use the
computer with the cover open.
11.
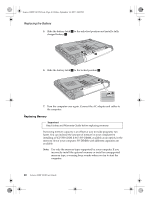
Reinstall the battery.
12.
Turn the computer over again, and reconnect the ac adapter and cables
to the computer.
1
2
2
1
1
1
3
3
3
3
3
Lenovo 3000Y310 UG.book
Page 48
Friday, September 14, 2007
4:24 PM