Lexmark C530DN Help Menu Pages - Page 5
Menus and Messages Guide, Software and, Documentation, Software and Documentation, User's Guide
 |
UPC - 734646030908
View all Lexmark C530DN manuals
Add to My Manuals
Save this manual to your list of manuals |
Page 5 highlights
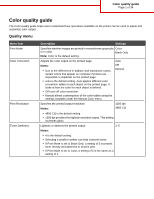
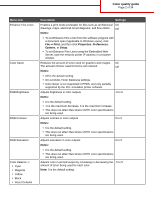
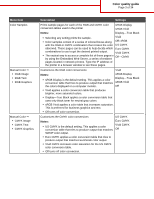
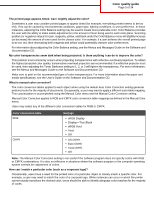
Color quality guide Page 5 of 34 The printed page appears tinted. Can I slightly adjust the color? Sometimes a user may consider printed pages to appear tinted (for example, everything printed seems to be too red). This can be caused by environmental conditions, paper type, lighting conditions, or user preference. In these instances, adjusting the Color Balance setting may be used to create more preferable color. Color Balance provides the user with the ability to make subtle adjustments to the amount of toner being used in each color plane. Selecting positive (or negative) values for cyan, magenta, yellow, and black under the Color Balance menu will slightly increase (or decrease) the amount of toner used for the chosen color. For example, if a user believes the overall printed page to be too red, then decreasing both magenta and yellow could potentially improve color preferences. For information about adjusting the Color Balance setting, see the Menus and Messages Guide on the Software and Documentation CD. My color transparencies seem dark when being projected. Is there anything I can do to improve the color? This problem most commonly occurs when projecting transparencies with reflective overhead projectors. To obtain the highest projected color quality, transmissive overhead projectors are recommended. If a reflective projector must be used, then adjusting the Toner Darkness setting to 1, 2, or 3 will lighten the transparency. For more information, see the Menus and Messages Guide on the Software and Documentation CD. Make sure to print on the recommended type of color transparencies. For more information about the paper and media specifications, see the User's Guide on the Software and Documentation CD. What is manual color correction? The color conversion tables applied to each object when using the default Auto Color Correction setting generate preferred color for the majority of documents. Occasionally, a user may want to apply a different color table mapping. This customization is accomplished using the Manual Color menu and the Manual Color Correction setting. Manual Color Correction applies to RGB and CMYK color conversion table mappings as defined in the Manual Color menu. Users may select any of the different color conversion tables for RGB or CMYK: Color conversion table RGB CMYK Settings • sRGB Display • Display-True Black • sRGB Vivid • Vivid • Off • US CMYK • Euro CMYK • Vivid CMYK • Off Note: The Manual Color Correction setting is not useful if the software program does not specify colors with RGB or CMYK combinations. It is also not effective in situations where the software program or the computer operating system controls the adjustment of colors. How can I match a particular color (such as a corporate logo)? Occasionally, users have a need for the printed color of a particular object to closely match a specific color. For example, a user may need to match the color of a corporate logo. While instances can occur in which the printer cannot exactly reproduce the desired color, users should be able to identify adequate color matches for the majority of cases.
-
 1
1 -
 2
2 -
 3
3 -
 4
4 -
 5
5 -
 6
6 -
 7
7 -
 8
8 -
 9
9 -
 10
10 -
 11
11 -
12
-
13
-
14
-
15
-
16
-
17
-
18
-
19
-
20
-
21
-
22
-
23
-
24
-
25
-
26
-
27
-
28
-
29
-
30
-
31
-
32
-
33
-
34
 |
 |
