Lexmark Consumer Inkjet Photo Guide - Page 15
Printing a borderless photo, select Only Borderless.
 |
View all Lexmark Consumer Inkjet manuals
Add to My Manuals
Save this manual to your list of manuals |
Page 15 highlights
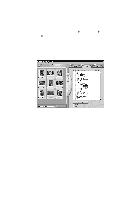
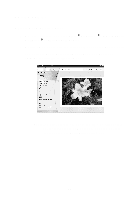
Printing a borderless photo 1 For best results, load photo paper into the tray. For help, see page 9. 2 Open the Photo Center. For help, see page 29. 3 Open the photo that you want to print. • To access your photo from a memory card, see page 12. • To access your photo from a folder on your computer, see page 10. 4 From the Which layouts to list? drop-down menu of the Page tab, select Only Borderless. 5 Scroll through the layout thumbnails to select a borderless layout for your photos. 6 Click and drag your photo into the layout. 7 Print your photo. For help, see "Print your photos" on page 14. 8 To prevent smudging, remove each photo as it exits the printer, and let it dry completely before stacking. 15
-
 1
1 -
2
-
3
-
4
-
5
-
6
-
7
-
8
-
9
-
 10
10 -
 11
11 -
 12
12 -
 13
13 -
 14
14 -
 15
15 -
 16
16 -
 17
17 -
 18
18 -
 19
19 -
 20
20 -
21
-
22
-
23
-
24
-
25
-
26
-
27
-
28
-
29
-
30
-
31
-
32
-
33
 |
 |

15
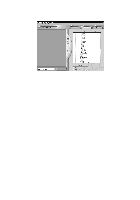
Printing a borderless photo
1
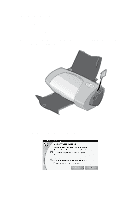
For best results, load photo paper into the tray. For help, see
page 9.
2
Open the Photo Center. For help, see page 29.
3
Open the photo that you want to print.
•
To access your photo from a memory card, see page 12.
•
To access your photo from a folder on your computer, see
page 10.
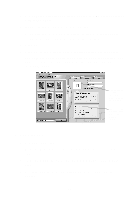
4
From the Which layouts to list? drop-down menu of the Page tab,
select Only Borderless.
5
Scroll through the layout thumbnails to select a borderless layout for
your photos.
6
Click and drag your photo into the layout.
7
Print your photo. For help, see “Print your photos” on page 14.
8
To prevent smudging, remove each photo as it exits the printer, and
let it dry completely before stacking.