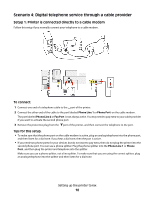
Lexmark Interpret S402 Fax Guide - Page 5
Setting up the printer to fax, Step 1: Connect the printer to the telephone line
 |
View all Lexmark Interpret S402 manuals
Add to My Manuals
Save this manual to your list of manuals |
Page 5 highlights
Setting up the printer to fax Step 1: Connect the printer to the telephone line Check the scenarios below and follow the setup that is applicable to your telephone service. Scenario 1: Standard telephone line Setup 1: Printer is connected to a dedicated fax line To connect: Connect the cable from the wall jack to the port of the printer. Tips for this setup: • You can set the printer to receive faxes automatically (Auto Answer On) or manually (Auto Answer Off). • If you want to receive faxes automatically (Auto Answer On), then set the printer to pick up on any number of rings that you want. Setting up the printer to fax 5
-
 1
1 -
 2
2 -
 3
3 -
 4
4 -
 5
5 -
 6
6 -
 7
7 -
 8
8 -
 9
9 -
 10
10 -
 11
11 -
12
-
13
-
14
-
15
-
16
-
17
-
18
-
19
-
20
-
21
-
22
-
23
-
24
 |
 |
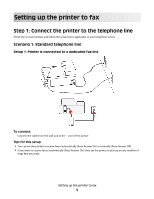
Setting up the printer to fax
Step 1: Connect the printer to the telephone line
Check the scenarios below and follow the setup that is applicable to your telephone service.
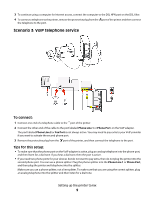
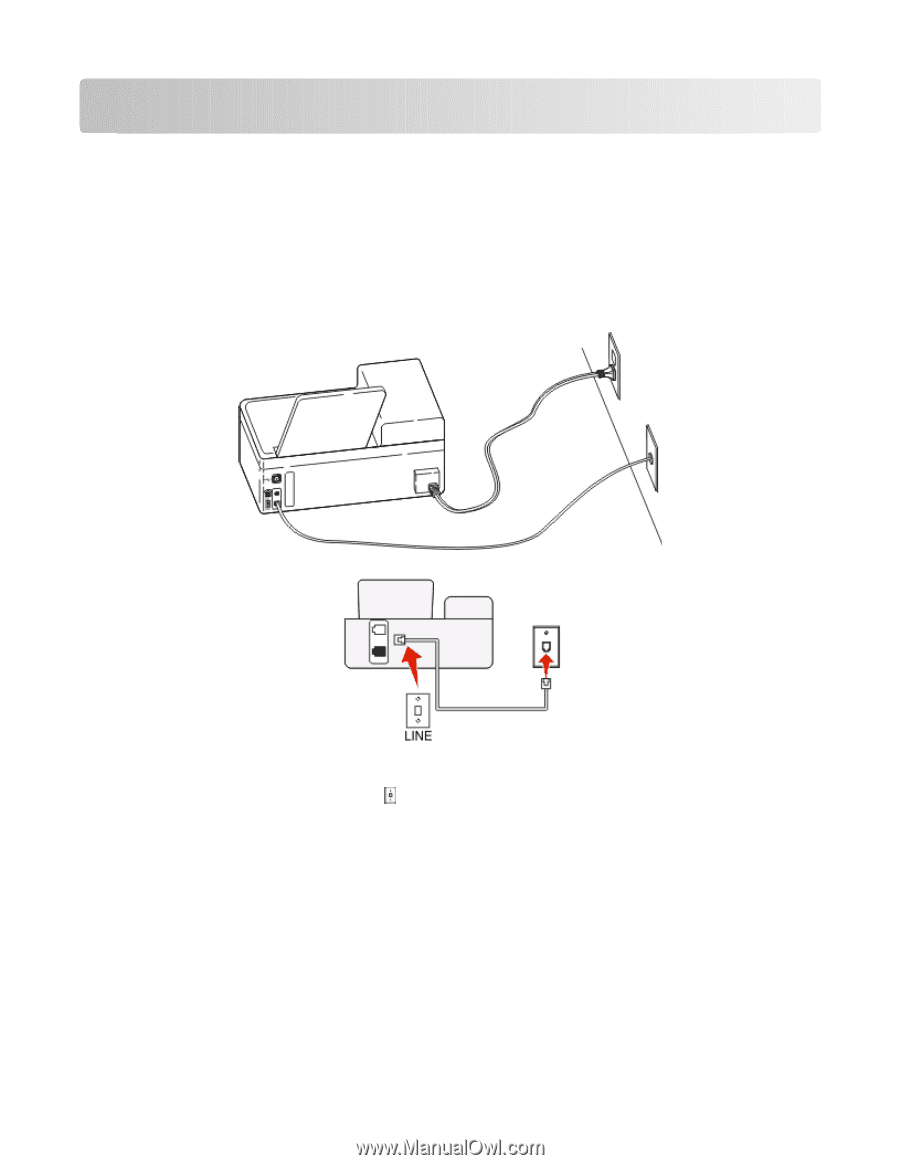
Scenario 1: Standard telephone line
Setup 1: Printer is connected to a dedicated fax line
To connect:
Connect the cable from the wall jack to the
port of the printer.
Tips for this setup:
•
You can set the printer to receive faxes automatically (Auto Answer On) or manually (Auto Answer Off).
•
If you want to receive faxes automatically (Auto Answer On), then set the printer to pick up on any number of
rings that you want.
Setting up the printer to fax
5