Lexmark X543DN User Guide - Page 58
Printing photos from a PictBridge-enabled digital camera, Printing information s
 |
UPC - 734646099479
View all Lexmark X543DN manuals
Add to My Manuals
Save this manual to your list of manuals |
Page 58 highlights
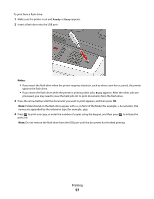
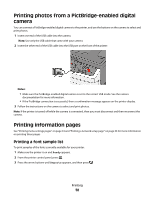
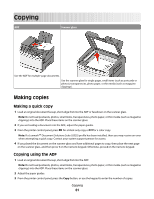
Printing photos from a PictBridge-enabled digital camera You can connect a PictBridge-enabled digital camera to the printer, and use the buttons on the camera to select and print photos. 1 Insert one end of the USB cable into the camera. Note: Use only the USB cable that came with your camera. 2 Insert the other end of the USB cable into the USB port on the front of the printer. Notes: • Make sure the PictBridge-enabled digital camera is set to the correct USB mode. See the camera documentation for more information. • If the PictBridge connection is successful, then a confirmation message appears on the printer display. 3 Follow the instructions on the camera to select and print photos. Note: If the printer is turned off while the camera is connected, then you must disconnect and then reconnect the camera. Printing information pages See "Printing menu settings pages" on page 33 and "Printing a network setup page" on page 33 for more information on printing these pages. Printing a font sample list To print samples of the fonts currently available for your printer: 1 Make sure the printer is on and Ready appears. 2 From the printer control panel, press . 3 Press the arrow buttons until Reports appears, and then press . Printing 58
-
 1
1 -
2
-
3
-
4
-
5
-
6
-
7
-
8
-
9
-
10
-
11
-
12
-
13
-
14
-
15
-
16
-
17
-
18
-
19
-
20
-
21
-
22
-
23
-
24
-
25
-
26
-
27
-
28
-
29
-
30
-
31
-
32
-
33
-
34
-
35
-
36
-
37
-
38
-
39
-
40
-
41
-
42
-
43
-
44
-
45
-
46
-
47
-
48
-
49
-
50
-
51
-
52
-
 53
53 -
 54
54 -
 55
55 -
 56
56 -
 57
57 -
 58
58 -
 59
59 -
 60
60 -
 61
61 -
 62
62 -
 63
63 -
64
-
65
-
66
-
67
-
68
-
69
-
70
-
71
-
72
-
73
-
74
-
75
-
76
-
77
-
78
-
79
-
80
-
81
-
82
-
83
-
84
-
85
-
86
-
87
-
88
-
89
-
90
-
91
-
92
-
93
-
94
-
95
-
96
-
97
-
98
-
99
-
100
-
101
-
102
-
103
-
104
-
105
-
106
-
107
-
108
-
109
-
110
-
111
-
112
-
113
-
114
-
115
-
116
-
117
-
118
-
119
-
120
-
121
-
122
-
123
-
124
-
125
-
126
-
127
-
128
-
129
-
130
-
131
-
132
-
133
-
134
-
135
-
136
-
137
-
138
-
139
-
140
-
141
-
142
-
143
-
144
-
145
-
146
-
147
-
148
-
149
-
150
-
151
-
152
-
153
-
154
-
155
-
156
-
157
-
158
-
159
-
160
-
161
-
162
-
163
-
164
-
165
-
166
-
167
-
168
-
169
-
170
-
171
-
172
-
173
-
174
-
175
-
176
-
177
-
178
-
179
-
180
-
181
-
182
-
183
-
184
-
185
-
186
-
187
-
188
-
189
-
190
-
191
-
192
-
193
-
194
-
195
-
196
-
197
-
198
-
199
-
200
-
201
-
202
-
203
-
204
-
205
-
206
-
207
-
208
-
209
-
210
-
211
-
212
-
213
-
214
-
215
-
216
-
217
-
218
-
219
-
220
-
221
-
222
-
223
-
224
-
225
-
226
-
227
-
228
-
229
-
230
-
231
-
232
-
233
-
234
-
235
-
236
-
237
-
238
-
239
-
240
-
241
-
242
-
243
-
244
-
245
 |
 |
