Lexmark X945e Quick Reference
Lexmark X945e Manual
 |
View all Lexmark X945e manuals
Add to My Manuals
Save this manual to your list of manuals |
Lexmark X945e manual content summary:
- Lexmark X945e | Quick Reference - Page 1
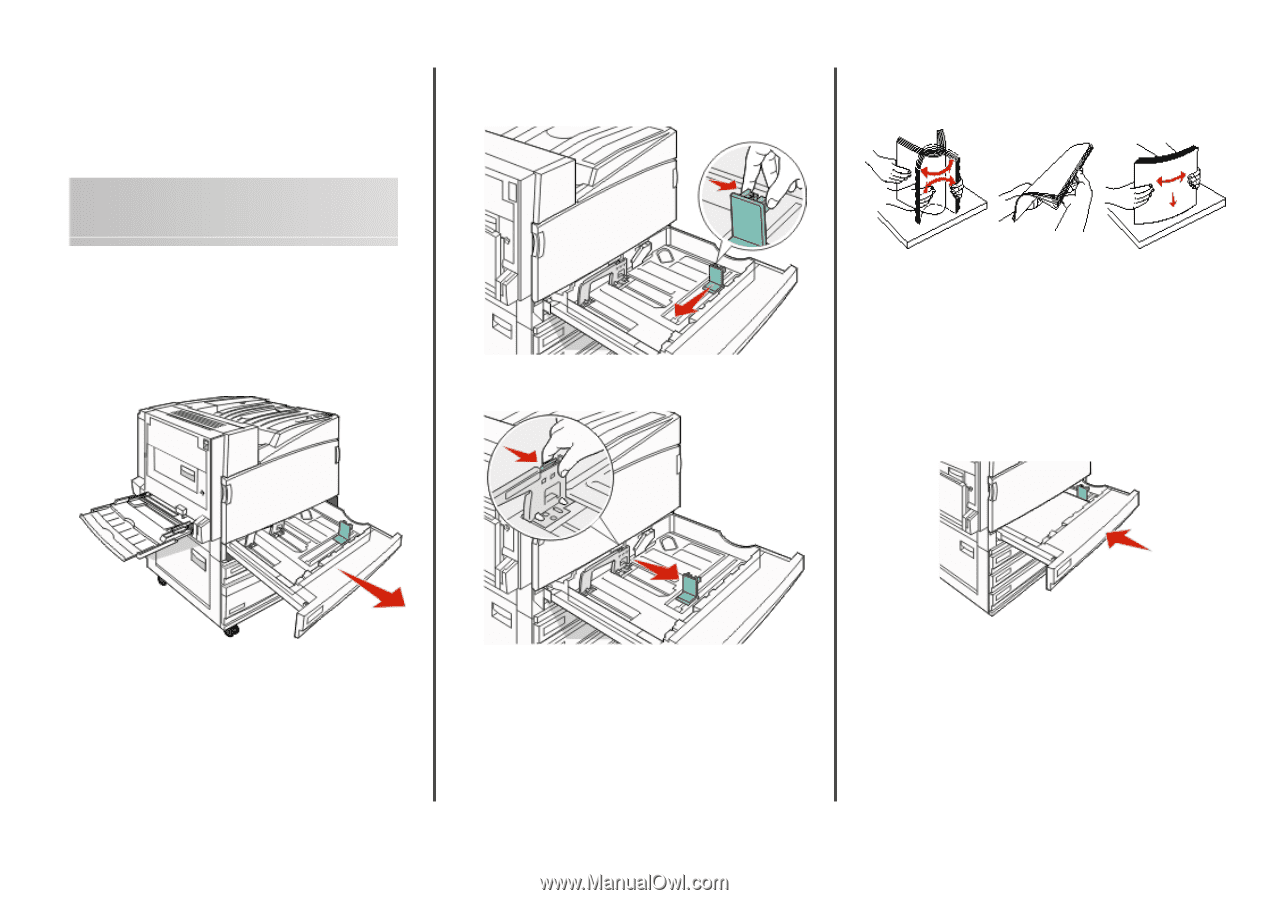
Lexmark™ X94x Quick Reference Loading paper and specialty media Loading the 520-sheet trays The printer has a standard 520-sheet tray (Tray 1), and it may have one or more optional 520-sheet trays. All 520-sheet trays support the same paper sizes and types. Paper may be loaded in the trays in either - Lexmark X945e | Quick Reference - Page 2
Load the paper stack with the recommended print side faceup. 2 Squeeze the length guide tab inward as shown, and slide the guide to the correct position for the paper size being loaded. 5 Make sure the paper guides are secure against the edges of the paper. 6 Insert the tray into the printer. 7 If - Lexmark X945e | Quick Reference - Page 3
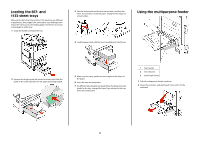
Size setting for the multipurpose feeder must be set manually. The factory default Paper Type setting is Plain Paper. The Paper Type setting must be set manually for all trays that do not contain plain paper. 1 Make sure the printer is on and Ready appears. 2 From the control panel, touch . 3 Touch - Lexmark X945e | Quick Reference - Page 4
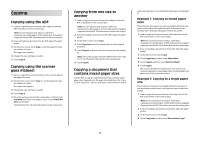
The scanner identifies the mixed paper sizes as they scan. Copies are printed on mixed paper sizes corresponding to the paper sizes of the original document. Example 2: Copying to a single paper size The printer has one paper tray, loaded with letter-size paper. A document that contains letter- and - Lexmark X945e | Quick Reference - Page 5
Copy to, and then touch Letter. 6 Touch Copy It. The scanner identifies the mixed paper sizes as they scan and then scales the legal-size pages to print on letter-size paper. Copying on both sides of the paper (duplexing) 1 Load an original document faceup, short edge first into the ADF or facedown - Lexmark X945e | Quick Reference - Page 6
, .tif, .pcx, and .dcx. Many USB flash memory devices are tested and approved for use with the printer. For more information, visit the Lexmark Web site at www.lexmark.com. Notes: • Hi-Speed USB devices must support the Full-speed standard. Devices supporting only USB Low-speed capabilities are not - Lexmark X945e | Quick Reference - Page 7
82 Replace waste toner box appears. The printer will not continue printing until the waste toner box is replaced. 1 Waste toner box 2 Door E6 3 Door E 4 Printhead lens cleaner 5 E6 Door tab 7 1 Unpack the replacement waste toner box and accessories. 2 Open Door E (front printer door). Warning - Lexmark X945e | Quick Reference - Page 8
Door tab, and then push the door down. 5 Remove the waste toner box. 7 Place the waste toner box in the recycling bag. 4 Remove the old printhead lens cleaner from Door E, and then discard it. 6 Place the plastic cover over the waste toner box. 8 Use the new printhead lens cleaner to clean the - Lexmark X945e | Quick Reference - Page 9
press the bar down. 13 Remove all paper from the printer paper path. Visit www.lexmark.com/recycling to learn how to recycle the waste toner box. Replacing a photoconductor Replace the black photoconductor when 84 Replace black pc unit appears. Replace the cyan, magenta, and yellow 9 3 Remove the - Lexmark X945e | Quick Reference - Page 10
E. Replacing a toner cartridge Replace the specified toner cartridge (cyan, magenta, yellow, or black) when 88 Replace toner appears. The printer will not continue printing until the specified cartridge is replaced. 1 Make sure the printer is on and Ready or 88 Replace toner appears - Lexmark X945e | Quick Reference - Page 11
Make sure that the printer is turned off and unplugged from the wall outlet. CAUTION-SHOCK HAZARD: To avoid the risk of electric shock, unplug the power cord from the wall outlet and disconnect all cables to the printer before proceeding. 2 Remove paper from the paper support and paper exit tray. 11 - Lexmark X945e | Quick Reference - Page 12
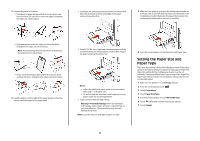
may cause damage to your printer. 5 Make sure the paper support and paper exit tray are dry before beginning a new print job. Cleaning the scanner glass Clean the scanner glass if you encounter print quality problems, such as streaks on copied or scanned images. 1 Slightly dampen a soft, lint
-
 1
1 -
 2
2 -
 3
3 -
 4
4 -
 5
5 -
 6
6 -
 7
7 -
8
-
9
-
10
-
11
-
12
 |
 |
Lexmark™ X94x
Quick Reference
Loading paper and
specialty media
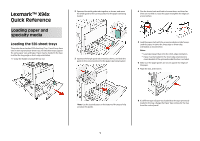
Loading the 520-sheet trays
The printer has a standard 520-sheet tray (Tray 1), and it may have
one or more optional 520-sheet trays. All 520-sheet trays support
the same paper sizes and types. Paper may be loaded in the trays
in either the long-edge or short-edge orientation.
1
Grasp the handle, and pull the tray out.
2
Squeeze the width guide tabs together as shown, and move
the width guide to the correct position for the paper size being
loaded.
3
Squeeze the length guide tab inward as shown, and slide the
guide to the correct position for the paper size being loaded.
Note:
Use the size indicators on the bottom of the tray to help
position the guides.
4
Flex the sheets back and forth to loosen them, and then fan
them. Do not fold or crease the paper. Straighten the edges on
a level surface.
5
Load the paper stack with the recommended print side faceup.
Load the paper in either the long-edge or short-edge
orientation as shown below:
Notes:
•
Load sizes larger than A4 in the short-edge orientation.
•
Paper must be loaded in the short-edge orientation to
create booklets if the optional booklet finisher is installed.
6
Make sure the paper guides are secure against the edges of
the paper.
7
Align the tray, and insert it.
8
If a different type of paper was loaded than the type previously
loaded in the tray, change the Paper Type setting for the tray
from the control panel.
1