LiftMaster 3850 3850 Elite Series Manual - Page 10
Attach the Rail to the Header Bracket, INSTALLATION STEP 3 - belt
 |
View all LiftMaster 3850 manuals
Add to My Manuals
Save this manual to your list of manuals |
Page 10 highlights
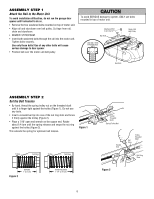
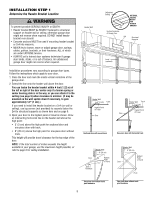
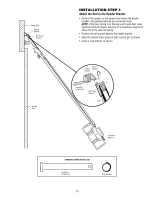
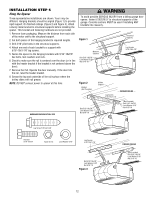
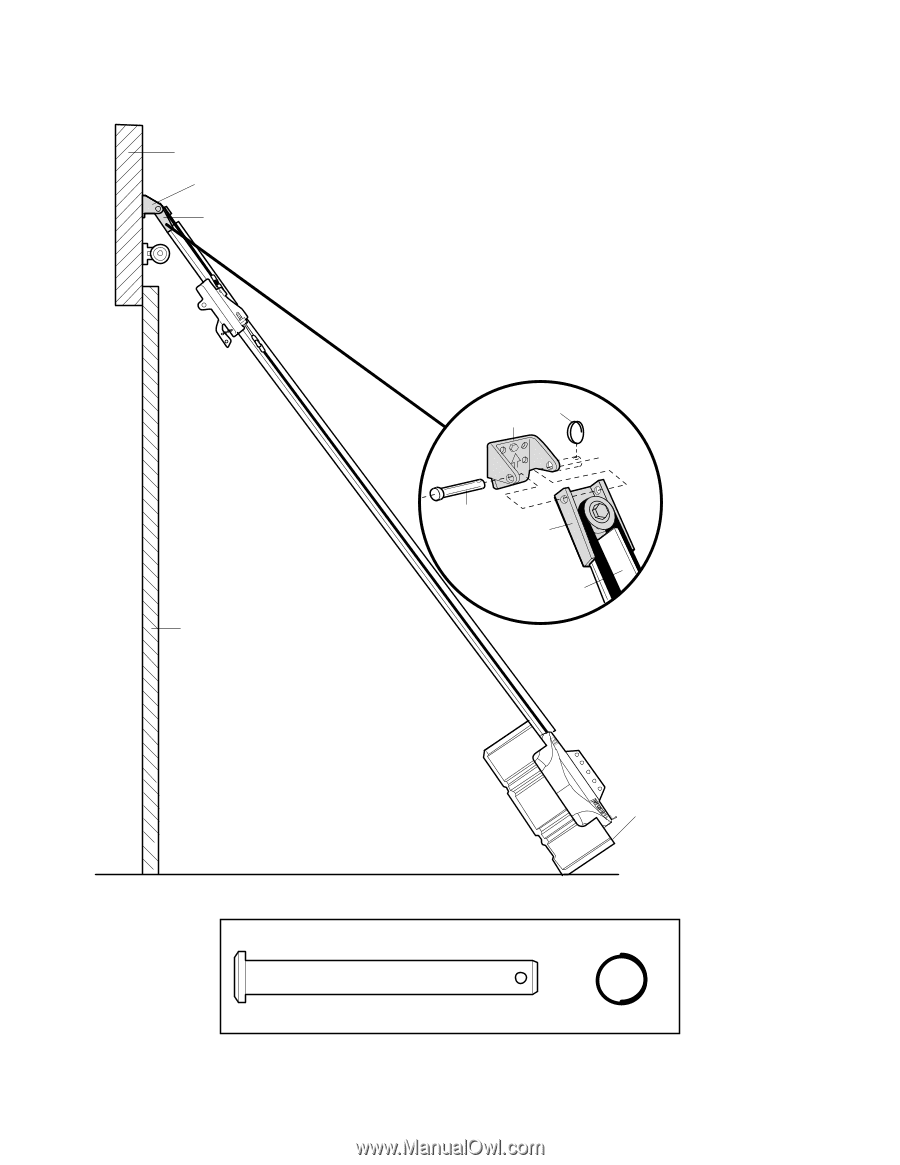
Header Wall Header Bracket Belt Pulley Bracket Garage Door INSTALLATION STEP 3 Attach the Rail to the Header Bracket • Position the opener on the garage floor below the header bracket. Use packing material as a protective base. NOTE: If the door spring is in the way you'll need help. Have someone hold the opener securely on a temporary support to allow the rail to clear the spring. • Position the rail bracket against the header bracket. • Align the bracket holes and join with a clevis pin as shown. • Insert a ring fastener to secure. Ring Header Fastener Bracket Clevis Pin 5/16"x2-3/4" Belt Pulley Bracket Rail Temporary Support HARDWARE SHOWN ACTUAL SIZE Clevis Pin 5/16"x2-3/4" Ring Fastener 10
-
 1
1 -
2
-
3
-
4
-
 5
5 -
 6
6 -
 7
7 -
 8
8 -
 9
9 -
 10
10 -
 11
11 -
 12
12 -
 13
13 -
 14
14 -
 15
15 -
16
-
17
-
18
-
19
-
20
-
21
-
22
-
23
-
24
-
25
-
26
-
27
-
28
-
29
-
30
-
31
-
32
-
33
-
34
-
35
-
36
-
37
-
38
-
39
-
40
 |
 |
10
Clevis Pin
5/16"x2-3/4"
Ring
Fastener
Header
Bracket
Belt Pulley
Bracket
Temporary
Support
Header Wall
Garage
Door
Clevis Pin
5/16"x2-3/4"
Ring
Fastener
Header
Bracket
Belt Pulley
Bracket
Rail
HARDWARE SHOWN ACTUAL SIZE
INSTALLATION STEP 3
Attach the Rail to the Header Bracket
•
Position the opener on the garage floor below the header
bracket. Use packing material as a protective base.
NOTE:
If the door spring is in the way you’ll need help. Have
someone hold the opener securely on a temporary support to
allow the rail to clear the spring.
•
Position the rail bracket against the header bracket.
•
Align the bracket holes and join with a clevis pin as shown.
•
Insert a ring fastener to secure.