Linksys WRE54G-RM User Guide - Page 16
Setting Up the Wireless-G Range Expander - setup
 |
UPC - 745883588213
View all Linksys WRE54G-RM manuals
Add to My Manuals
Save this manual to your list of manuals |
Page 16 highlights
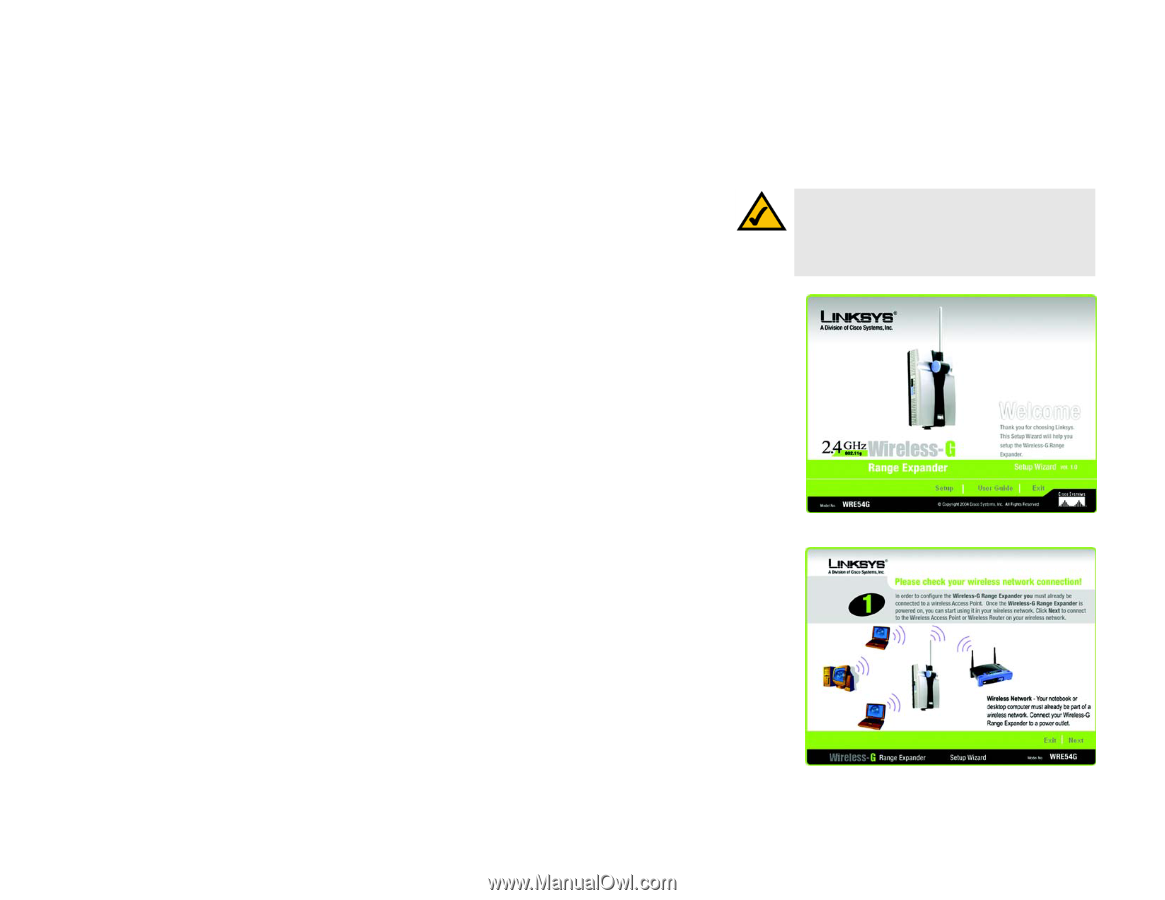
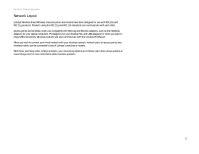
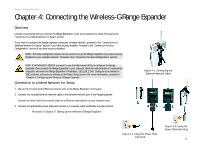
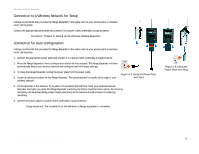
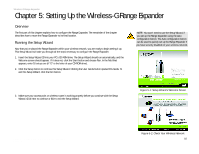
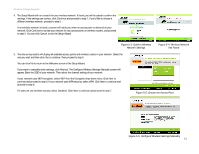
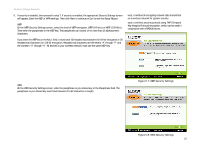
Wireless-G Range Expander Chapter 5: Setting Up the Wireless-G Range Expander Overview The first part of this chapter explains how to configure the Range Expander. The remainder of the chapter describes how to move the Range Expander to its final location. Running the Setup Wizard Now that you've placed the Range Expander within your wireless network, you are ready to begin setting it up. This Setup Wizard will take you through all the steps necessary to configure the Range Expander. 1. Insert the Setup Wizard CD into your PC's CD-ROM drive. The Setup Wizard should run automatically, and the Welcome screen should appear. If it does not, click the Start button and choose Run. In the field that appears, enter D:\setup.exe (if "D" is the letter of your CD-ROM drive). 2. Click the Setup button to continue this Setup Wizard. Clicking the User Guide button opened this Guide. To exit this Setup Wizard, click the Exit button. NOTE: You won't need to use the Setup Wizard, if you set up the Range Expander using the Auto configuration button. The Auto configuration button can be used to quickly set up the Range Expander if you have security disabled on your wireless network. 3. Make sure your access point or wireless router is working properly before you continue with the Setup Wizard. Click Next to continue or Exit to exit the Setup Wizard. Figure 5-1: Setup Wizard's Welcome Screen Chapter 5: Setting Up the Wireless-G Range Expander Overview Figure 5-2: Check Your Wireless Network 10
-
 1
1 -
2
-
3
-
4
-
5
-
6
-
7
-
8
-
9
-
10
-
 11
11 -
 12
12 -
 13
13 -
 14
14 -
 15
15 -
 16
16 -
 17
17 -
 18
18 -
 19
19 -
 20
20 -
 21
21 -
22
-
23
-
24
-
25
-
26
-
27
-
28
-
29
-
30
-
31
-
32
-
33
-
34
-
35
-
36
-
37
-
38
-
39
-
40
-
41
-
42
-
43
-
44
-
45
-
46
 |
 |