Linksys WRE54G-RM User Guide - Page 5
List of s - manuals
 |
UPC - 745883588213
View all Linksys WRE54G-RM manuals
Add to My Manuals
Save this manual to your list of manuals |
Page 5 highlights
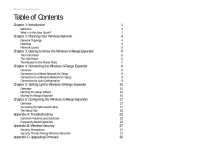
Wireless-G Range Expander List of Figures Figure 3-1: Front Panel 6 Figure 3-1: Front Panel with Ethernet Network Cable Connected 6 Figure 3-2: Recess for the Power Plate 7 Figure 4-1: Connecting the Ethernet Network Cable 8 Figure 4-2: Using the Power Plate with Cord 8 Figure 4-3: Using the Power Plate with Plug 8 Figure 4-4: Using the Power Plate with Cord 9 Figure 4-5: Using the Power Plate with Plug 9 Figure 5-1: Setup Wizard's Welcome Screen 10 Figure 5-2: Check Your Wireless Network 10 Figure 5-3: Confirm Wireless Network Settings 11 Figure 5-4: Wireless Network Not Found 11 Figure 5-5: Choose the Access Point 11 Figure 5-6: Configure Wireless Settings Manually 11 Figure 5-7: WEP Security Settings 12 Figure 5-8: WPA Security Settings 12 Figure 5-9: Choose the Range Expander 13 Figure 5-10: Enter the Password 13 Figure 5-11: Configure Network Address Settings 14 Figure 5-12: MAC Address of Access Point or Wireless Router (WRE54G v1 Only) 14 Figure 5-13: Confirmation Screen 15 Figure 5-14: Congratulations Screen 15 Figure 5-15: Using the Power Plate with Cord 16 Figure 5-16: Using the Power Plate with Plug 16 Figure 6-1: Login Screen 17 Figure 6-2: Setup Tab - Basic Setup 18 Figure 6-3: WPA Security 19
-
 1
1 -
 2
2 -
 3
3 -
 4
4 -
 5
5 -
 6
6 -
 7
7 -
 8
8 -
 9
9 -
 10
10 -
 11
11 -
12
-
13
-
14
-
15
-
16
-
17
-
18
-
19
-
20
-
21
-
22
-
23
-
24
-
25
-
26
-
27
-
28
-
29
-
30
-
31
-
32
-
33
-
34
-
35
-
36
-
37
-
38
-
39
-
40
-
41
-
42
-
43
-
44
-
45
-
46
 |
 |
