Marantz SD4050 SD4050 User Guide - Page 10
Dubbing, Proper Recording Level, Rec Mute And Rec Pause Button
 |
View all Marantz SD4050 manuals
Add to My Manuals
Save this manual to your list of manuals |
Page 10 highlights
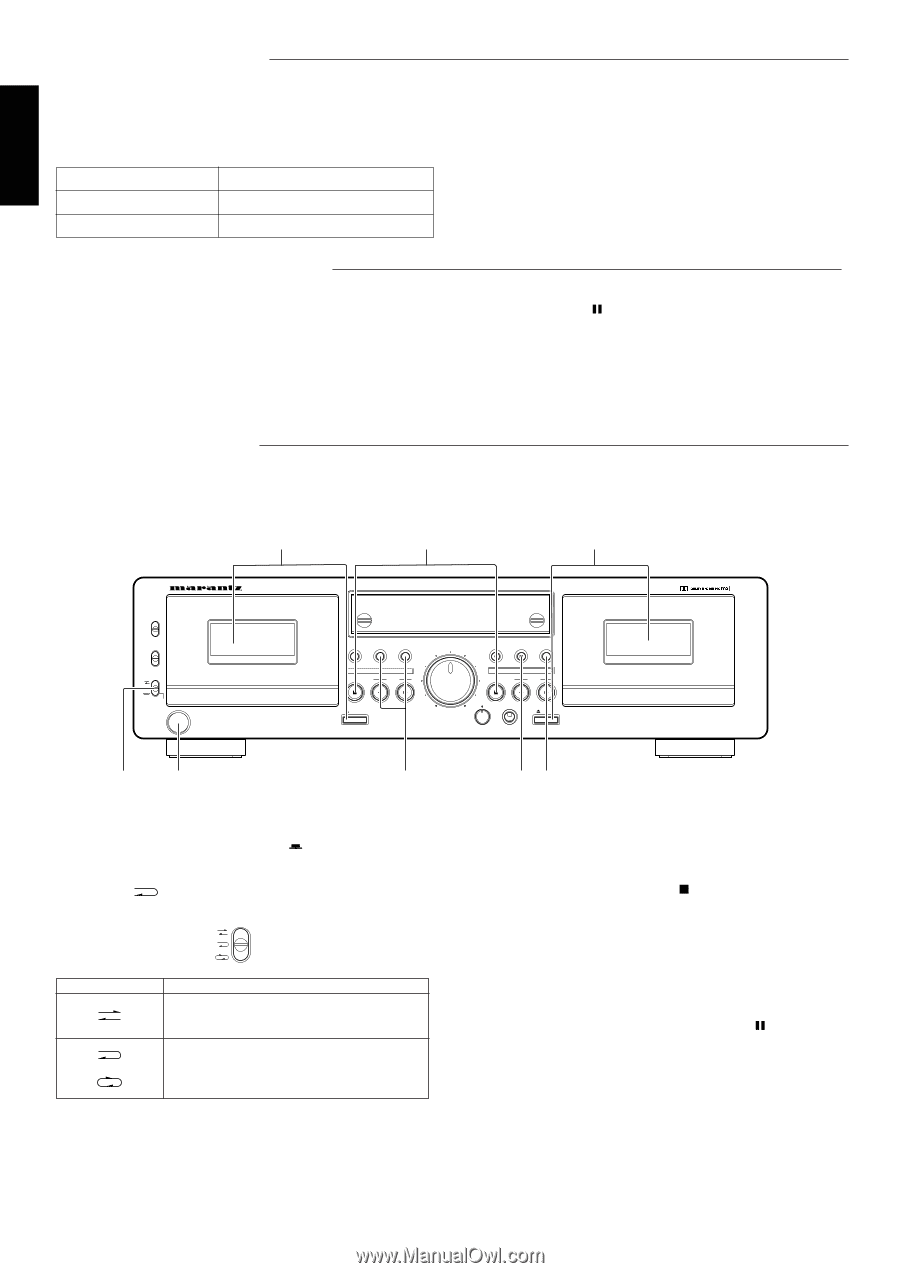
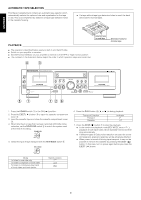
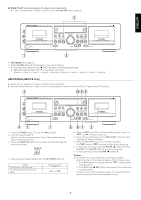
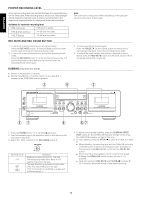
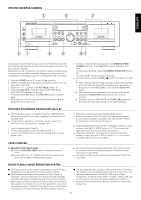
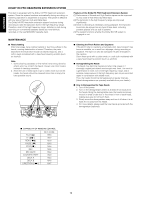
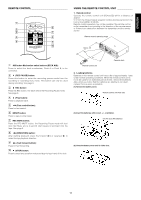
ENGLISH FRANÇAIS PROPER RECORDING LEVEL A too high recording level can saturate the tape and cause distortion. On the other hand, if the recording level is set too low, soft passages will be marked by residual noise. A proper recording level is the single most important factor for making well balanced recordings. Guideline for maximum recording level TYPE q (Normal) 0 dB level on peaks TYPE w (High position) ѿ1 dB level on peaks TYPE r (Metal) ѿ3 dB level on peaks REC MUTE AND REC PAUSE BUTTON 1. To record a 4-second blank section during recording: Press the REC MUTE button. A 4-second blank will be recorded and the deck will enter the recording Pause mode. 2. To record a 4-second blank section during the recording Pause mode: Press the REC MUTE button from the recording Pause mode. A 4 second blank will be recorded and the deck will enter the recording Pause mode again. DUBBING (from deck A to deck B) ¼ Switch on the amplifier or receiver. ¼ Set the Tape Monitor or Function switch on your amplifier or receiver to the TAPE/TAPE monitor position. w t Note: The optimum recording level differs depending on the program source and the type of tape used. 3. To cancel recording of blank space: Press the PAUSE ( ) button. Blank space recording will be canceled and the deck enters the recording Pause mode. 4. To extend the blank section with another 4 seconds or more: Simply press the REC MUTE button and the blank section will be increased with another 4 seconds. w DOLBY NR C B OFF TIMER REC OFF PLAY REV. MODE CCONT. PLAY DOUBLE CASSETTE DECK SD4050 COUNTER RESET COUNTER RESET DUBBING SPEED SYNC REV NORMAL HIGH REC LEVEL RECORD PAUSE REC MUTE AUTO REVERSE AUTO TAPE SELECT/HIGH SPEED DUBBING STOP PLAY POWER ON/OFF A PLAY EJECT STOP PLAY AUTO REVERSE AUTO TAPE SELECT/HIGH SPEED DUBBING MIN MAX PITCH CONTROL - PHONES + EJECT BREC/PLAY eq r yu 1. Press the POWER switch q to the ON ( ) position. 2. Load the cassette tape to be played on deck A and the one to be recorded in deck B w. 3. Select the position of the REV MODE switch e. REV. MODE Reverse mode or Operation Dubbing is performed only for one side. The decks stop when either deck A or B reaches the end of the tape. The tape direction is reversed on each deck when they reach the end of the tape. (This is convenient for dubbing to a tape with a different length.) 4. To being normal speed dubbing, press the DUBBING SPEED HIGH button r. The NORM DUB indicator will light at this timee. The HIGH DUB indicator will light at this time. 5. To stop dubbing, press the STOP ( ) button t of deck A or deck B. ¼ When dubbing, the recording level and the Dolby NR recording will be the same as those of the playback tape, regardless of the positions of the REC LEVEL control and the DOLBY NR button. ¼ When listening to the playback sound suring normal speed dubbing, the DOLBY NR switch remains off even if it is pressed. ¼ Operation using the REC MUTE and PAUSE ( ) buttons y, u of deck B is permitted during normal speed dubbing. 10
-
 1
1 -
2
-
3
-
4
-
 5
5 -
 6
6 -
 7
7 -
 8
8 -
 9
9 -
 10
10 -
 11
11 -
 12
12 -
 13
13 -
 14
14 -
 15
15 -
16
-
17
-
18
-
19
-
20
-
21
-
22
-
23
-
24
-
25
-
26
 |
 |