Maytag MER6875BAS Use and Care Guide
Maytag MER6875BAS - Convection Double Oven Range Manual
 |
UPC - 719881178646
View all Maytag MER6875BAS manuals
Add to My Manuals
Save this manual to your list of manuals |
Maytag MER6875BAS manual content summary:
- Maytag MER6875BAS | Use and Care Guide - Page 1
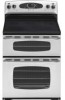
MAY[AG Maytag Electric Smoothtop Double Oven Range Precision Touch 850 Series Table Safety 1 =3 Surface Cooking 4=7 Controls Smoothtop Surface Warming Center Form No. A/05/06 Oven Cooking 8=18 Control _anel Baking Cook & Hold Delay Toasting Broiling Keep Warm Favorite Oven Racks Part No - Maytag MER6875BAS | Use and Care Guide - Page 2
General instructions To ensure proper and safe operation: Appliance must be properly installed and grounded by a qualified technician. Do not attempt to adjust, repair, service, or replace any part of your appliance unless it is specifically recommended in this guide. All other servicing should be - Maytag MER6875BAS | Use and Care Guide - Page 3
in contact with hot heating elements. To ensure proper operation and to avoid damage to the appliance or possible injury, do not adjust, service, repair or replace any part of the appliance unless specifically recommended in this guide. Refer all other servicing to a qualified technician. NEVER - Maytag MER6875BAS | Use and Care Guide - Page 4
oven racks in desired locations while ovens are cool. If rack must be moved while an oven is hot, do not let potholder contact hot element in oven. Self-Cleaning Ovens Clean only parts listed in this guide parts of the unit. Ventilating Hoods Clean range oven is the oven to an oven self-cleaning - Maytag MER6875BAS | Use and Care Guide - Page 5
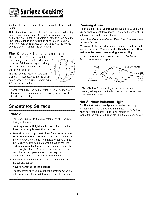
the smoothtop. This allows you to change the size of these elements. Turn control OFF LOW Iligh knob to OFF before switching element size. Press the switch to the left to use the large element or to the rightto use the small element. Triple Element (select models:) The cooking surface has one - Maytag MER6875BAS | Use and Care Guide - Page 6
Smoothtop Surface Notes: • For Canadian models, the smoothtop does NOT operate during smoothtop elements will not respond to changes in settings as quickly as coil elements. range are identified by permanent circles on the smoothtop surface. For most efficient cooking, fit the pan size to the element - Maytag MER6875BAS | Use and Care Guide - Page 7
may vary by model:) Use the Warming Center to keep hot cooked foods warm, such as vegetables, gravies and oven-safe dinner plates. food directly on the surface. • Do net use a small pan on a large element. Not only does this waste energy, but it can also result in spillovers burning Maytag Servicer. - Maytag MER6875BAS | Use and Care Guide - Page 8
Cookware Recommendations Using the right cookware can prevent many problems, such as food taking longer to cook or is critical on smoothtop surfaces. The base must not be more than 1 inch larger than the element. When canners and pots do not meet these standards, cooking times may be longer, and - Maytag MER6875BAS | Use and Care Guide - Page 9
oven functions. Control panel shown includes model specific features. (Styling may vary depending on model for the 12-hour format. To change the clock to 24-hour format: The colon will remain on. When electrical power is supplied or after a double beep will sound if a programming error occurs. 8 - Maytag MER6875BAS | Use and Care Guide - Page 10
power to the appliance and call an authorized servicer. Adjusting Sound Level The factory default setting for sound is medium (MEd), but it can be changed to low (LO) or high (HI). To change the setting: 1. Press and hold Delay and upper oven CANCEL pads for three seconds. A beep will sound - Maytag MER6875BAS | Use and Care Guide - Page 11
back part of the lower oven bake element will not glow red during baking. This is normal. When baking frozen, self-rise pizza in the upper oven, place appropriate number pads until the desired temperature is displayed. To change the oven temperature during preheat, press the Bake pad twice, then - Maytag MER6875BAS | Use and Care Guide - Page 12
Roast pad again or wait four seconds. ° LOWER ROAST and the FAN icon flash in the display. ° 000 will flash in the display. 3. Select the oven temperature. Press the Autoset pad for 325° F or the appropriate number pads. • Each additional press of the Autoset pad will increase the temperature by 25 - Maytag MER6875BAS | Use and Care Guide - Page 13
want to delay the start of the Cook & Hold cycle. (Autoset "" '/ 3. Press the Cook & Hold pad. • HOLD and DELAY flash in the display. • The oven temperature can be set from 170° Fto 550° F. ° 00:00 and either UPPERor LOWER flash. 4. Press the desired function pad again OR wait four seconds - Maytag MER6875BAS | Use and Care Guide - Page 14
min * Toasting times are approximate and should be used as a guide only. ** Brand names are registered trademarks of the respective manufacturers. Notes: • Lower oven may not be operated while upper oven is toasting, if the lower oven is operating when the Toast pad is pressed, a beep will sound - Maytag MER6875BAS | Use and Care Guide - Page 15
start. • BROIL and HI or LO will remain lit. 4. For optimum browning, preheat broil element for 3-4 minutes before adding food. 5. Place food in the oven. Leave oven door open about four inches (the first stop]. 6. Turn meat once while cooking. 7. When food is cooked, press the CANCEL pad. _CANCEL_ - Maytag MER6875BAS | Use and Care Guide - Page 16
oven and leave plates in the oven for 15 minutes more. - use only oven-safe plates, check with the manufacturer. - do not set warm dishes on a cold surface as rapid temperature changes running Cook & Hold setting will be saved. • A double then a single beep will sound to indicate that the control - Maytag MER6875BAS | Use and Care Guide - Page 17
15° the display will show -_15°"" 4. Press the Autoset pad to adjust the temperature. Each time the Autoset pad is pressed, the temperature changes by 5°. The oven temperature can be increased or decreased by 5° to 35 °. 5. The time of day will automatically reappear in the display. You do not need - Maytag MER6875BAS | Use and Care Guide - Page 18
oven vent is located below the backguard on your range. When high moisture foods are cooked in the upper oven, steam may be visible coming from the oven vent. This is normal. OVEN or aluminum foil directly on the oven bottom. • Place rack on the rack support in the oven; tilt the front end up - Maytag MER6875BAS | Use and Care Guide - Page 19
, is available as an accessory. It fits in the left, upper portion of the lower oven and provides space for a vegetable dish when a large roaster is on the lower rack. Contact your Maytag dealer for the "HALFRACK" Accessory Kit or call 1-877-232-6771 USA or 1-800-688-8408 Canada to order - Maytag MER6875BAS | Use and Care Guide - Page 20
Do not allow a heavy build-up of soil to accumulate in the oven. During the cleaning process, the kitchen should be well ventilated to get To Delay a Self=Clean Cycle: 1. Press tile Delay pad once for upper oven and twice for lower oven. • DELAY flashes. ° 00:00 and UPPERor LOWER will flash in the - Maytag MER6875BAS | Use and Care Guide - Page 21
clean cycle. If oven racks were left in the oven and do not slide smoothly after a clean cycle, wipe racks and rack supports with a small oven. Sounds As the oven heats, you may hear sounds of metal parts expanding and contracting. This is normal and will not damage the oven. Notes: ° If an oven - Maytag MER6875BAS | Use and Care Guide - Page 22
oven cleaners, abrasive or caustic cleaning agents on exterior finish of range element to be sure the knobs have been correctly replaced. Cooktop Glass-Ceramic Never use oven cleaners, chlorine bleach, ammonia or glass cleaners with ammonia. NOTE: Call an authorized servicer Creme_ (Part No. - Maytag MER6875BAS | Use and Care Guide - Page 23
Oven Interiors Oven Racks Stainless Steel (select models left in the oven during a self-clean operation. If this occurs, wipe the rack edge and rack support with a small To polish and help prevent fingerprints, follow with Stainless Steel Magic Spray (Part No. 20000008)_. • Moderate/Heavy Soil -- Wipe - Maytag MER6875BAS | Use and Care Guide - Page 24
arms. Oven Windows To protect the oven door windows: 1. Do not use abrasive cleaning agents such as steel wool scouring Maytag. Call 1-877-232-6771 USA and 1-800-688-8408 Canada, ask for part number 74009925 - halogen bulb. To replace oven light bulbs: 1. Disconnect power to the range. 2. When oven - Maytag MER6875BAS | Use and Care Guide - Page 25
Leveling Legs Be sure the range should be leveled when installed. If the range is not level, turn the leveling legs, located at each corner of the range, until range is level. _ (_ I1 _,,JJ _ANT/_BRACKET LEVELING LEG Convenience Outlet (Canadian models only) The convenience outlet is - Maytag MER6875BAS | Use and Care Guide - Page 26
17 for location. o Check to make sure range is level. o Temperatures often vary between a new oven and an old one. As ovens age, the oven temperature often "drifts" and may become hotter or cooler. See page 16 for instructions on adjusting the oven temperature. Important: It is not recommended to - Maytag MER6875BAS | Use and Care Guide - Page 27
This is normal for a new range and will disappear after a few is an error or a problem. If BAKE or LOCK appear servicer. • The oven makes several low level noises. You may hear the oven relays as they go on and off. This is normal. • As the oven heats and cools, you may hear sounds of metal parts - Maytag MER6875BAS | Use and Care Guide - Page 28
call 1-800-688-2080. ° User's guides, service manuals and parts informationare available from Maytag Services, LLC, Customer Assistance. Notes." When writing or calling about a service problem, please include: a. Your name, address and telephone number; b. Model number and serial number; c. Name and - Maytag MER6875BAS | Use and Care Guide - Page 29
VlA AG Cuisini_re _lectrique & deux fours et dessus lisse Maytag Precision Touch S_rie 850 is/n/e S6curit 29=32 Cuisson sur la surface Commandes Surface_ dessuslisse ae four Hublot Lampe de four 53=54 Recherche des pauues ....... 55=56 _ Garautie et service 57 Guia de uso y cuidado 58 - Maytag MER6875BAS | Use and Care Guide - Page 30
instructions g n rales Pour assurer une utilisation appropri_e et s_curitaire : seul un technicien qualifie devrait installer rappareil et le mettre _ la terre. Ne reglez pas, reparez ni remplacez un composant, _ moins que cola ne soit specifiquement recommande darts ce guide cas de problemes ou de - Maytag MER6875BAS | Use and Care Guide - Page 31
Si rappareil est installe,pre,sd'une rappareiL Utilisez de la feuille d'ahminium uniquement seion les instructions de ce guide. Les flacons d'ae,rosolpeuvent EXPLOSERIorsqu'on les expose _ . Pendantet apre,susage, ne touchez pas les elements chauffants ni les parois inte,rieuresdes fours et - Maytag MER6875BAS | Use and Care Guide - Page 32
pas un jouet. IIs ne doivent pus jouer avec les boutons ou route autre piece de rappareiL Hottes d'extraction Nettoyezuniquement lespieces mentJonneesdans ce guide. Ne nettoyez pus le joint de porte. Le jointjoue un role essentielquant retancheit& Ne frottez pas, n'endommagez pas ou ne d@lacez pas - Maytag MER6875BAS | Use and Care Guide - Page 33
qui s'echappent [orsque rhufle de cuisson, [es corps gras, [a margarine et [es poeles ou marmites _ revetement antiadhesif sont surchauffes peuvent egaiement ¢tre nocives. Conservez ces instructions pour consultation uJt_rieure 32 - Maytag MER6875BAS | Use and Care Guide - Page 34
1'_16ment. 4. Apr_s une cuisson,tournez le bouton _ la position OFF (Arr6t). RetirezI'ustensile. t':16ments doubles (certains modeles) La surfacede cuissoncomportedeux c!lc!ments © O doubles,situ(_sa I'avantdroit et _ ravant gauchesur OFF le dessuslisse. Cos 616mentsont une dimension variable - Maytag MER6875BAS | Use and Care Guide - Page 35
Surface L:LEMENT SIMPLE (, DE RL:CHAUFFAGE L:LEMENT DOUBLE CENTRE DE RECHAUFFAGE ELEMENT SIMPLE A VEC L'OPTION DE RECHAUFFAGE FLEX- CHOICE r chauffage (Le style peut varier selon le modele) Utiliserle centrede r_chauffagepour maintenirau chaudlesmetscults, commeI_gumes,sauceset - Maytag MER6875BAS | Use and Care Guide - Page 36
les rayures • N'utilisezpas de casserolesen verre.Ellespourraient rayerla surface. • N'utilisezjamais de support m6tallique ou anneaude wok entre un rdcipient et la surface de cuisson. Cesobjets peuventmarquer fond sur la table de cuisson,ne I'utilisezpas. Contactezun r@arateuragrd_ Maytag. 35 - Maytag MER6875BAS | Use and Care Guide - Page 37
Culssosnurle surfece Recommandations sur les ustensiles L'utilisationdu bon ustensilepeut emp6cherde nombreux probl_mescommela n6cessitdde cuire plus Ionguementla nourriture et la difficultd _ obtenir des r6sultats uniformes.De bons ustensilesr6duisentlos dur#esde cuisson,utilisent moins d'6nergie - Maytag MER6875BAS | Use and Care Guide - Page 38
IorsqueI'on appuie sur une touche. Le four produit un bip double en cas d'erreur de programmation. Important : Quatresecondesapr_s avoirentr_!le ; appuyeza nouveaupour choisir 12 Hr. 3. Programmezrheure en suivant les instructions donn6esdans la section _ R_glagede rhorloge ;_. t Favorite_ • Les - Maytag MER6875BAS | Use and Care Guide - Page 39
Culssoneufour Lorsquele courant 6lectrique arriveou apr_s une interruption de courant,la derniSreheure avant I'interruptionde courant va clignoter. Pour rappeler I'heuredu jour Iorsqu'uneautre fonction de durde s'affiche,appuyezsur la touche Clock. Annulation de I'affichage de I'heure : Si I'onne - Maytag MER6875BAS | Use and Care Guide - Page 40
Culssoenufour RCglage du niveau de bruit Le rc!glagepar ddaut de rusine pour le niveaude bruit est MEd (rnoyen],rnaisce rc!glagepeut 6tre chang6a LO (faible)ou a Hi (fort). Modification du rCgiage: 1. Appuyezsur lestouchesDelay et Cancel du four supCrieur pendant troissecondes.Un bip retentit. _ - Maytag MER6875BAS | Use and Care Guide - Page 41
¢ulssoenufour Diff6rences de cuisson entre I'ancien four et le nouveau II est normal de remarquer queiques diff6rences dans la durde de cuissonentre un four neuf et un four ancien. VoyezAjustementde la temp4raturedu four a la page 46. Programmatien de Convect Bake : 1. Appuyezsur la touche Convect - Maytag MER6875BAS | Use and Care Guide - Page 42
¢ulssoenufour Remarques : • Lorsdu r6tissageavec convection,la durc!ede cuissondolt 6tre programm6eavant la tempc!rature. • Si la recette n6cessitequa le four soit prc!chauff6a, joutez 15 minutesa la durra de cuisson programm6e. • Losdur6es de r6tissagepeuventvarier solon los coupesde viande. • - Maytag MER6875BAS | Use and Care Guide - Page 43
Culssoenufour • L'ic6nePREHEAT(Prdchauffage)parait a I'afficheur. • La tempdraturerdelle du four sera affich6ependant le pr6chauffage. • La tempdratureprogramm6es'affiche Iorsque le four est pr6chauff6. Lorsque la dur6e de caisson s'est 6coul6e : • Quatrebips retentissent. •Les mots WARM(Chaud)et - Maytag MER6875BAS | Use and Care Guide - Page 44
3V2-4 mn 4'/_ - 43/4mn 2V2-3 mn 4-5mn 4V2 - 5 mn 3V2 -4 mn Sandwichau fromag_ 3V2- 4V2mn Les duties sont approximativeset ne serventque de guides. ** Les noms de marquesont des marques d@os_es des fabricants respectifs. Reilrlarques : • Le four inf_rieur peat ne pas _tre atiJis_Iorsque le four - Maytag MER6875BAS | Use and Care Guide - Page 45
¢ulssoenufour Cuisson au gril Programmation du gril : 1. Appuyezsur la touche Broil qui convient. Broil • Losroots BROIL,UPPERet SETclignotent. 2. Appuyezsur la touche Autoset une lois pour programmer un gril a temp6rature61ev6eou deuxlois pour programmerun gril _ temp6raturebasso. • HI ( - Maytag MER6875BAS | Use and Care Guide - Page 46
Favorite et maintenez-la ainsi pendanttrois secondes. , Le cyclecuisson et maintien nouvellementprogramm6 ou en cours de fonctionnementserasauvegardc!. , Un hip double et un hip simple se feront entendrepour indiquer que le rCgulateura accept6le r_glage Favorite. D_marrage d'un cycle programm_ duns - Maytag MER6875BAS | Use and Care Guide - Page 47
Culssoneufour Arr t automatique/mode Sabbat Lesfours s'arr6tentautomatiquementapr_s 12 heuress'ils sont laiss6saccidentellementen marche. Annulation de I'arret de 12 heures et fonctionnement 72 heures : des fours en continu pendant 1. Appuyezsur la touche Olock et maintenez-laainsi pendant - Maytag MER6875BAS | Use and Care Guide - Page 48
uneporte est ouverte.Lorsquela porte est i/Uppei" ",_ ferm6e,appuyezsur Oven Light [Lampedu four) pour ',OvenLi_hLJ allumerou _teindre la lampe Pour remettre los grilles en place : • Mettez la grille sur le support de grille du four; relevez16g_remenlte rebord avant;poussezla grille jusqu'a ce qu' - Maytag MER6875BAS | Use and Care Guide - Page 49
Culssoenufour Position des grilles (:fourinf rieur) --5 --4 --3 --2 --1 Caisson de g_teaux _ etages sat deax grilles Pourde meilleursr6sultatspour la cuissonde g_teauxsur deux grilles, utilisezles positions2 et 4. Placezlesg_teauxsur la grille, commeil est indiqu& NIVEALI5 : Utilisezseulementpour - Maytag MER6875BAS | Use and Care Guide - Page 50
nettoyu e Four autonettoyant 6. Essuyezlos r6sidussucreset acides,commelospatatesdouces,la tomatoou lossaucesa basede lait. La porcelainevitrific!eposs_de une certaine rc!sistanceaux compos(!sacides, mais qui n'est pas limit6e. Ellepoutsed6colorersilos r_sidusacidesou sucresnesont pas - Maytag MER6875BAS | Use and Care Guide - Page 51
cycled'autonettoyage. Si les grilles du four ont _t_ laiss_es _ I'int_rieur pendant le cycle d'autonettoyage et qu'elles glissent real sur leurs supports, enduisez-les,ainsi que lossupports,d'une fine touche d'huile vc!g6tale. De fines lignes peuvent apparaitre dans [a porcelaine parce qu'eiie - Maytag MER6875BAS | Use and Care Guide - Page 52
Techniques de nettoyage *Les noms de marquesont des marques d6pos6esdes diff6rents fabricants. ** Pour commander,composezle 1-877-232-6771aux E.-U.et le 1-800-688-8408au Canada. Lbchefrite et sa grille Ne ceuvrezjamais la grille depapier d'aluminium;cola emp_che la grai_e de cooler dansla - Maytag MER6875BAS | Use and Care Guide - Page 53
Hublots et portesverre int_rieurdes fours Grillesdu four Aeier inoxydable [curtainsmoddles) Poign_ede porte, panneau×I at_reauxPeinture_mail • Evitezd'utilisertrop d'eau,qui risqueraitde s'infiltrersousou derriereleverre. • Laveza I'eauet au savon.Rinceza I'eauclaireets6chez. Unproduitde - Maytag MER6875BAS | Use and Care Guide - Page 54
.Ceci est normal et diminuera avec le temps. Pour s'assurerle remplacementde I'ampoulepar une ampoule appropri6e,con]n]andez-laaupr_sdu service-clientsde Maytag. Appelez 1-877-232-6771auxE.-U.et 1-800-688-8408au Canadaet commandezI'articlerdf6rencen° 74009925,ampoule_ halog_ne. Pour remplacer les - Maytag MER6875BAS | Use and Care Guide - Page 55
pieds de r_glagede I'aplomb_ chacun des anglesde la cuisini_re,jusqu'_ ce que celle-ci soit _ _,,// d'aplomb, f _£_ BRIDE L'APLOMB Prise pratique (Modeles canadiens seulement) Une prise pratique est situ_e en bas _ gauche du dosseret. Assurez-vous que les cordons de I'appareil ne reposent - Maytag MER6875BAS | Use and Care Guide - Page 56
Pour la plupart des probleraes obsew_s, essayez d'abord ce qui suit. Une partie ou la totaJit_de Ja euisinibrene fonetionne pus. L'horloge,los ic_nes et/ou los lampes fonctionnent, mais le four ne chauffe pus. La lampe de four et/ou rhorloge ne fonetionnent pus. [es r_sultatsde la caisson different - Maytag MER6875BAS | Use and Care Guide - Page 57
Le four ne se nettoie pas. correctement La porte du four ne se d_verrouille apr_s le cycle d'autonettoyage. La surface _ dessus lisse montre des signes d'usure. De I'humidit_se retrouve sur le huMot ou de la vapeur s'_chappe de r_vent. Odeur forte ou furn_e I_g_re la raise en marche du four. Codes - Maytag MER6875BAS | Use and Care Guide - Page 58
L'AUTREOU D'UNEPROVINCEA L'AUTRE. Ne scat pas couverts par ces garanties 1. Lesprobl_meset dommagesrc!sultantdes situationssuivantes: a. Mise en service,livraisonou entretien effectu6sincorrectement. b.Toute r@aration,modification,alto!rationet tout r_glagenon autoris6spar le fabricant ou par un - Maytag MER6875BAS | Use and Care Guide - Page 59
M_ Y[AG ® Estufa el6ctrica de cubierta lisa con doble homo Nla:ytag serie 'Precision Touch' 850 Tabla Seguridad 59=61 Cocci(in en la cubierta Controles Cubierta lisa Elemento calentador ........ 62=65 Cocci(in en el homo Panel de control Horneado 66=77 'Cook& Hold' (Cocinar y mantener - Maytag MER6875BAS | Use and Care Guide - Page 60
cubfir todas las posibles circunstancias y situaciones que puedan ocurrir. Se debe ejercer sentido com_n, precauci6n y cuidado cuando se instale,se realice mantenimiento o se haga funcionar el electrodomestico. Siemprep6ngaseen contacto con su distfibuidor, agente de servicio o fabficante si - Maytag MER6875BAS | Use and Care Guide - Page 61
pala evitar quemaduras por el vapor. Elementos calefactores NUNOA use papel de aluminio para cubrir los platillos protectores, las parrillas o la parte inferior de los hornos. Esto puede crear riesgos de choque el6ctrico, incendio o da_os al electrodom6stico. Use el papel de aluminio solamente - Maytag MER6875BAS | Use and Care Guide - Page 62
solos o sin supervisi6ncuando el electrodom_stico est_ en uso o est_ caliente. @UNCA permlta que los nlffos se sienten o se paren en nlnguna parte del electrodomestico pues se pueden lesionar o quemar. Se les debe ensehar a los nlffos que el electrodomestico y los utensillosque estan en el o sobre - Maytag MER6875BAS | Use and Care Guide - Page 63
¢occi6ennla cublerta Controles superiores Useestoscontrolespara encenderlos elementossuperiores. Se disponede una selecci6ninfinita de ajustesdel calor desde 'Low' [Bajo) hasta'High' [Alto). Estasperillas pueden colocarseen cualquierade estosajusteso entre ellos. Programaci6n de los controles 1. - Maytag MER6875BAS | Use and Care Guide - Page 64
Coccl6enn[a cubiem "Slow Boil" (Hen/or lento): Losalimentosforman burbujas moderadamente.El ajuste de hen/or lentotambi6n puedeser usado para la mayoffade lasfrituras y para mantener la cocciOnde grandes cantidadesde I[quido. [Ajustela perilla entre las posiciones"High"y "Low", para obtener el hen/ - Maytag MER6875BAS | Use and Care Guide - Page 65
.Nea la secciOnde Limpiezaen la p%ina 80.) , Aseg0resede que la superficiey la parte inferior del utensilio estc!nlimpios antesde encenderla estufapara evitar rayaduras. • Paraevitar rayaduraso dafio metal se derrite sobre la cubierta,no la use. Llamea un tc!cnicode serviciode Maytag. B4 - Maytag MER6875BAS | Use and Care Guide - Page 66
Cocd6ne. le ceblene Recomendaciones sobre los utensilios Si se usanlos utensilioscorrectosse puedenevitar muchos problemas,tal come la prolongaci6ndel tiempo de cocci6n de los alimentoso la obtenciOnde resultadosno consistentes.Los utensilioscorrectos reducenel tiempo de cocci6n, usan menos energ[ - Maytag MER6875BAS | Use and Care Guide - Page 67
muestrala hora del d[a, el temporizador y lasfuncionesdel homo. El panelde control quese muestraincluyelascaracter[sticasque son especfficasde carla model& (Elestilo puedevariar dependiendodel modelo.) 'Bake'(Hornear) Usepara horneary asar. Funcionamiento de las teclas 'Broil' [Asar) 'Clean - Maytag MER6875BAS | Use and Care Guide - Page 68
¢occi6nenelhomo Para ajustar el reloj: 1. Optima la tecla 'Clock' [Reloj]. , La hera del din destellar_en el indicadorvisual. , Los dos puntos destellar_nen el indicadorvisual. 2. Oprima Insteclas num6ricascorrespondientespara programarla hera del dfa. 3. Optima la tecla 'Clock' nuevamenteo - Maytag MER6875BAS | Use and Care Guide - Page 69
¢occi6nenelhomo C6digos de fallas 'BAKE'(Hornea0o 'LOCK'[Bloqueado] pueden destellar r_pidamenteen el indicadorvisual para advertirle de alg0n error o problem& Si 'BAKE'o 'LOCK'destellan en el indicadorvisual, optima la tecla 'CANCEL' (Anular). Si 'BAKE'(Hornea0 o 'LOCK' [Bloqueado] contin0an - Maytag MER6875BAS | Use and Care Guide - Page 70
¢occi6nenelhomo 5. Coloque el alimento en el homo. 6. Verifique el proceso de cocciOn al haber transcurrido el tiempo mfnimo de cocciOn. Cocine durante un mayor tiempo si es necesario. 7. Cuando termine la cocciOn, oprima la tecla 'CANCEL' (Anular]. 8. Retire el alimento del homo. Diferencias en el - Maytag MER6875BAS | Use and Care Guide - Page 71
el nivelde cocciOndel alimento. Cocinedurante un mayor tiempo si es necesario. ° La luz del homo permanecerdencendidahastaque se optima la tecla 'Oven Light' [Luz del homo). ° Optima cualquiertecla para mostrarel tiempo de cocci6n restante. 7. Cuandotermine la cocciOn,oprima la tecla 'CANCEL - Maytag MER6875BAS | Use and Care Guide - Page 72
¢occi6nenelhomo 2. Seleccionela cantidad de tiempo de cocciOndeseadousandolas teclas num6ricas. • 'HOLD'(Mantener caliente) continuar_di estellando. Funci6n de cocinar y mantener caliente diferida. • Eltiempo se desplegar_ei n el indicadorvisual. • Se puede programarel tiempo de cocciOnentre 00: - Maytag MER6875BAS | Use and Care Guide - Page 73
¢occi6ennelhomo Tostado (homo superior solamente) Estafunci6n sirve para tostar pan y productos/_\ que se preparan en una tostadorao en un /_ horno tostador. //_ \% 1. Optima la tecla 'Toast' _Tostar). _l _::_:_:_ _/_ 2. Oprimala tecla 'Autoset' [Autoajuste) para programar4 minutos de - Maytag MER6875BAS | Use and Care Guide - Page 74
Cocd6n#nel horno Asado Para asar: 1. Oprimala tecla 'Broil' (Asar)correspondienteal homo que deseeusar. • 'BROIL','UPPER'(Superio0y 'SET' [Programa0destellar_nen el indicadorvisual. 2. Oprimala tecla 'Aetoset' (Autoajuste)unavez para asar en el ajuste 'HI' (Alto) o dosvecespara asar en el ajuste ' - Maytag MER6875BAS | Use and Care Guide - Page 75
¢occi6nenelhomo 'Keep Warm' (Nlanter|er caliente) Estafunci6n sirve para mantener losalimentoscalienteso para calentar panesy plates. Para usar la funci6n mantener caliente: 1. Oprimala tecla 'Keep Warm' (Mantener caliente) apropiada. !/f • 'WARM' (Calentar)destella en el indicadorvisual. ; - Maytag MER6875BAS | Use and Care Guide - Page 76
Cocclbennel homo Apagado autom tico/Niodo sab tico Loshornosse apagar_nautomdticamentedespuOsde 12 horassi los deja encendidosaccidentalmente. Para anular el apagado autom_tico a las 12 horas y permitir que el homo funcione de manera continua durante 72 horas: 1. Oprimay mantengaoprimida la tecla ' - Maytag MER6875BAS | Use and Care Guide - Page 77
la puertade un homo. Cuandola puerta est6 cerrada,oprima la tecla 'Oven Light' (Luzdel Homo) para encendero apagar la luz del homo. oprima la tecla 'OvenLight' escuchar_iuna serialsonora. Parte inferior del homo Protejala parte inferior de los hornoscontra derrames, especialmentelosderrames_cidos o - Maytag MER6875BAS | Use and Care Guide - Page 78
¢occ16ennel horno Posiciones de las parrillas (homo inferior) --5 --4 --3 --2 --1 Horneado de tortas de capas en dos parriUas Para obtener los mejores resultados cuando hornee tortas en dos parrillas,use las parrillas2 y 4. Coloquelastortas en lasparrillascomo se muestra. PARRILLA 5: Use para - Maytag MER6875BAS | Use and Care Guide - Page 79
est_ dise_adapara sellar el calor dentro del homo durante el ciclo de autolimpieza. 5. Limpieel excesode grasa o los derramesde la parte inferior del homo. Estoevita el humo excesivo,las llamasy las Ilamaradas durante el ciclo de autolimpieza. 6. Limpie losderramesazucaradosy _icidostales como - Maytag MER6875BAS | Use and Care Guide - Page 80
2. Programela cantidad de tiempo que deseadiferir la autolimpieza Despu6s de la autolimpieza usandolasteclas num6ricascorrespondientes. Aproximadamenteuna hera despu6sde que hayafinalizado el ciclo 3. Oprimala tecla 'Clean' (Limpieza)apropiada. de autolimpieza,'LOCK'se apagar& Las puertaspodr_n - Maytag MER6875BAS | Use and Care Guide - Page 81
Hmpleze Procedimientos de limpieza * Losnombresde los productosson marcasregistradasde sus respect[yesfabricantes. ** Parahacer un pedido,Ilameal 1-877-232-6771en EE.UU. y al 1-800-688-8/408en Canad& ProtectorTrasero y Cubierta Porceiana Esrnaltada Laporcelanaesvidriofundido sobreel metaly - Maytag MER6875BAS | Use and Care Guide - Page 82
Hmpleze Ventanillasy de Puertas los Hornos =Vidrio Eviteusar cantidadesexcesivasde agua,ya que puede escurrirsedebajo o detr_isdel vidrio y mancharlo. Lavecon aguay jab6n. Enjuaguecon agua limpia y seque. Sepueden usar limpiadoresde vidrio si se redan en un paso primero. o No use - Maytag MER6875BAS | Use and Care Guide - Page 83
nuevapuede sentirse"esponjosa"cuando secierra. Esto es normaly se reducir_ con e[ use. Paraasegurarsede instalar el foco de repuestocorrecto, pida un foco Maytag. Llameal 1-877-232-8771en EE.UUy. al 1-800-888-8408en Canaday pida la piezan0mero74009925foco de halOgeno. Para reemplazar los feces del - Maytag MER6875BAS | Use and Care Guide - Page 84
Mementmlemo Tomillos niveladores Asegt_resede que la estufaest4 nivelarsecuando se II/] ('_ instala. Si la estufa no est4 nivelada,gire los [ [[I I tornillos niveladoresque seencuentran en cada J/J_ I esquinade la estufa hastaque la mismaestc! _$_ o)/,l) nivelada. __oPonTE ANTIVUEL CO - Maytag MER6875BAS | Use and Care Guide - Page 85
est6 bien conectadoen el tomacorriente. , Verifique o restablezcael disyuntor. Verifiqueo reemplaceel fusible. , Verifique el suministro el6ctrico. Una parte o la totalidad del eleetrodom6sticono funeiona. ° Verifique si los controles superiores y/o del horno fueron programados correctamente. Vea - Maytag MER6875BAS | Use and Care Guide - Page 86
La puerta del homo no se desbloqueadespu_s del ciclo de autolimpieza. i¸i!ii1i i ! !i!i i ! iii ! i i i i i i i i i i i! i i i i i ! i! • Elinteriordel homotodav[aest,1caliente.Espereaproximadamenteuna horaparaque el homo se enfr[edespu6sde que el ciclo de autolimpiezahayafinalizado.Lapuerta - Maytag MER6875BAS | Use and Care Guide - Page 87
86 - Maytag MER6875BAS | Use and Care Guide - Page 88
el distribuidor o la compafi[a de serviciono pueden resolverel problem& escriba a Maytag Services,LLC, Attn: CAIR:_Center,P.O.Box 2370,Cleveland,TN ; e. Comprobantede compra (recibo de compra). Form No. A/05/06 Part No 8113P639-60 @2006 Maytag Appliances Sales Co All rights reserved. Litho USA
-
 1
1 -
 2
2 -
 3
3 -
 4
4 -
 5
5 -
 6
6 -
 7
7 -
8
-
9
-
10
-
11
-
12
-
13
-
14
-
15
-
16
-
17
-
18
-
19
-
20
-
21
-
22
-
23
-
24
-
25
-
26
-
27
-
28
-
29
-
30
-
31
-
32
-
33
-
34
-
35
-
36
-
37
-
38
-
39
-
40
-
41
-
42
-
43
-
44
-
45
-
46
-
47
-
48
-
49
-
50
-
51
-
52
-
53
-
54
-
55
-
56
-
57
-
58
-
59
-
60
-
61
-
62
-
63
-
64
-
65
-
66
-
67
-
68
-
69
-
70
-
71
-
72
-
73
-
74
-
75
-
76
-
77
-
78
-
79
-
80
-
81
-
82
-
83
-
84
-
85
-
86
-
87
-
88
 |
 |

MAY[AG
Maytag
Electric Smoothtop
Double Oven Range
Precision Touch 850 Series
Table
Safety
..........................................
1 =3
Surface
Cooking
......................
4=7
Controls
Smoothtop Surface
Warming Center
Oven Cooking
.........................
8=18
Control _anel
Baking
Cook & Hold
Delay
Toasting
Broiling
Keep Warm
Favorite
Oven Racks
Form No. A/05/06
Part No
8113P639-60
Care
& Cleaning
...................
19=22
Self-Clean Oven
Cleaning Procedures
Maintenance
.........................
23=24
Oven Doors
Oven Window
Oven Light
Troubleshooting
...................
25=26
_
Warranty
& Service
27
Guide
d'utilisation
et
d'entretien
...................................
28
Gu[a de
use y
cuidado
..............
58
<_2006 Maytag
Appliances
Sales
Co.
All rights
reserved.
Lithe USA.