McAfee MSA-3400-SWGI Installation Guide - Page 25
Physically installing the appliance
 |
View all McAfee MSA-3400-SWGI manuals
Add to My Manuals
Save this manual to your list of manuals |
Page 25 highlights
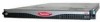
Connecting and configuring the appliance Physically installing the appliance If you have DHCP configured on your network, the IP addresses for these ports are now automatically allocated. Otherwise, the LAN1 port has a default IP address of 10.1.1.108 (subnet mask 255.255.255.0) to allow you to access the appliance initially across the network. LAN2 port The LAN2 port has a default IP address of 10.1.2.108 (subnet mask 255.255.255.0). The operation of the LAN2 port depends on how you are using the appliance: • Explicit Proxy mode - The LAN2 port is only used for direct local management connections. It cannot receive and transmit inbound and outbound protocol traffic. Use this port if you cannot achieve a remote management connection through the LAN1 port, because: • The LAN1 port IP address is in a different subnet to your remote computer. • You have forgotten the LAN1 port IP address that you set, and have disabled the default IP address of 10.1.1.108 for that port. • You connected fiber cables to the fiber LAN1 and LAN2 ports, and now want to enable these ports. • Transparent Router and Transparent Bridge modes - The LAN2 port is used (with LAN1) to connect the appliance to your network. It receives and transmits the same type of traffic as the LAN1 port. Remote Access Card - 3300 and 3400 appliances only Provides remote access and limited management of the 3300 and 3400 appliances. It allows you to reboot the appliance using a CD in a remote administration computer. You can connect an Ethernet Cat 5e cable to the RJ-45 port. Hard disk drives 3000, 3100 appliances only - The 3000 and 3100 appliances have a single hard disk drive. 3200 appliances only - The 3200 appliances have two SCSI hard disk drives, managed in a RAID 1 (mirror) configuration. 3300 and 3400 appliances only - There are two "hot-pluggable" SCSI hard disk drives, managed in a RAID 1 (mirror) configuration. The drives mirror the appliance's operating system and data, ensuring seamless operation in the event of a problem with one of the drives. You can then remove the failed drive and insert a new drive without needing to turn off the appliance, see Troubleshooting. The LEDs show the following status information: • Operational - the top LED lights green when the drive is in use. CAUTION: Do not remove a drive when it is operational because this can cause data loss or hardware damage. • Predicted failure - The bottom LED flashes green, amber, and off if the drive is about to fail. • Failure - The bottom LED flashes amber when the drive has failed. • No power - Both LEDs are off when the drive is not receiving power from the appliance. USB Connect Keyboard, Mouse and Out of Band Management adapter (if required). Connectors Physically installing the appliance Use this task to physically install the appliance. Task 1 Remove the appliance from the protective packaging and place it on a flat surface. McAfee Email and Web Security Appliance 5.5 Installation Guide 25
-
 1
1 -
2
-
3
-
4
-
5
-
6
-
7
-
8
-
9
-
10
-
11
-
12
-
13
-
14
-
15
-
16
-
17
-
18
-
19
-
 20
20 -
 21
21 -
 22
22 -
 23
23 -
 24
24 -
 25
25 -
 26
26 -
 27
27 -
 28
28 -
 29
29 -
 30
30 -
31
-
32
-
33
-
34
-
35
-
36
-
37
-
38
-
39
-
40
-
41
-
42
-
43
-
44
-
45
-
46
-
47
-
48
-
49
-
50
-
51
-
52
-
53
-
54
-
55
-
56
-
57
-
58
-
59
-
60
 |
 |
