Motorola DROID 4 by User Guide - Page 11
Basics, Assemble & Charge Battery
 |
View all Motorola DROID 4 by manuals
Add to My Manuals
Save this manual to your list of manuals |
Page 11 highlights
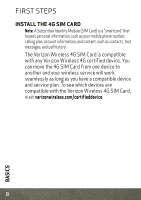
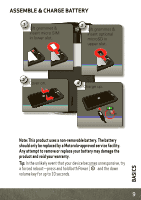
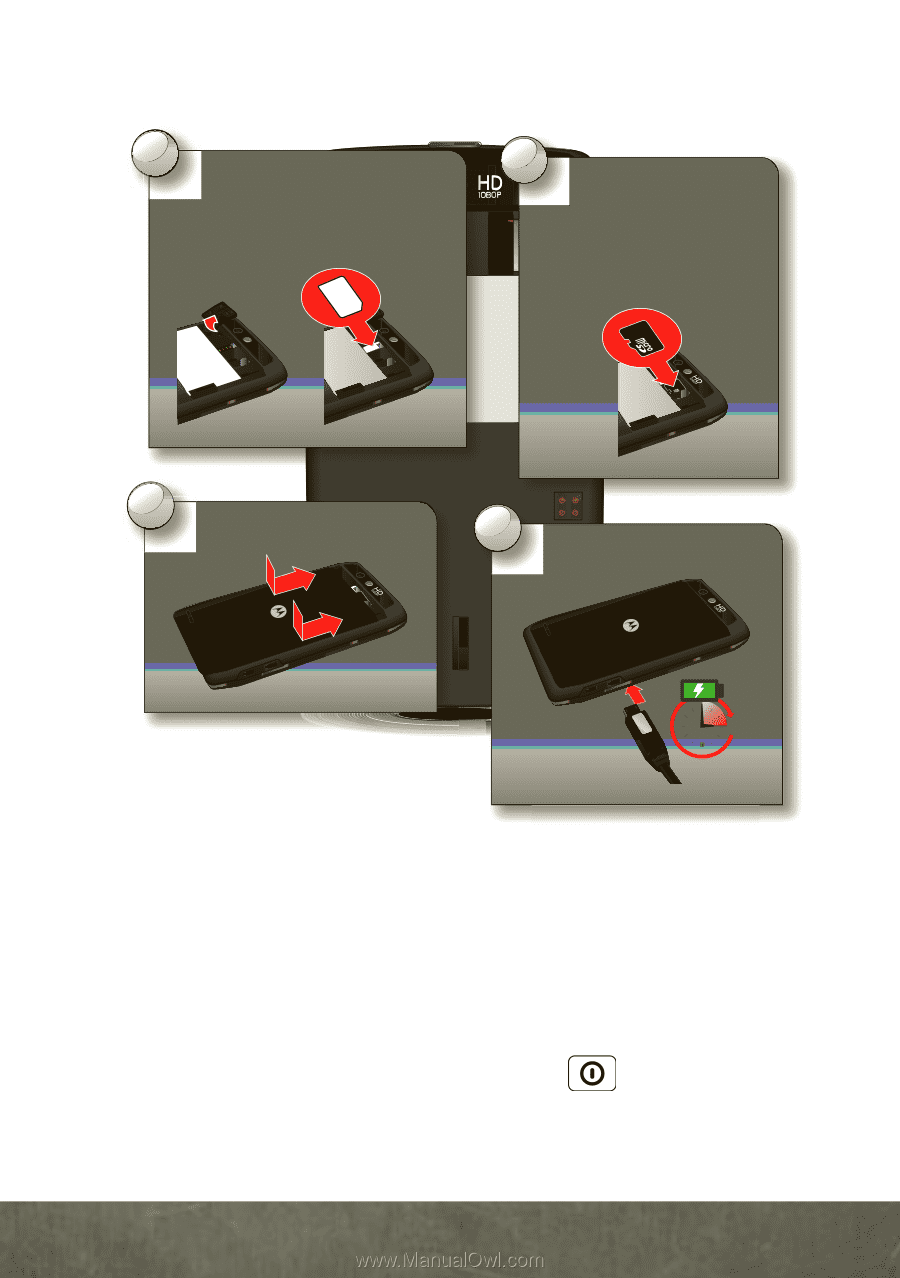
ASSEMBLE & CHARGE BATTERY 1 Lift grommet & insert micro SIM in lower slot. 2 Lift grommet & insert optional microSD in upper slot. 3 Cover on. 4 Charge up. 3H Note: This product uses a non-removable battery. The battery should only be replaced by a Motorola-approved service facility. Any attempt to remove or replace your battery may damage the product and void your warranty. Tip: In the unlikely event that your device becomes unresponsive, try a forced reboot-press and hold both Power and the down volume key for up to 10 seconds. 9 BASICS
-
 1
1 -
2
-
3
-
4
-
5
-
 6
6 -
 7
7 -
 8
8 -
 9
9 -
 10
10 -
 11
11 -
 12
12 -
 13
13 -
 14
14 -
 15
15 -
 16
16 -
17
-
18
-
19
-
20
-
21
-
22
-
23
-
24
-
25
-
26
-
27
-
28
-
29
-
30
-
31
-
32
-
33
-
34
-
35
-
36
-
37
-
38
-
39
-
40
-
41
-
42
-
43
-
44
-
45
-
46
-
47
-
48
-
49
-
50
-
51
-
52
-
53
-
54
 |
 |
9
BASICS
ASSEMBLE & CHARGE BATTERY
Note: This product uses a non-removable battery. The battery
should only be replaced by a Motorola-approved service facility.
Any attempt to remove or replace your battery may damage the
product and void your warranty.
Tip:
In the unlikely event that your device becomes unresponsive, try
a forced reboot—press and hold both Power
and the down
volume key for up to 10 seconds.
1
Lift gro
mm
et &
insert
m
icro SIM
in lower slot.
2
Lift gro
mm
et &
insert optional
m
icroSD in
upper slot.
4
Charge up.
3H
3
Cover on.