Nikon D3100 D3100 User's Manual - Page 131
Connections, Connecting to a Computer, Before Connecting the Camera
 |
UPC - 018208254729
View all Nikon D3100 manuals
Add to My Manuals
Save this manual to your list of manuals |
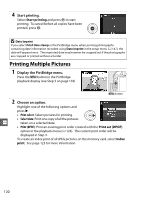
Page 131 highlights
QConnections Connecting to a Computer This section describes how to use a UC-E4 USB cable (available separately) to connect the camera to a computer. Before Connecting the Camera Before connecting the camera, install the software on the supplied ViewNX 2 CD. To ensure that data transfer is not interrupted, be sure the camera EN-EL14 battery is fully charged. If in doubt, charge the battery before use or use an EH-5a AC adapter and EP-5A power connector (available separately). ❚❚ Supplied Software ViewNX 2 includes a "Nikon Transfer 2" function for copying pictures from the camera to the computer, where ViewNX 2 can be used to view and print selected images or to edit photographs and movies. For more information, see ViewNX 2 online help. ❚❚ Supported Operating Systems The supplied software can be used with computers running the following operating systems: • Windows: Windows 7 (Home Basic/Home Premium/Professional/Enterprise/ Ultimate), Windows Vista Service Pack 2 (Home Basic/Home Premium/Business/ Enterprise/Ultimate) and Windows XP Service Pack 3 (Home Edition/Professional). ViewNX 2 runs as a 32-bit application in 64-bit editions of Windows 7 and Windows Q Vista. • Macintosh: Mac OS X (version 10.4.11, 10.5.8, 10.6.4) See the websites listed on page xiv for the latest information on supported operating systems. A Connecting Cables Be sure the camera is off when connecting or disconnecting interface cables. Do not use force or attempt to insert the connectors at an angle. Close the connector cover when the connector is not in use. D During Transfer Do not turn the camera off or disconnect the USB cable while transfer is in progress. A Windows To visit the Nikon website after installing ViewNX 2, select All Programs > Link to Nikon from the Windows start menu (Internet connection required). 115
-
 1
1 -
2
-
3
-
4
-
5
-
6
-
7
-
8
-
9
-
10
-
11
-
12
-
13
-
14
-
15
-
16
-
17
-
18
-
19
-
20
-
21
-
22
-
23
-
24
-
25
-
26
-
27
-
28
-
29
-
30
-
31
-
32
-
33
-
34
-
35
-
36
-
37
-
38
-
39
-
40
-
41
-
42
-
43
-
44
-
45
-
46
-
47
-
48
-
49
-
50
-
51
-
52
-
53
-
54
-
55
-
56
-
57
-
58
-
59
-
60
-
61
-
62
-
63
-
64
-
65
-
66
-
67
-
68
-
69
-
70
-
71
-
72
-
73
-
74
-
75
-
76
-
77
-
78
-
79
-
80
-
81
-
82
-
83
-
84
-
85
-
86
-
87
-
88
-
89
-
90
-
91
-
92
-
93
-
94
-
95
-
96
-
97
-
98
-
99
-
100
-
101
-
102
-
103
-
104
-
105
-
106
-
107
-
108
-
109
-
110
-
111
-
112
-
113
-
114
-
115
-
116
-
117
-
118
-
119
-
120
-
121
-
122
-
123
-
124
-
125
-
 126
126 -
 127
127 -
 128
128 -
 129
129 -
 130
130 -
 131
131 -
 132
132 -
 133
133 -
 134
134 -
 135
135 -
 136
136 -
137
-
138
-
139
-
140
-
141
-
142
-
143
-
144
-
145
-
146
-
147
-
148
-
149
-
150
-
151
-
152
-
153
-
154
-
155
-
156
-
157
-
158
-
159
-
160
-
161
-
162
-
163
-
164
-
165
-
166
-
167
-
168
-
169
-
170
-
171
-
172
-
173
-
174
-
175
-
176
-
177
-
178
-
179
-
180
-
181
-
182
-
183
-
184
-
185
-
186
-
187
-
188
-
189
-
190
-
191
-
192
-
193
-
194
-
195
-
196
-
197
-
198
-
199
-
200
-
201
-
202
-
203
-
204
-
205
-
206
-
207
-
208
-
209
-
210
-
211
-
212
-
213
-
214
-
215
-
216
-
217
-
218
-
219
-
220
-
221
-
222
-
223
-
224
 |
 |
