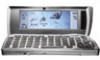
Nokia 9290 Software on CD Rom Guide - Page 9
General
 |
View all Nokia 9290 manuals
Add to My Manuals
Save this manual to your list of manuals |
Page 9 highlights
To create a new profile, proceed as follows: 1 If no profiles have been defined, press New. A dialog opens. Continue with step 4. 2 If at least one profile has been defined, press Profile Settings in the main view to view available profiles. 3 To create a new profile based on the settings of an old one, select the one to be used as a base and click New. A dialog opens. 4 Define the following sync profile settings - General and Data. General page Default: At least one of the available synchronization profiles must be defined as the default profile. To define the current profile as the default, choose Yes. The default profile is shown in the main view for quick access. Profile name: Type a descriptive name for the profile. Example: "My Office Calendar." Each profile must have a unique profile name. Use Internet access/Host address/Port/HTTP Authentication: Refer to your Internet service provider or system administrator for the correct values. User name: Your user ID for the synchronization server. Refer to your Internet service provider or system administrator for your correct ID. Password: Type your password here. For security reasons, the password is shown with asterisks (*****). Refer to your Internet service provider or system administrator for your correct password. Note: The Settings button is active only in the HTTP Authentication field. Tip: When adding a new profile based on an old one, select the profile whose values are closest to the values of the new profile. Tip: For ease-of-use, set the most used profile as the default profile. 7
-
 1
1 -
2
-
3
-
 4
4 -
 5
5 -
 6
6 -
 7
7 -
 8
8 -
 9
9 -
 10
10 -
 11
11 -
 12
12 -
 13
13 -
 14
14 -
15
-
16
-
17
-
18
-
19
-
20
-
21
-
22
-
23
-
24
-
25
-
26
-
27
-
28
-
29
-
30
-
31
-
32
-
33
-
34
-
35
-
36
-
37
-
38
-
39
-
40
 |
 |
