Oki C710n C710 User's Guide, English - Page 90
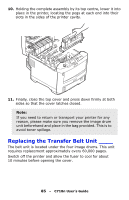
Finally, close the top cover and press down firmly at both, black nearest the front.
 |
View all Oki C710n manuals
Add to My Manuals
Save this manual to your list of manuals |
Page 90 highlights
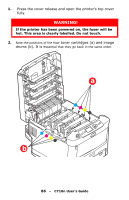
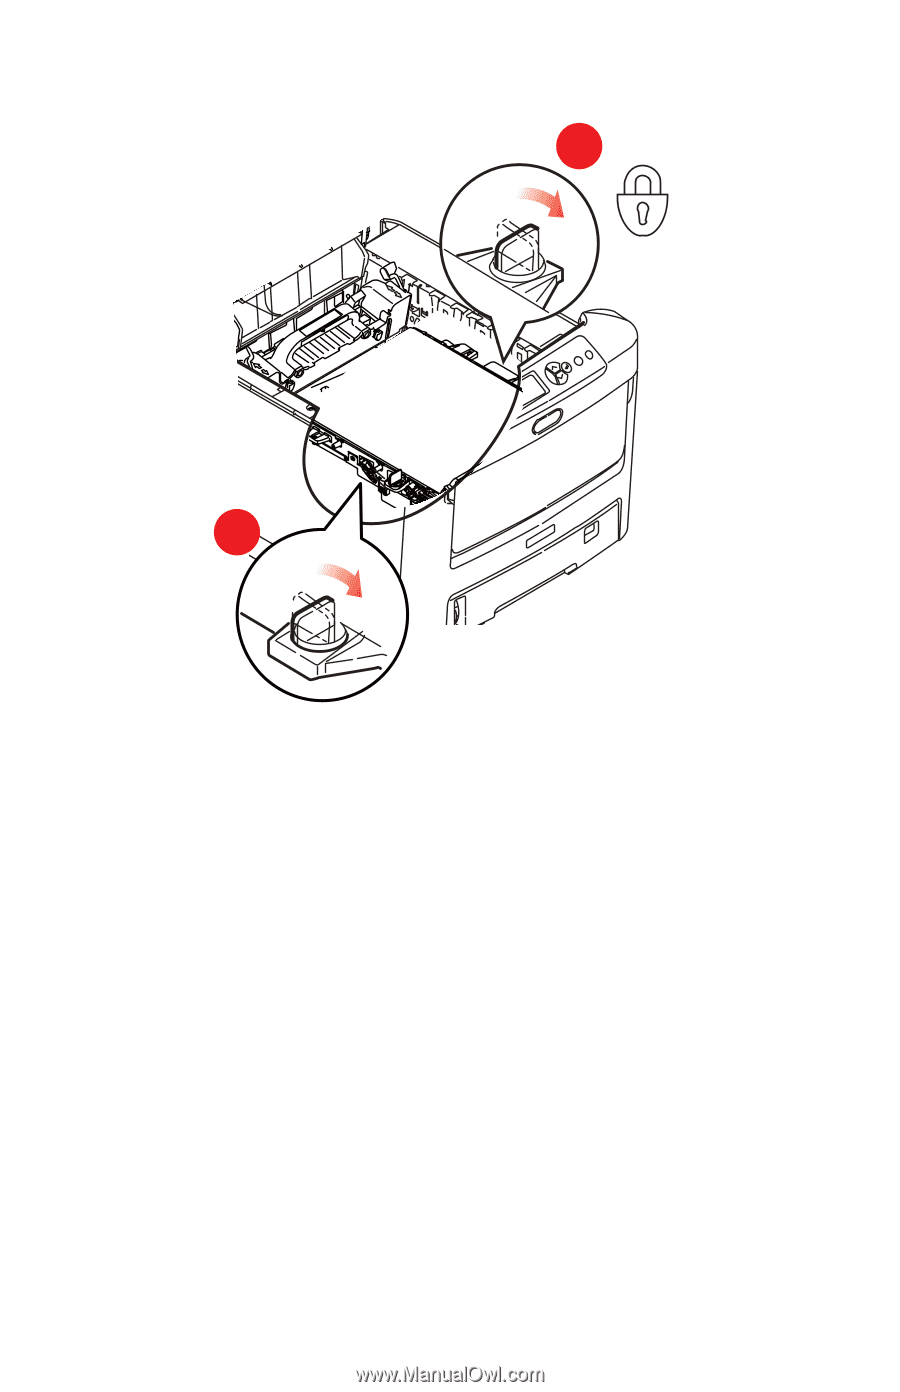
8. Turn the two fasteners (a) 90° to the right until they lock. This will secure the belt unit in place. a a 9. Replace the four image drums, complete with their toner cartridges, into the printer in the same sequence as they came out: cyan (nearest the rear), magenta, yellow and black (nearest the front). 10. Finally, close the top cover and press down firmly at both sides so that the cover latches closed. 90 - C710n User's Guide
-
 1
1 -
2
-
3
-
4
-
5
-
6
-
7
-
8
-
9
-
10
-
11
-
12
-
13
-
14
-
15
-
16
-
17
-
18
-
19
-
20
-
21
-
22
-
23
-
24
-
25
-
26
-
27
-
28
-
29
-
30
-
31
-
32
-
33
-
34
-
35
-
36
-
37
-
38
-
39
-
40
-
41
-
42
-
43
-
44
-
45
-
46
-
47
-
48
-
49
-
50
-
51
-
52
-
53
-
54
-
55
-
56
-
57
-
58
-
59
-
60
-
61
-
62
-
63
-
64
-
65
-
66
-
67
-
68
-
69
-
70
-
71
-
72
-
73
-
74
-
75
-
76
-
77
-
78
-
79
-
80
-
81
-
82
-
83
-
84
-
 85
85 -
 86
86 -
 87
87 -
 88
88 -
 89
89 -
 90
90 -
 91
91 -
 92
92 -
 93
93 -
 94
94 -
 95
95 -
96
-
97
-
98
-
99
-
100
-
101
 |
 |
90
– C710n User’s Guide
8.
Turn the two fasteners (a) 90° to the right until they lock. This will
secure the belt unit in place.
9.
Replace the four image drums, complete with their toner
cartridges, into the printer in the same sequence as they
came out: cyan (nearest the rear), magenta, yellow and
black (nearest the front).
10.
Finally, close the top cover and press down firmly at both
sides so that the cover latches closed.
a
a