Oki C9600n Guide: Software Installation 9600 Series (American English) - Page 11
Windows, Installation, Parallel Connection cont'd
 |
View all Oki C9600n manuals
Add to My Manuals
Save this manual to your list of manuals |
Page 11 highlights
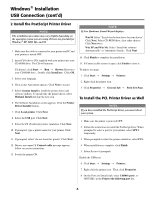
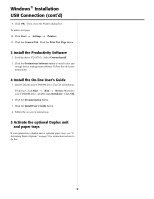
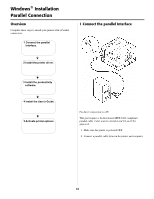
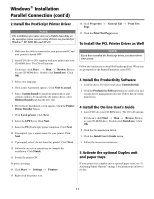
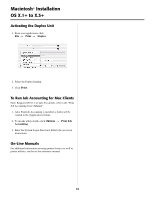
Windows® Installation Parallel Connection (cont'd) 2 Install the PostScript Printer Driver NOTE The installation procedure may vary slightly depending on the operating system you are using. Drivers are provided for Windows® XP, 2000, Me, and NT 4.0. 16. Click Properties → General Tab → Print Test Page. 17. Click the Print Test Page button. To Install the PCL Printer Driver as Well 1. Make sure the cable is connected to your printer and PC and your printer is turned OFF. 2. Insert CD1 (driver CD) supplied with your printer into your CD-ROM drive. The CD will autorun. If it doesn't, click Start → Run → Browse. Browse to your CD-ROM drive. Double-click Install.exe. Click OK. 3. Select your language. 4. The License Agreement appears. Click Next to accept. 5. Select Custom Install to install the printer driver and software utilities. To install only the printer driver, select Minimal Install and skip the next step. 6. The Software Installation screen appears. Click the Printer Driver Installer button. 7. Click Local printer. Click Next. 8. Select the LPT1 port. Click Next. 9. Select the PS (PostScript) printer emulation. Click Next. 10. If prompted, type a printer name for your printer. Click Next. 11. If prompted, select "do not share this printer" Click Next. 12. Follow the on-screen instructions to compete the installation. Click Finish. 13. Switch the printer ON. To print a test page: 14. Click Start → Settings → Printers. 15. Right-click the printer icon. NOTE If you have installed the PostScript driver, you must reboot your system. Follow the instructions to install the PostScript driver. When you are prompted for the Printer Emulation, select PCL. 3 Install the Productivity Software 1. Load the driver CD (CD1) and select Custom Install. 2. Click the Productivity Software button to install color and storage device management software. Follow the on-screen instructions. 4 Install the On-line User's Guide 1. Insert CD2 into your CD-ROM drive. The CD will autorun. If it doesn't, click Start → Run → Browse. Browse to your CD-ROM drive. Double-click Install.exe. Click OK. 2. Click the Documentation button. 3. Click the Install User's Guide button. 4. Follow the on-screen instructions. 5 Activate the optional Duplex unit and paper trays If your printer has a duplex unit or optional paper trays, see "6 Activating Printer Options" on page 5 for instructions on how to do this. 11
-
 1
1 -
2
-
3
-
4
-
5
-
 6
6 -
 7
7 -
 8
8 -
 9
9 -
 10
10 -
 11
11 -
 12
12 -
 13
13 -
 14
14 -
 15
15 -
 16
16 -
17
-
18
-
19
-
20
 |
 |
